In a world filled with innumerable options for organic, whole grain, artisan baked, and seriously fancy bread, why would someone go to the trouble to make their own? Control over ingredients, incredible smell and taste, and satisfaction from producing homemade loaves are just not enough for most of us to make time for bread baking as more than a special occasion activity. But if you are reading this, I could safely guess that you want to eat healthier and feel better.
Long fermented sourdough is the bread that our ancestors depended on as the cornerstone of their daily diet and the “staff of life”. Now in our current culture, bread has been vilified to the degree that we often feel bad for enjoying it. We buy gluten-free substitutes or pass on bread completely thinking that it’s the only choice we have for optimal health. New science (and old sensibility) are revealing that for most, gluten is not the problem. And this goes far beyond bread. In our effort to industrialize food production, we have lost some very important practices that affect our digestion of all grains. This means that much of the gluten-free product at today’s grocery stores is just as indigestible and irritating to your system as the wheat products you were buying them to replace! Let me repeat that. It’s not just gluten making you sick.
Wheat and other grains like brown rice, quinoa, and spelt, plus nuts, seeds, and legumes all contain protective mechanisms that work to ensure that they can still propagate themselves when they are consumed by herbivores with one stomach. The grains are eliminated “pre fertilized” in nature. Gluten, other lectins, enzyme inhibitors, and phytic acid allow the seed to pass through the digestive system without harm. This is good for the plant but bad for our digestion and absorption of nutrients. Luckily, old methods of soaking and fermenting grains break down this protective barrier, making the grains less irritating to our system and much more digestible and nutritious.
A long sourdough fermentation process as described in the following recipes breaks down the carbohydrates and the long stretchy gluten in the dough and greatly reduces phytates in the grain. This process produces a very tasty loaf, but also neutralizes the antinutrients and unlocks vitamins and minerals in the grain. People who have experienced gluten intolerance (not the 2% of the population who have celiac disease) should be able to eat and enjoy this bread without discomfort.
Long fermentation does take a long time though. If you want to incorporate this bread into your daily life, you’ll need to make some new habits. First, you need a starter and that starter needs a little attention to stay alive. Once it’s working well, you just need to feed it once or twice a week. Then you’ll need to create a leaven and let the dough rise overnight. All of this can be done on a weekend with the active work of mixing and kneading only taking a short time and the rising happening while you do other things or overnight. Once you get into the swing of things, it will become second nature and you’ll have healthy, homemade loaves, our staff of life, available whenever you like.
SOURDOUGH STARTER
I started baking homemade bread for my family in 1996. Crusty french baguettes were not available at the supermarket back then so I became obsessed with perfecting the recipe so that we could enjoy them at home whenever we wanted. The rest of the country was on a bread tangent too so my close friend often brought me freshly ground flour that she was using to make daily loaves in a bread machine. My results were incredibly tasty and much healthier than anything I could buy at my local market. The cookbooks that I used to perfect my methods, Baking with Julia and The Best Bread Ever, both contained lengthy recipes for sourdough starters that intrigued me. I was daunted though by the amount of time required to create one (I was making bread in between nursing babies and diaper changes) and the number of variables that could go wrong, so I never gave it a go.
Fast forward to 2013. A book I read a couple of years ago by Michael Pollan called Cooked that talks about the four elements Earth, Fire, Air, and Water and how they relate to cooking and eating that was turned into a Netflix documentary. I watched it with my homeschoolers and we were inspired to finally take the plunge into traditional bread making as a science project. I searched the internet for information and found loads of different processes. I decided to use the easiest one that seemed most likely to end in a loaf of bread rather than frustration.
What follows is so simple! I find this to be a top priority when trying something new. Expensive or hard to source ingredients and complicated instructions stall us when we are embarking on a new idea. To me, simple equals success. Once you have mastered this technique, research the other traditional starters. Rye and spelt flour produce wonderful results, and you can even do a starter with organic grapes. The world of fermented dough awaits!
*Note 12/19
Nearly 7 years into sourdough baking, I have learned a thing or two that will make your experience even more successful. The main tip is that you need to discard a lot of starter to get yours active to its maximum potential. I am never one to waste even a morsel of food. It goes against my morals as much as stealing! So what to do with all that starter? Since the original writing of this post, I have added Sourdough Crackers & Pancakes to Bloom.
Let me tell you that while the crackers take a bit of time and muscle, they are the most loved of all my recipes by my family. I make a lot of good food and frankly, they are a little spoiled and hard to thrill. They are grateful for my meals but not often gushing with praise. Not so for these crackers that taste like the orange crackers in the red box that aren’t as healthy a treat as they are advertised to be. The pancakes are no harder than any others from scratch. Just remember to start them the night before.
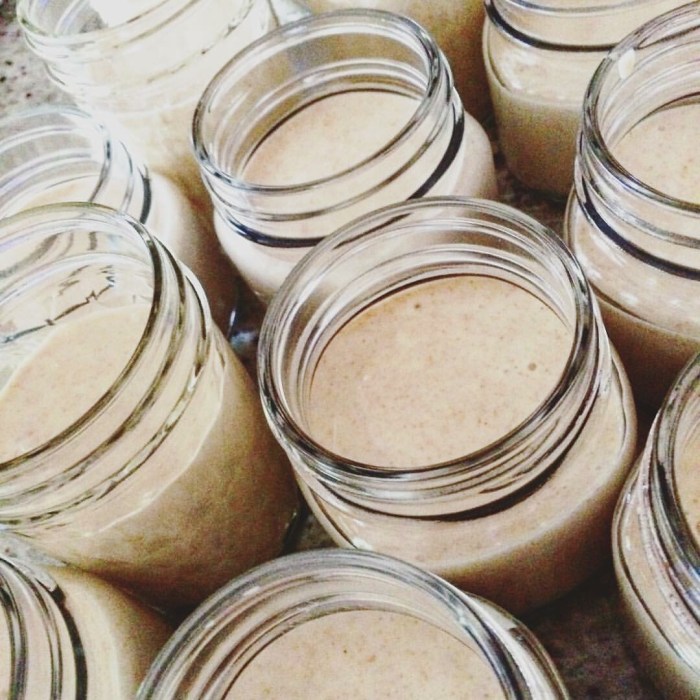
The discarded starter that you end up with when you feed your developing friend has all the health benefits described above. It just doesn’t have the strength yet to give sourdough bread the lift it needs. So keep a separate mason jar labeled “discard” and add what you would throw away in the instructions until you have enough to make one of these recipes. You will also have to discard some starter if you are reviving it after a long rest in the fridge. If you are making bread often and need “discard” for pancakes or crackers, just feed the starter for a few days before you make your bread instead of waiting. It will help it grow even stronger and you will end up with all you need.
Recipe
Ingredients
unbleached, organic, white bread flour – The quality of the flour is important for your health and for developing a strong starter. Please feel free to use whatever you already have, but buy the good stuff when you restock. It should only be a dollar or two more than standard commercial flour
finely ground, whole, organic spelt flour (optional)
filtered water, room temperature
Equipment
2 quart, wide mouth mason jar or ceramic bowl (do not use metal)
measuring cups or a scale (highly recommended)
mixing spoons (I like a small wooden spatula)
plastic wrap or the lid to your container
Creating a sourdough starter takes about 5 days depending on the temperature in your house. The ideal temperature is between 70-75 degrees. If your space is cooler than this, the fermentation will take longer. If it’s too hot though, this will kill the developing yeast. The general rule of thumb is that if you are sweating, your starter will be unhappy.
Day One
1/2 cup or 120 grams flour
3/4 cup or 180 grams of water
Combine the flour and water in your jar or bowl. Mix the ingredients well until they are combined into a thick, smooth batter. When you are done mixing, scrape down the sides of your container so that there are very few small bits left which can dry out and ruin your final product. Place the lid on the container loosely without tightening it or cover with plastic wrap, leaving a tiny corner open for air circulation.
Day Two
Discard all but 75 grams or 2/3 cup of the starter. Feed the remaining starter with the 100 grams (7/8 cup) of flour and 125 grams (1 1/8 cup) of water. Stir well to incorporate the flour and scrape down the sides. Place the lid on the container loosely without tightening it or cover with plastic wrap leaving a tiny corner open for air circulation.
You may have small bubbles forming today, but if the starter doesn’t look much different yet, just stay the course.
Day Three
Discard all but 75 grams (2/3 cup) of the starter. In your original container, feed the starter with the 100 grams (7/8 cup) of flour and 125 grams (1 1/8 cup) of water. Stir well to incorporate the flour and scrape down the sides. Place the lid on the container loosely without tightening it or cover with plastic wrap leaving a tiny corner open for air circulation.
By day three you should have lots of bubbles forming letting you know that there is some good yeast developing. It should also be starting to smell like a warm loaf of sourdough bread. Don’t get too excited if your starter has a huge burst of energy in these first days. This initial activity is a great sign but does not mean it is ready to use. If you are concerned, check the troubleshooting guide below.
Day Four
Discard all but 75 grams (2/3 cup) of the starter. In your original container, feed the starter with the 100 grams (7/8 cup) of flour and 125 grams (1 1/8 cup) of water. Stir well to incorporate the flour and scrape down the sides. Place the lid on the container loosely without tightening it or cover with plastic wrap leaving a tiny corner open for air circulation.
On day four, you should notice that the batter is honeycombed with bubbles before you feed it. It will also smell even more pungent. If you taste a little bit, it should be quite sour, but without salt, it will not taste like bread. Check the troubleshooting suggestions if you are concerned.
Note: I like to add two tablespoons of finely ground, whole spelt flour (in place of two tablespoons of white flour) to the starter on day four and every few times I feed my mature starter. It gives it a quick kick that causes the fermentation to accelerate and strengthen the starter. This is not required and can be done anytime once your starter is established as well.
Day Five
Discard all but 75 grams (2/3 cup) of the starter. In your original container, feed the starter with the 100 grams (7/8 cup) of flour and 125 grams (1 1/8 cup) of water. Stir well to incorporate the flour and scrape down the sides. Place the lid on the container loosely without tightening it or cover with plastic wrap leaving a tiny corner open for air circulation.
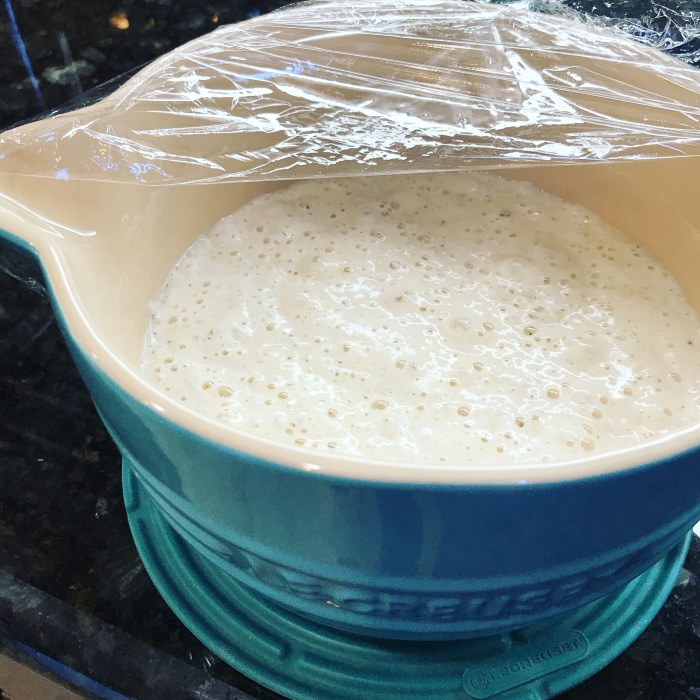
By now the starter should be active enough that it will double in size from one day to the next. This will tell you the yeast is very active and is creating tons of little pockets of air inside the batter.
After day 5, you can continue to feed and discard your new starter for another week or more to give it great strength and activity. It will rise bread after day 5 but if your first loaf is dense, it is simply because your starter is too young. Mine is many years old now and is as reliable as Old Faithful. It also comes back to life very quickly if I leave it for a rest in the fridge. It’s worth the patience to feed it for a long period at first.
Resting Your Starter
Now your starter is ready to use or can be placed in the fridge to rest until you are ready to make bread. If you’d like to rest the starter, cover your mason jar or transfer it to a clean jar if you had it developing in a bowl. Keep it in the fridge until one day before you want to make bread. A quick note about mason jars… If you take an active starter and put it in the fridge, it will continue to expel gas continuously, just more slowly. I never fully tighten my jars so that if the starter is super active, the gas can escape without exploding the glass jar. This has happened to friends and it’s not pretty!
In this refrigerated state, it must be brought to room temperature and fed at least once a week. When you feed it, leave it on the counter for twenty-four hours and then cover it tightly and put it back in the fridge. For this process, follow the directions above, discarding all but 75 grams and feeding 100 grams of flour and 125 grams of water.
Now you are ready to make leaven. I use my starter so often that I don’t need to follow the discard and feeding instructions above to make leaven. I simply remove my starter from the fridge, let it come to room temp, and measure out the ingredients for the leaven. If there is leftover leaven from the Rustic Boule, add it back to your starter jar. The leaven for the Enriched Sandwich Bread is completely added to your dough and also wouldn’t go back into the jar because it contains milk.
If you are taking a long break from making bread, you will need to discard some of your starter before feeding it. You can discard up to half the starter without harming it and still keep it growing strong. Set a task in your schedule to remove it from the fridge and feed it once a week, leaving it out to develop for 24 hours and placing it back to rest in the refrigerator.
Troubleshooting
This recipe is for the most foolproof starter I’ve found. That doesn’t mean that nothing can ever go wrong with it, though. Once you have a bubbling happy starter, I suggest dividing it into two containers and even freezing about 120 grams of it tightly sealed in a small freezer bag. This way if you have a mishap with mold or forget about it on the counter for too many days, you don’t have to start all the way over at square one.
Q Nothing is happening inside my starter. It just looks like paste.
This may happen if you are trying to get a starter going during the coldest months of the year or if your flour is highly processed or bleached. If the flour looks clean and white, but just lifeless, add one teaspoon of active dry yeast when you feed it next. This will give it a little kickstart to get things bubbling away. I’ve also found that a tablespoon of finely ground, whole rye or spelt flour can have the same effect. Additionally, always make sure you are using room temperature water. Water that is too cold will slow the fermentation and water that is too hot will kill the starter.
Q There are tiny black dots on top of my starter that are not mold.
Early in the developing process, a little bit of the flour on the surface of your starter may oxidize. This can mean that you had a little too much air circulation or not quite enough water. You can gently scrape off the top layer and discard it or just stir it into the mix. Once the fermentation is going strong, this will stop happening.
Q There is a thin layer of liquid on top of my starter that is slightly grey or red.
This indicates that your starter had too much liquid and too little flour. Pour off the liquid and feed the starter normally, increasing the flour by a tablespoon or two until it feels like a firm paste when stirred. If the flour/water ratio gives you consistent trouble, try weighing the flour instead of using measuring cups.
You may also notice liquid rises to the top of your starter consistently when you rest it for a week in the refrigerator. This is normal. When you are ready to bring your starter to room temp and feed it, pour off this liquid or stir it in and feed it normally. Many people say that this “liquor” gives the starter more flavor. I have nothing scientific to prove this but I never pour it off.
Q My starter is moldy
In order for a starter to get moldy, it has to have had undesirable bacteria introduced to it at some point. Make sure that your jar or bowl and mixing spoons are scrupulously clean. You can also transfer your starter to a clean jar for storage every few weeks to avoid buildup of hard batter on the sides, rim, and lid. If your starter is moldy, carefully spoon off all but about ¾ cup from the bottom of the jar. Put this in a new clean jar and feed it until it is forming a strong honeycomb of bubbles again before you put it away to rest. Alternatively, discard the entire thing and defrost your frozen “emergency batch” as described above. Once it’s defrosted, feed it and let it develop on the counter for a few days before you put it in the fridge to rest.

Now you are ready to make bread! Your starter will work for sandwich bread, classic sourdough, pita, pizza crust, English muffins, or rolls… Actually, anything that you can imagine can be made with a starter.

My starter is sitting on my kitchen counter as I type! Looking forward to bread next weekend!
LikeLike
Wonderful! I’ll get the country boule recipe posted this week so that you can pick which one you’d like to try.
LikeLike
I love your blog! I’m going to try making sourdough starter with your recipe. I also have some 25+ year sourdough starter a friend gave me for making pancakes, waffles, bread, etc…so I’m following the “restarting your sourdough starter” recipe. May I put the starters in close proximity to each other? My only consistently warmish place in our home is an upstairs bathroom. I’ve set up a cabinet, and have monitored the temperature for awhile-consistently in the 70’s. I think I’ve read something in the past about not fermenting more than one recipe in close proximity with another. Is that correct, does it matter? Thanks so much for your detailed, step-by-step directions-extremely helpful!
LikeLike
Hi Darlene! All cool questions. You can ferment these starters close together if you want them to share flora or far away if you want to see how they grow independently. It would be a fun experiment to split them up and do both. Since it’s warming up outside, I wouldn’t worry about the temp in your home too much. It is really only important if it is very hot or very cold. If you are comfortable, your starter will be too. At some point I you might just mix the starters together but I think it will be so interesting to see how they work differently first. Tag me on Instagram if you post pictures!!! @jbingaman 👍🏻
LikeLike
I’ve gotten a starter from a friend & have used the restarting instructions. I’m excited to begin incorporating it into recipes! Also curious if I would need feed the discard, in a separate jar, before I give some to another friend?
LikeLike
You could! I’d use the leaven recipe to revive your gifted starter. 25 grams of starter, and 100 grams each of flour and water. Just do that in two separate containers so you can use one for your friend. Then freeze the rest of what you were given in case you ever need to start again from brand new. It will last forever that way. Although killing a starter and needing to start over is harder than people think. Don’t throw anything away without asking for help 😃
LikeLike
Hey, Jess-
I’m finally embarking on the learning process of sourdough. I have a question: why is discarding critical to getting a starter active? I find myself wanting to get the “why” being that my end goal is to really instinctually know sourdough. Thanks for all the love you put into this beautiful window into you and your family & home daily.
LikeLike
I don’t know how I missed your comment, Tish! The reason for discarding starter as you are growing it, is because the bacteria will have consumed all of the available food in the flour after each feeding. It needs fresh flour to continue to grow active bacteria. You could “never” discard anything and keep adding multiples of flour and water. The starter would still develop but you would end up with an absolute vat of goo before you had something active enough to bake with. Does that make sense? I don’t like waste so I try to use the discard for all sorts of things. You can even use it to thicken soup and gravy, add it to creamy potato dishes or really anything that calls for cream or a roux. If you “discard” into a separate jar and keep in in the fridge to use up in your cooking then you don’t have to dump good flour in the trash.
LikeLike