Sourdough Storage, Tips, & Tricks!

If you are one of my regular customers or you use my recipes to make your own bread, here are some ideas to help use your loaves for maximum benefit. Sourdough is special so we don’t want to waste a crumb!

First, don’t put your boules in plastic until they are completely cool. I do this right before bed the day I bake it. The bread is still gassing off and it will create condensation in the bag and ruin your crust. When you are ready to store it, a ziplock works a bit better than plastic wrap.

I leave my bread in the pantry for about 4 days, and if it isn’t already gone, I let it spend the rest of its life in the fridge. It will mold more easily than commercial bread because it’s not full of dead junk 🙂

Sourdough freezes well. If you would like to freeze all or part of the loaf, wrap it in 2 layers of plastic wrap and then put that into a freezer bag. This works well for singles or small families who won’t eat a whole loaf in a week. When you are ready to defrost it, just set it on the counter. The crust will not be quite as crisp, but a quick trip to the toaster fixes that. 

To refresh a full loaf, remove it from the freezer and let it defrost on the counter. Once it has come to room temp., place it in a cold oven and preheat to 500 degrees then set a timer for 8 minutes. Regardless of whether the oven has come to temperature or not, check the bead to see if the crust has crisped up and the interior has softened. If it has, remove it or you can give it another few minutes. This method will revive your bread to like it was just baked!

If you are heating holiday rolls, you have a couple of options. Start by placing your par-baked rolls into a muffin tin or onto a baking sheet. You can use my method above and place them into a cold oven on the second rack from the top. Turn the oven onto preheat to 500. Now wait about 5 minutes and give them a look.

Depending on how fast your oven preheats, you’ll need to leave them a few more minutes or go to the next step. The tops should be browning so turn your pan around and wait a few more minutes until you see they are all browned evenly. Don’t get distracted doing something else or they will overcook.

It’s likely that your oven will already be hot if you are heating par-baked rolls for a gathering. In this case, lower the oven heat to 325. Move a rack to the second rack from the top, and bake the rolls for around 8 minutes, turning the pan halfway through. Since all ovens circulate heat differently, watch your rolls. When they start to get golden brown on top, they will be nice and warm on the inside. I wish I could give you an exact time, but the truth is, you’ll just need to watch them and pull them out when they are finished to your liking. There’s gotta be a little drama before a holiday dinner, right?!?

When I slice my boules, I find it easiest to cut them into fourths first. That way you won’t be trying to keep the cut straight on such a big slice. Cut the whole thing in half with a sturdy, serrated knife, and then each half, in half one more time for four equal parts. Now you can slice it easily and the pieces fit into the toaster. The Hokkaido sandwich bread is easy to slice because it has a tight crumb. Don’t despair if it feels hard after being refrigerated. This is because it contains butter and will come right back to life if you toast it on the lowest setting.

You can use fresh bread crumbs for recipes or dry them for long storage

When I get down to the last little butt ends, I save them for bread crumbs. You can freeze them until you are ready to prepare them. To make the bread crumbs, simply cut or tear the bread into 1-inch-ish pieces and give them a whirl in the blender or food processor until they are nice and fine. Now spread them thinly onto a cookie sheet and put them in a safe place for a day or two until they have completely dried out. A cold oven seems like an obvious place to put them, but if you forget and turn the oven on, they can catch fire and cause serious undue stress. Don’t do that, lol. When they are dry, put them in a mason jar or ziplock. They will keep indefinitely!

Left-over sourdough also makes fantastic croutons. Cube the bread and put a few tablespoons of olive oil and a cube or two of butter in a skillet. Add the bread to your skillet and turn the heat on low. Use a spatula to turn the cubes occasionally. The bread will dry out and toast very slowly. When each cube is crispy, sprinkle over a little salt. When the croutons are cool, you can bag them up for salads but your family will probably want to eat them like chips so hide them if you have menu plans!

Preserved Lemons

I really like easy fermentation and preservation projects that illustrate how simple things in the kitchen can be. I always aim to demystify what food marketing has worked so hard to convince us is difficult. This is one of those recipes. Actually, it’s really just a process. There is no strict recipe you have to follow. Just a couple of rules like making sure your lemons are clean and jar is sterile.

Why do you want to make these lemons when there are always fresh ones at the market? Well first off, there are some super delicious recipes that actually call for this product. Look up Moroccan Chicken with Preserved Lemon and Olives. There are several versions to try that will give you a new way to mix up your menu planning. More than one classic dish though, these give you a way to preserve the season’s bounty. It feels like even more fun to use lemons that wouldn’t have surely gone to waste from a neighbor’s overflowing tree!

I mainly use these where I would normally use fresh lemon but might not always have them on hand. I add the thinly sliced rind to salsa and salads and use a whole lemon each time I make bone broth or veggie stock. The acid helps the other ingredients give up their nutrients into the liquid. They are salty and have a stronger flavor than fresh so a little goes a long way. So let’s get on to the instructions.

You don’t need much special equipment for preserved lemons. Grab a nice big jar and give it a good wash in hot soapy water to make sure it’s squeaky clean. Find something to push the lemons down in the jar with. Pull out your paring knife, and a weight you’d use for fermenting veggies. If you don’t have one of these weights, I have lots of info on how to fashion one from things you already have in your kitchen in my Sauerkraut recipe.

The other ingredient you need for preservation is salt. Use the best salt you can afford for this since the extra minerals will add nutrition to your project. Real Salt is a great brand. You can also source Celtic Sea Salt or Himalayan Salt at any health food store. It’s just a few dollars more than table salt but wildly more nutritious.

And of course, you need freshly washed lemons!!

Start by slicing a few of your lemons. I slice part of them into quarters without cutting through them and part in actual quarters so there will be different sizes for different uses when they are done.

I don’t cut up all my lemons at once because it’s hard to tell how many you’ll need to fill the jar. Just know it will be more than you think!

Next, start adding the lemons to the sterilized jar. Add one layer and sprinkle in some salt. Add more salt than you would if you were salting prepared food but not so much that it completely covers the lemons.

After you finish each layer of lemons and have added salt, press the lemons down so that they take up less space in the jar and start to express their juice.

Continue adding, salting, and pressing until your jar is nearly overfull.

Now it’s time to add your weight.

Once your jar is weighted, you’ll leave it in a cool place for 4-6 weeks. During the first week or so, you’ll want to vent and shake the jar. Especially if you aren’t using a canning jar with a vent. You can see in my photo that this is a repurposed jar so I’ll be careful to vent it every morning until I notice that it’s not releasing any gas. Exploding jars make these projects the opposite of fun!

Once your project is finished, remove the weight and it will keep nearly indefinitely in the fridge. Just be sure the lemons are always covered in the salty juice. If they start to get a little dry on top, feel free to add a little more salt and water or fresh lemon juice.

These are last year’s lemons. They are almost gone so I’ll be ready for the next batch when they are ready this spring!

Sourdough Starter Maintenance

The number one question I get about sourdough is not about making bread! It’s about how to keep starter alive and active when you don’t want to bake every day. There are some real challenges with the standard methods. Many suggest you use huge amounts of flour and water to feed a large amount which results in tons of discard. They also often recommend that you leave your starter on the counter full-time which means you have to attend to it every day. This daily feeding makes tons of waste when you aren’t baking, but possibly more distressing… If you forget about it for a few days, you find your little bacteria friend dried out or runny and dead looking.

So, I have a process that solves all of these problems. It was born from making leaven for my bakery that I have adapted for infrequent bakers.

And speaking of leaven, let me clarify what that is before I start the instructions.  Active starter and leaven are basically the same things. Leaven is just starter mixed with flour and water in specific measurements and allowed to ferment overnight so that it is ready to make bread. I’m going to use the word leaven and starter sort of interchangeably throughout this writing but know that when I say starter, I am referring to what you keep long-term in a mason jar, and when I say leaven, I mean what you are measuring and growing for bread.

Now, let’s imagine that you took the time to grow a starter or maybe you bought some from me, and now you really, realllllly don’t want to kill it. You also don’t want to make bread every darn day. The key is training it to keep happily in the fridge.

Interestingly, the bacteria in your starter will adapt to thriving in the cold once you start using this method. This means that it will ultimately remain stronger in the refrigerator for longer and you won’t have to work as hard to get it active when you want to make leaven.

If your starter has been in the fridge for a week or more (or has been hanging out on the counter) and looks very thin with few bubbles, start these simple instructions to revive it about 4 days before you want to make bread. Stay tuned till the end to learn how you can eliminate the need for this lead time.

Reviving Starter
Before bed on day 1, take just 12 grams of starter from your jar and put it in a non-reactive bowl. Add 50 grams of water and mix with a spatula until it is mostly dissolved. Add 50 grams of flour and mix well. Cover and leave the mixture to ferment overnight. Consider all the other starter in your jar discard and use it for crackers or pancakes or just throw it away.

12 grams is a tiny amount of starter!

Mix in your water

Mix in the flour

Cover and let ferment overnight

In the morning, check to see how many bubbles you are getting and how robust the starter looks. Lots of tiny bubbles will not produce the same bread as a leaven that has large bubbles that mostly stay strong when you shake the bowl a little bit. If it seems to need more strength, put it in the fridge until the evening when you will start again. If you leave it on the counter all day, the whole process will take longer.

Before bed on day 2, take just 12 grams of starter from the leaven you made the night before and put it in a non-reactive bowl. Add 50 grams of water and mix with a spatula until it is mostly dissolved. Add 50 grams of flour and mix well. Cover and leave the mixture to ferment overnight. Everything but the 12 grams that you used is now considered discard. That’s why we are making such a small amount each time.

Check again in the morning for large bubbles that hold up well. If you are not there yet, refrigerate your leaven and follow day 2’s instructions again in the evening

Continue to discard all but 12 grams of starter and mix with 50 grams of water and flour until you wake up to a super happy leaven. It shouldn’t take more than 4 days.

Very happy leaven!!

Once you are happy with the result, you are ready to make bread. However, if you want to use this leaven, you will only end up with a tiny bit of leftover to store, so I suggest feeding it one more night in larger proportions so that you have enough to use and a good amount of leftover to store.

If you are following these instructions, you will have placed your very happy starter in the fridge in the morning. On the evening that you wish to make bread, measure 25 grams of starter from the leaven you made the night before and put it in a non-reactive bowl. Add 100 grams of water and mix with a spatula until it is mostly dissolved. Add 100 grams of flour and mix well. Cover and leave the mixture to ferment overnight. 

In the morning, you will use 100 grams of leaven to make 1 loaf of the Rustic Boule. You will have about 125 grams of leaven, to keep for your next bake. Since you have been keeping the starter in the fridge the whole time, the bacteria have already begun to adapt to thriving in the cold and will hold nicely for about a week. You can also encourage it to stay strong for longer by putting the leftover 125 grams in a mason jar and straight into the fridge before it falls. Be sure that there is space for it to grow and cap the jar very loosely when you put it away because the fermentation activity will continue. Just very, very slowly.

This leaven has started to fall. Try to put your leftover in the fridge before this happens to extend the time that it stays active in cold storage.

The last step is to remove the starter from the fridge about a week later to make another loaf of bread. If you put it away when it was very robust and had large bubbles, you should be able to make leaven in 1 day. You can discard everything in the jar but 25 grams of starter, adding the 100 grams of water and bread flour. This will give you 100 grams of leaven and 125 grams of leftover to keep in the fridge.

 In my bakery, I never discard anything because I use my starter many days in the week, in varying amounts. Instead, I add anything left from my leaven back to the jar and give it a good mix. Then I put the jar immediately back into the fridge. The fresh leaven feeds what is in the jar just enough to keep it very happy. If you catch the sourdough bug and end up baking more often than once a week, you will only need to discard when your jar begins to get a little too full. Always make sure there is at least a quarter of empty space so that you don’t have an overflow and keep that cap loose so that it can’t explode.

Whew! That is a lot of information you just plowed through. If you are overwhelmed, please don’t despair. I promise that when you read through this post a few more times and then follow the directions, it will become SO EASY. Your starter will be ready for you at a moment’s notice instead of having to plan ahead.

One last tip! I highly recommend keeping about 50 grams of robust starter in the freezer as a backup. The next time you make bread, instead of discarding, put your leftover in a zip lock and put it in the freezer nice and flat. If you happen to have a catastrophe, you can always defrost and revive it by using this process starting with day 1. It is also easy to dehydrate starter by smoothing a thin layer of it on parchment and leaving it to dry out. When it is completely dry, it will easily break into pieces that are simple to store in the pantry. If you end up needing it, rehydrate it in a little water and then revive it by starting the process at day 1.

As always, if you have any questions, please message me!! I want you to have a stress-free, sourdough relationship!!

With a little practice, you’ll be turning out beautiful loaves of bread!

Praying A Jeep Cherokee Back To A Boy

I feel compelled to give an update and a huge, HUGE message of gratitude to every single person who supported my family in a crisis turned miracle yesterday. We are tired (adrenaline really has its way with your body) and so very overwhelmed as we feel the grace we experienced settle into our cells.

And before I give this update, I want to say that I am going to tell this story from my perspective but this is NOT my story. It wasn’t my trauma or my good outcome. But I am a mama and I feel ferociously protective of my people. When they hurt, I hurt… and that hurt compels me to whatever I can do to protect and cover them in support and protection. Please know that the I’s in this story are only because I am writing it – but not a reflection of whose victory this was, the force of love that is God to us in this family and my beautiful son. So with that…

This is a story all about how my life got flipped turned upside down, on a Wednesday morning, before coffee. While I was waking up slowly I was listening to David Letterman interview Kim Kardashian on Netflix. She was telling the story of the robbery she experienced in France and commented that she and her sisters were talking about what they would do in an imaginary scenario of this type at dinner the night before it happened. My blood went cold with an intuitive hit. 

I’m talking to myself internally saying, “Nope. Get that robbery, loss, violation business out of my knowing NOW” when Ashton burst into my room and said, “MOM”! He never says “mom”, only “MOMMM”. “The Jeep is gone.” 

Again, I thought “Nope. You just aren’t seeing straight”. We ran outside. No car. No beloved project that he bought and restored with his hard-earned dollars. With his best friend who passed away last year. Which he finished in Cody’s honor.

Call the police.

Call the insurance company.

Oh, yeah. Breathe too. Coffee.

Call the praying people. Create the social media posts. 

Now! The first hours are the most important.

The boy went to work. He was alive. It was just a thing. But a very, very special thing. Ick. That violation feeling is sick. I needed a minute to get full-on, freaked out hysterical. I have to cry sh!t out before I can be productive. I’m too old to let that make me feel soft or weak anymore. 

The girls couldn’t be still. They started the hunt. They drove to every field, alley, and warehouse parking lot in the IE. Does anyone need to hire some detectives?

Audree and Chloe found an abandoned car in the field by our house. They thought it could be a clue. They cautiously drove by the car and rather than finding it abandoned saw a duck head pop out of the driver’s side window. Not a stuffed duck. Not a toy. Just a real duck in an abandoned car. Audree had to avoid her desire to capture and rehabilitate the duck in the middle of her crime investigation stint, and also gave the animal control dispatch a good chuckle.

Later in the day, as the hunt continued, Chloe saw a car wash called Quack Quack and screamed, “It’s a sign”! They searched the car wash but it was a bread crumb to keep going and not quite the destination. We were all energized by some much needed laughs.

And then the outpouring of sharing and praying started. If a kid ever needed covering and a tsumani of prayers to pull a hunk of metal and rubber back to a human, he did. And he got it. Big.

I stayed home and between baking and working, pulled the clues together into a golden thread of hope. There wasn’t any more to do so I sat down and released the hope to something stronger, faith in the best outcome, before I picked him up from work.

When he got home, he went door to door, asking for ring camera footage and handing out fliers. At about 7:30, he was out of gas and laid on the couch pale. He said, “I don’t know what to do next mom”. I said, “That’s because you already did it all. Sleep and be prepared to feel like hell tomorrow from the adrenaline. Now we wait”.

He went to his room to call his FIL to be and the neighborhood kids filtered in to be close and show their support. I was winding down the bakery and getting to the dishes when I heard from his room, “I’ve got it, mom”! Got what???

We fumbled for shoes, left a neighbor with the dogs, and teleported out to my car. We drove exactly the speed limit and obeyed every traffic law but miraculously arrived at the location he’d been emailed… Quite a distance, in another city, in a quick ten minutes. Mario co-piloting and me on the phone with two different police departments, one in each ear. Chaos pinpointed by the laser vision of intention.

The car wasn’t at the exact address so we circled around a park… And there it was. There it effing was, in near perfect condition. Now what?

I was barking mama bear safety orders but the boy was on planet reunited where ears don’t work so bolted out of my car. 

This is where I’ll take a break to say I’ve done many stupid, dangerous, and hair brained things in my life and one got pushed out of the top 3 spot last night. I know this was dangerous. The seriously selfless contact that we were on the phone with at Redlands PD implored me not to stop and also knew we couldn’t do that. We were aware of danger and prepared. That’s all I have to say about that.

At this point, my daughter and her friend rolled up who I shooed (yelled) away which she also didn’t entirely obey. We sat in the locked car to wait for the police. This is when we saw an extremely equipped tow truck come by and slowwww before it passed. Then a gutsy sports car that announced it presence aggressively. And then they passed again. Goosebumps called me to action. I asked Ashton if he wanted me to get the troops on their way and he said, “Call everyone. Now”, so I did. Dad, Audree’s boyfriend, friend’s dad, Brother and SIL, one of Andrew’s cooks. Who am I missing? They all started making their way to our shared location, at the speed limit, obeying all the traffic laws.

Within 15 minutes there were at least 10 cars and 15 people surrounding us and the car, with blazing hazards on. For some reason the tow truck and gutsy sports car stopped circling.

The police showed up in one hour instead of two and listened to everyone’s details. She was fantastic. And patient. The group had a lot to say and she listened to every detail. Ashton was free to go so Bella called AAA.

And then we waited again. And again. It took for flipping ever. The final promised ETA was surpassed by 15 or 20 min. I got misty when they loaded Ashton’s Jeep, Cody’s Jeep, onto the tow truck to get it home. And then Audree called to say there was a bad accident in front of them. We sat on the freeway a long time.

Our neighboor Mario was alone with me in my car and I asked him if he thought that the AAA delay might have been another little miracle and he quietly said, “I was already thinking that, Mom”.

I know that we live in a tricky world. A lot of time it hurts here. It hurts to be human. No religion or positive thinking, or fancy mantra protects us from that. I also know there are angels and sometimes they show up in the funniest ways. They come to add grace, and hope, and healing, and sometimes help humans pray Jeep Cherokee’s back to boys.

Happy Mother’s Day!

E296D98F-C572-4B82-A69F-2BB9A32EBB4E

Mother’s Day, when all my chicks have lost their downy fluff and grown flight feathers, has me feeling wistful and reflective. Raising a troupe of milky breathed babes and beginning readers was the sweetest season. I was also exhausted and smelled like puke a lot of the time. It was hard, but so, SO much fun.

Now that everyone is flying, I feel like I know a few things about having parts of my heart living outside my body that I want to share. 

When they were little, I read ALL the books and tried to “mother right”. I was intentional and planned a life that Charlotte Mason would have given her stamp of approval. Then I realized that I was outnumbered and that my plans had to be more outline and less to-do list. When they turned to teens, they had their own to-do lists! Who knew the kids wouldn’t just want to do everything my way?

Here’s what I know for sure. Individual children have individual paths to successful adulting. Some want and need lots of guidance and structure in the greenhouse of childhood and others need to (and must) make their own mistakes to learn. Under my surface desire to successfully mother by to-do list, there was something more happening. What I was really doing was trying to protect my own heart. The one, the ones… outside my body.

I’ve learned that to love is to risk heartbreak. When my kids hurt, I hurt. It’s when I hurt the most. 

In the early years of their adolescence, I tried to keep from hurting by having a lot of structure (rules). As my babies turned to teens, I constricted instead of releasing my grip a finger at a time. They resisted and it wasn’t pretty. They were trying to practice independence while still in the safety of my nest and I was trying to keep them under my wing. It looked like prudent parenting from the outside, but it was actually self-protection. I didn’t want their mistakes to break my heart. 

With time and experience, I found that everyone was so much happier when I worked on teaching values instead of writing family rule lists. I started risking the heartbreak buy loosening my grip and being a resource for solving problems and processing complicated feelings. I taught my teens that it was ok to make mistakes and that I would listen and help them through anything. ANYTHING. 

I learned that my capacity to hurt was much larger than I knew.

I found out that when I was, and am this most trusted soft place to fall, I get to know my children deeply instead of the version of them they think I will accept. That was always my goal. To know their deepest parts. This knowing is even better than baby babbles and milky breath. And if you know how I feel about babies, you know this is really saying something.

On Mother’s Day, I send unquantifiable gratitude to my own mother and the grandmas and in-law mothers in love, and aunties that let me and the women of my generation fly around with their beautiful hearts. And to the next generation, I say ~  the joy is worth the risk. I see you and know that it’s both beautiful and brutal. But we can do hard things. Happy Mother’s Day Lovelies!

Prepared

C75C45A0-7B75-4275-98C9-A29A13D3B097

Caution: Please read the following post with the humility, compassion, and empathy with which it was written. I’m still learning how to do life along with my friends and family and offer the following with tons of motherly love.

I am afraid of a lot of things. I’m a tiny lady and it makes me feel like I’m at a disadvantage in many life scenarios. I’m still working out my peace. When I was in midwifery school though, I learned how NOT to be afraid of emergencies. I learned that fear is counterproductive to purposeful action and to lean on my training.

I feel deeply today for people I see are afraid of the possibility of an emergency. I also see that as a culture, we haven’t had much training… or haven’t really suffered much if we think toilet paper will keep us safe. Travel to places where people toil in a way most people in our generation have never imagined shows that when things go to crap, it’s not toilet paper humans are wishing for.

I’m not an expert at crisis preparedness but growing up with outdoorsmen, I have a few outside of the Charmin box ideas that might help us feel less anxiety and even raise the next generation with less fear and more independence. Here are some thoughts you can take or leave like an all you can eat buffet.

Do you know how to navigate without Waze, with a compass and map? Do you know your loved one’s addresses and telephone numbers by heart without your hand-held “phone book”? Could you wrangle up some food if the supermarket was closed? If you didn’t grow up hunting, can you craft a trap? Do you know what’s edible in a field of “weeds” like dandelions or chickweed? Can you start a fire? How about at the master’s degree level without matches? Do you know how to sensibly stock up on dry goods that can be stretched into many meals? Do you know how to make water potable in a variety of circumstances? Do you know how to make effective medicine out of common plants? Are you teaching these skills to your kids? 

I’m not suggesting that we will or will not need these skills in the near future. I’m sharing that real preparation can help us ALL feel less afraid of any emergency because if something happens, we will rely on our training. Fear is a guide. It says to do something you are not doing or not to do something dangerous that you are getting ready to do. I propose that the collective anxiety we are experiencing is a beacon asking us to revisit our life skills. 

If your protected, packaged, structured upbringing failed to expose you to this kind of know-how, choose something that feels most important to learn about today… now. It’s counterproductive to panic in an emergency, so let’s stock our pantries with skills instead of just toilet paper. And then take a collective, deep breath, showing compassion to ourselves and each other in this very tricky world we live in.

Kombucha Baby!

3131CC71-9F00-4ECB-B890-CD0CB362A8D6

Kombucha is a delicious fermented tea that has been consumed for thousands of years, most likely discovered by accident when someone left their sweetened tea sitting around too long. It’s been very popular lately so I’d venture a guess that by now you have tried it out. It’s a tart, fizzy, and addictively delicious alternative to soda, full of glorious health benefits. A drawback is that it gets expensive if you fall madly in love! 

Bottled kombucha can start at about $2 at the market, but I’ve seen it much pricier, going for up to $6 or $7 a bottle where I live in the burbs. I can imagine even higher prices in metropolitan areas. So what’s a booch lover to do? Make your own!

Before we get into the recipe, let’s look at the health benefits, which are many. It’s a bit of work to make but I think this long list will get you motivated. The most popular benefit of kombucha is that its fermentation process makes it a fantastic source of probiotics. You’ve got to be living in a cave at this point to not know we all need more good bacteria in our diet, so this is a great benefit alone… But wait, there’s more!

  • Kombucha made from (all or part) green tea offers many of the same health benefits as green tea itself like blood sugar control, and blood sugar control can help with weight loss! Additionally, science shows that it improves several markers of diabetes.
  • Kombucha is also rich in antioxidants which are very beneficial for the liver. Science shows that antioxidants in food rather than supplements may be more beneficial so booch is a delicious way to get those antioxidants in every day. 
  • Kombucha is rich in tea polyphenols and acetic acid, which have both been shown to suppress the growth of undesirable bacteria and yeasts. This is huge if you are trying to rebalance your gut.
  • Kombucha has been shown to improve “bad” LDL and “good” HDL cholesterol levels in scientific tests and it may also protect against heart disease. *Going slightly off-topic for a sec here… If there is any remaining doubt – cholesterol is SO important for good health! This is a soapbox for a different day, but let’s just be clear, we need cholesterol for a properly functioning body (especially our brain)! We were sold a bill of goods in the 80’s when we were told it was bad for us. Can we move on from this terrible science once and for all friends?
  • Finally, test-tube studies show that kombucha suppresses the growth of cancer cells. It is unknown whether drinking kombucha has any effects on cancer risk in people but it will be interesting to see the results of continued testing.

Ok, let’s get to the recipe. The first thing you need is a SCOBY – a symbiotic culture of bacteria and yeast. Another definition could be a living disk of disgusting looking goo. I’ve learned to love my SCOBY because I’ve had her around and given away her babies for years now but she wins no points in the looks category. 

You can get a SCOBY a couple of ways. The easiest is one is to get one from someone you know that already makes kombucha. SCOBYs multiply so there are often some to share. You can also buy a SCOBY either at the health food store or online. 

I think the last option is the most fun – grow your own! If you are down for a quick project, buy a good, live kombucha next time you are at the market. Transfer the contents with a little added sugar to a wide-mouth mason jar. Leave an inch or two of space at the top and loosely cap the jar so that gas can escape. Store it in the pantry or on the counter where you will remember to check on it now and then. Depending on the temperature of your kitchen, the kombucha will miraculously transform into a SCOBY over between a week and a month’s time. You are looking for a disk that is between a quarter to a half-inch thick and nicely firm. The liquid that remains will be too tart to drink but you can add it to your first batch of homemade kombucha as a starter.

So let’s get to the brewing! You need some simple equipment and ingredients to get started.

Equipment

2-quart glass container with lid, sterilized – I have several extra-large 4-quart Ball jars that I use for fermentation. I double this recipe to make kombucha in these jars.

Small dish to hold your SCOBY – I like to use glass or stoneware, not metal.

Large container for brewing – I use a food-grade, large cambro but any bowl or pitcher works as long as it’s large enough.

Mesh Strainer

Bottles for decanting, sterilized – I like to use glass wine or sparkling water containers. Be sure they have a tight seal so that they will contain the carbonation of your finished product.

Funnel (optional)

Ingredients

½ cup loose tea – I like to use a combo of black and green organic tea. If your tee has fruit or flowers for added flavor that’s great! My recipe calls for more tea than you might find in other recipes. I think it produces much better kombucha this way.

½ cup raw sugar

1 quart filtered water, boiling – You will add ice after brewing to make just under 2 quarts total liquid

About 1 cup of reserved, live kombucha as starter

1 beautifully disgusting SCOBY

Start by adding the tea and sugar into your brewing container. Pour about one quart of boiling water over the tea and sugar and mix until the sugar has completely dissolved. Loosely cover the container and set it aside to brew it into a very strong tea. I leave it at least an hour, but often much longer to allow maximum extraction and to let the water cool naturally.

Once the tee is brewed, strain out the loose tea into the mason jar, pressing down on the tea leaves to get out every last drop. When I’m making large quantities at once, I use a second cambro for straining before adding the tea to my jars. It makes an extra container to wash but prevents spilling sticky tea. 

Now add ice to the sweetened tea to bring it to room temperature and then add the reserved starter kombucha. Finally, float the SCOBY on top of the tea and cover the container. I use a paper towel or cheesecloth with a rubber band. If for some reason, your SCOBY sinks a little, don’t worry about it. It will either pop up to the top overnight or you will see a new SCOBY forming in a day or two. The bacteria and yeast will do their job either way.

This is where the art of knowing when home-made kombucha is ready for bottling comes in. In a commercial environment, the fermentation process is precisely temperature controlled. At home, in your kitchen, the temp fluctuates. I have found that during temperate weather, my kombucha takes about a week. Once it starts to cool down in the fall, it can take more like 10 days, and in winter, it takes more like 2 weeks or even longer.

After a week, I slip a spoon into the container and do a taste test. You will want it to be slightly fizzy, mostly tart, but not all the way fermented, tasting like vinegar. If it’s too sweet, put the top back on the container and give it a few more days.

Once the kombucha is ready to bottle, start a new batch brewing and strain it as described above. When it’s brewed and cool, add a few tablespoons of the sweetened tee to your sterilized bottles, ready for the perfectly fermented kombucha. 

Now, gently remove the SCOBY to the sterilized dish in your equipment list and reserve a cup of kombucha for your next batch.

IMG_9193

I like to strain the finished kombucha when I bottle it because there is always particulate material that doesn’t look too thrilling even though it’s not unhealthy to consume. Pour the strained kombucha into your sterilized bottles. I make a meditative game out of this (stupidly refusing to use a funnel) to see if I can get it all in each bottle without spilling a drop. You know I’m a weird one already. This seems like a grounding and centering exercise. If you don’t like to test your steady hands and monk style breathing, use a damned funnel.

Ok, one important bottling detail is leaving plenty of headspace in your bottles to allow carbonation to develop during the second fermentation. The reason you added the fresh sweetened tea, is so that the good bacteria could consume it now and make yummy bubbles in your final product. The headspace allows this to happen without exploding any bottles. I’m knocking on wood before I say that I’ve NEVER exploded a jar or bottle because I’m so careful about this step. I leave the bottled kombucha on the counters for its second ferment for 4-5 days to get the carbonation really fizzy. During this process, I open the bottles just a twist or 2, until I hear a tiny bit of gas escape each day. It doesn’t make the final product less carbonated but I think it’s why I’ve never come downstairs in the morning to a sticky mess of broken glass.

IMG_9191

With everything bottled up, sterilize your fermenting vessel, add your sweetened tea, reserved kombucha, and SCOBY, and cover for the next round.

Whew! After day 4 or 5 of the second fermentation, you are DONE. Refrigerate your beautiful kombucha and drink away. I’ll add a little warning here… The daughter of my heart Mandy loves kombucha and was drinking at least a bottle a day of the store-bought sort for some time before I gave her my home-made version. She loved it and drank a ton only to find that she was experiencing an unintentional gastrointestinal cleanse later that evening. The home-made stuff is stronger!! When you start drinking your own for the first time, go easy at first. We can both drink as much as we like now because our bodies are used to it but take heed.

A final note, you can add all kinds of flavors to your second ferment. Fruit juice or puree work really well as do larger pieces of fruit. My friend makes a passion fruit version that makes me feel like I’ve been transported to a Hawian island. Go ahead and be as creative as you like and make notes on which experiments you like best. When you are ready, share your SCOBY babies so that your friends and fam can get their own booch brewing. 

As always, I’m here to answer your questions, but I hope my Julia Child style, ultra-detailed recipe has you off and running with all the info you need for first-time SUCCESS.

Beet Kvass

You only need a few ingredients to make this Beet Kvass recipe but for your minimal effort, you will create an incredibly beneficial health tonic!

IMG_9189

Beet Kvass is earthy, sweet, sour, and salty all at once. If you like to drink pickle juice, you will love kvass from the first sip. If not, know it’s an acquired taste, but like all fermented foods, you will begin to crave it as your body utilizes its benefits. Let’s be real though… Most people are either beet lovers or loathers. If you don’t like beets at all, make kombucha, water kefir, or sodas with ginger bug for a probiotic drink. If you are on the beet lover side, you will look forward to drinking this every single day!

The health benefits of Beet Kvass are many.  Kvass is a blood tonic that promotes regularity, aids indigestion, alkalizes the blood, treats kidney stones, cleanses the liver, and is brimming with probiotics. Follow this recipe to give kvass a go in your own kitchen.


Equipment

2-quart glass container with lid, sterilized – I have several extra-large 4-quart Ball jars that I use for fermentation. I double this recipe to make kvass in these jars.

Mesh strainer

Vegetable peeler

Sharp knife

Bottles for decanting, sterilized – I like to use glass wine or sparkling water containers. Be sure they have a tight seal so that they will contain the slight carbonation of your finished product.


Recipe

3 medium or 2 large organic beets, peeled – Some recipes call for unpeeled beets but I personally do not like the way the finished kvass tastes. I always peel my beets!

1/4 cup whey – The recipe for whey and cream cheese is below. You can also use live sauerkraut or other fermented veggie juice, live kombucha, or ginger bug.

1 tablespoon sea salt

2 quarts filtered water

Coursely cut the peeled beets and place them in your 2-quart container.


As with all fermentation, your container must be scrupulously clean. I use the sterilization setting on my dishwasher for this purpose making sure my containers are completely cooled before use to ensure beneficial bacteria are not killed by heat.

Now add the whey (or another fermentation starter) and salt to the beets.

IMG_9081

Cover the beets with water and stir well.


When you stir the kvass and the salt dissolves, it will appear slightly foamy. Cover the container. You can use a special fermentation seal that automatically vents or burp the container a few times per day. This isn’t a step that you can forget since the jar can explode if too much pressure builds up.

Because of the high sugar content in beets, kvass is a fast ferment. If your house is warm, it can take as little as two days. In a chilly winter kitchen, it can take up to a week. Be careful not to stretch the fermentation too long because the sugar can cause mold to develop quickly. I like to put mine in the fridge at the three-day mark.


As the kvass starts to ferment, you will see lots of bacteria activity. Bubbles will begin to form around the beets and travel up to make their escape. The bubbling action can get so alive that your jar of kvass looks carbonated. As the bubbles rise, you will notice foam on the top of your kvass. It is normal for this foam to have a slightly brown cast.

IMG_9122

In order to produce a rich beet taste without risking mold formation, I add one last step to my preparation before straining. After the initial three day fermentation, I place my covered container into the fridge for two to three days. I find that this greatly deepens the flavor of the kvass. After the rest in the fridge, remove the container, give the kvass a quick stir, and then strain the beets out reserving the liquid.

IMG_9186

Some recipes suggest a second round of fermentation by adding fresh water to the used beets, allowing them to ferment for a second time. I find the result much too light and prefer to discard the beets after the first use.

Now carefully put your strained kvass into sterilized bottles and refrigerate. Drink several ounces a day either diluted with a touch of sparkling water or straight up. The salty-sour flavor may seem strange at first but your body knows what’s good for it. In short order, you will find yourself craving your daily tonic! It will keep for months in the fridge but probably won’t last that long.

IMG_9190


WHEY and CREAM CHEESE

This recipe produces two products. The first, whey, is essential for making all kinds of lacto-fermented products and soaked grains. In lacto-fermentation, the beneficial bacteria in the whey will give your fermentation process a kickstart, allowing you to use less salt in your recipes. You may also use whey in soaking grains, brown rice, and beans to reduce the phytic acid and other “anti-nutrients” in them, allowing for easier digestion and increased nutrient bio-availability.

IMG_9084

Recipe

32-ounce carton of organic, full-fat yogurt

stainless steel bowl and strainer that nest nicely

paper towel

plastic wrap

Nest your strainer inside the stainless steel bowl and place the paper towel in the bottom of the strainer. Make sure there aren’t big wrinkles in the towel and that the edges are tucked in at the top. If the edges of the towel are hanging over the side, it will draw the whey up and out instead of into the bowl. Stir the yogurt and add the entire carton to the towel-lined strainer and cover the entire contraption with plastic wrap. You may use some extra plastic wrap or a large rubber band to secure the strainer and bowl so that you have a sturdy system.

Place the straining yogurt into the fridge overnight or until there is no liquid dripping through the strainer. The liquid that ends up in the bowl is your whey! Pour this liquid into a very clean mason jar. It will keep in the fridge for 6 months, but if you start fermenting all the veggies in your refrigerator, it will get used up quickly.

Once you have the whey that you need, you will be left with strained yogurt which is what is sold in the market as Greek yogurt. This product is also what was historically used like cream cheese. You can eat this just like regular yogurt, adding maple syrup, your favorite fruit preserves, or nuts. Also, try making it into muesli with oats and seeds. This traditional, European breakfast is incredibly healthy with both soaked grains and beneficial bacteria. You can also make savory spreads or dips with it. Add chives, parsley, cilantro, dill, and a tiny bit of chopped garlic with salt and pepper for a healthy and delicious veggie dip or spread for a bagel.

Sourdough Discard Crackers

img_6743

In order for a home cook to keep a sourdough starter active and bubbly, there is bound to be some waste. Careful planning and refrigerating the starter helps but occasionally you still have to discard. I’ve always made discard pancakes and love them. Recently though, I decided that I needed an alternative and set out to find a cracker recipe that really thrilled me.

When I prepare home-made food, I want it to taste as good or better than what I can buy. I don’t want my family wishing they could have the boxed or packaged versions. These crackers fit that bill. Depending on how you season them, they can be cheesy, herby, or just crispy and salty. They are also super healthy for all the reasons we already know that sourdough is awesome.  Try this recipe next time your starter is about to outgrow its jar!

One last comment – The Internet is full of recipes. Why do we need another one for crackers? I looked far a wide and didn’t find something that satisfied me. I want two things here… First, I want a recipe that tastes delicious. I talked about that above. But two, why are we bothering with sourdough crackers if they aren’t fermented? Some of the most popular recipes suggest mixing the ingredients and making the crackers right away. This defeats the whole purpose of sourdough! What I’ve done here is combine delicious and healthy. Anyone committed to sourdough because their bodies can’t handle digesting regular flour, can eat these crackers. AND they taste awesome. I’m so happy to fill in a gap, where both flavor and nutrition are priority. Please comment with your results.

Ingredients

220 grams or 1 cup All-Purpose Flour

110 grams or ½ cup Spelt Four

5 grams or 1 teaspoon Course Salt, plus more for dusting

2.5 grams or ½  teaspoon Baking Soda

320 grams or 1 ⅓ cups  Sourdough Starter

90 grams or 6 tablespoons Fat – refined coconut oil, olive oil, or melted butter

Optional Flavorings – herbs, finely chopped nuts, seeds, dry cheeses

Mix the flours, salt, and baking soda in a bowl. In a sperate bowl, measure the sourdough starter. Pour the flours on top of the starter and sprinkle the fat across the flour. Knead the ingredients together until they begin to form a cohesive ball. Depending on the natural humidity of the day, you may need up to a tablespoon of water for the dough to come together completely. Add it slowly so that the dough does not become wet.

Shape the dough into a rectangle and wrap it tightly in plastic wrap. Set it aside to ferment for 6 hours. When the 6 hours have elapsed, you may roll out and make the crackers or place the dough in the refrigerator for up to 3 days.

When you are ready to prepare the crackers, preheat the oven to 350 degrees. Place one of your oven racks on the top and one of the racks on the bottom.

Now very lightly flour your work surface. Cut the rectangle of fermented dough into 6 approximately equal pieces. One piece at a time, roll the dough out until it is about a 4 by 7-inch rectangle. It is not important to be exact. Sprinkle the seasonings of your choosing onto the dough. Fold the dough over on itself in an envelope as pictured.

Note –  At this point, you will be rolling out the dough for final cutting. The more particular you are about how you roll the dough out now, the more even your crackers will be. If you are making these for your family, it may not be important at all to have sharp, straight edges. If you are going to give them to friends or as a gift, work on keeping the dough very straight and even as you roll it out.

Roll the dough out until it is thinner than you think it needs to be! The approximate measurement is 2 millimeters remembering that it will poof up some in the oven. Once you make this recipe a time or two, you will know exactly how thin you need to go during this step for perfect crackers. You may sprinkle more salt on the dough and press it in with the rolling pin or palm of your hand now if desired.

Using the rolling pin or a ruler as your guide, use a pizza cutter to cut the rectangle of dough into equal pieces. If you like, you can trim away the ragged edges of your dough. These trimmings fold back together easily into a new, much smaller rectangle which can be rolled and cut again to avoid waste. Use a fork and score each cracker at least twice.


Place the crackers on an ungreased baking sheet and put them on the bottom rack of the oven. Set the timer for 10 minutes. When the 10 minutes have elapsed, move the baking sheet to the top rack of the oven. Depending on the thickness of your crackers, it will take about 10 more minutes for them to finish baking. I set my timer for 8 minutes and check them often until I see that they are golden, but not dark brown.

Remove the baking sheet from the oven an allow the crackers to cool. Repeat the process with the remaining rectangles of dough. Package the crackers in an airtight container to store them.

Rustic Sourdough Boule


4FB9D8B4-8142-419E-B3CB-5024314E0495

I resisted making the Rustic Country Loaf from the bread baking bible Tartine for years. I somehow had it in my mind that it was complicated and fussy. I already made great bread (even sourdough) so I just never looked into the details. Then one day, on a trip to the local library with my girls, I saw the book beckon me from the shelves. I took it home and made a leaven according to the directions that very night.

The next day I mixed the leaven with the flour and water using my hand. I was not impressed with the mess since I almost always used my stand mixer for dough making, but I was committed to following the directions exactly for my little experiment. Aside from the clumpy mess with the addition of the first ingredients, the process was very simple.

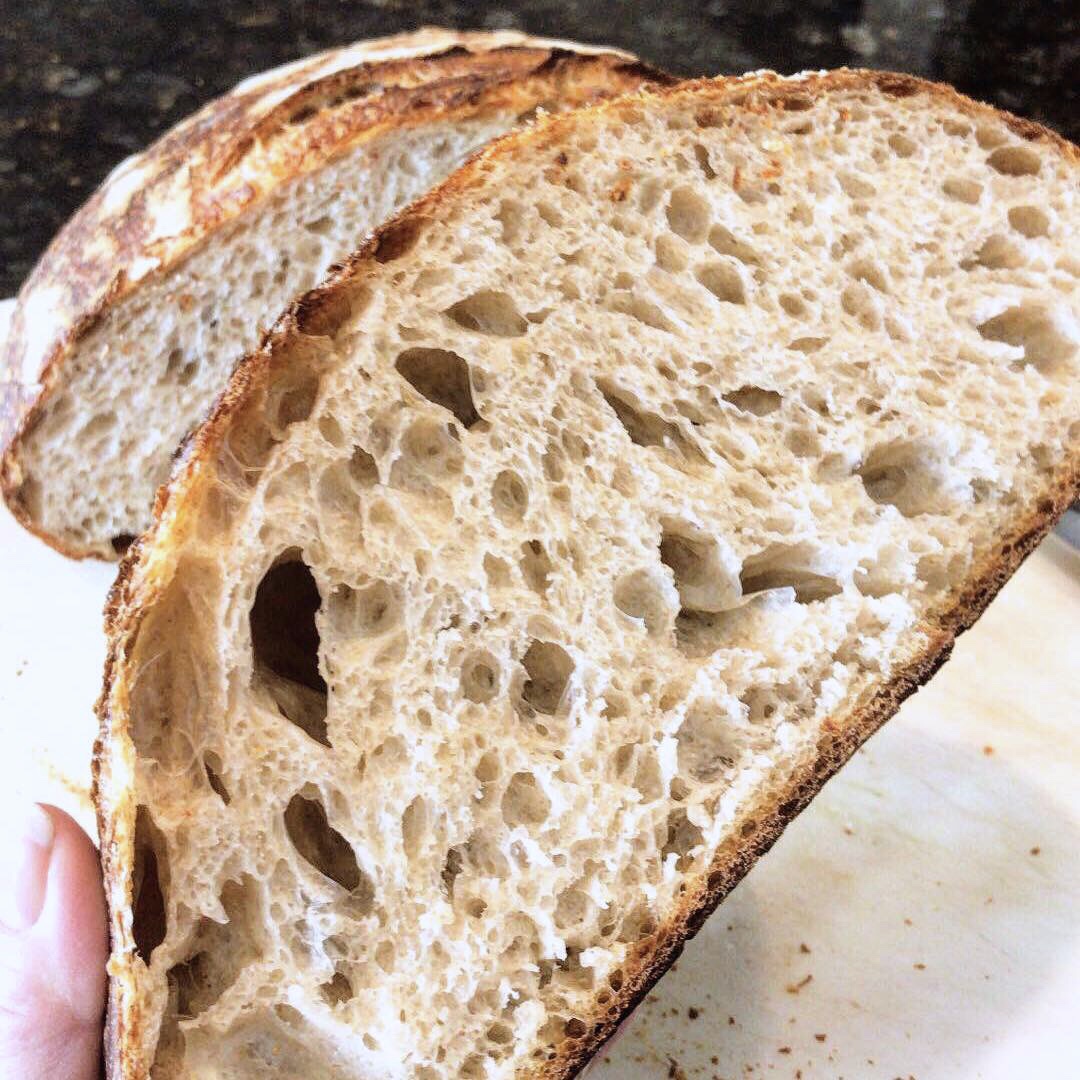
Once the dough rose, I formed my loaves, let them proof, and set the oven to 500 degrees. I preheated my dutch oven, placed my little dough baby inside, and scored it carefully. After the initial period of baking, I removed the cover so that the loaf could brown. I was absolutely elated with what I saw (and wondering why I had been so stubborn). The loaf wasn’t even finished and I was already sold. The crowning moment was once it was cooled, I sliced it down the middle, revealing the open crumb and incredible fragrance that I had been trying to achieve during all of my years of baking.

When I started sharing about my experience, I got feedback that people were having a lot of trouble with their sourdough. Part of the difficulty was from inexperience. Beginners just don’t know how things look and feel when they are correct. It was also, and maybe primarily because there is just too much information and too many opinions available. All this info overload causes crazy confusion. Should you add the salt when you add the flour to the leaven or wait 30 min? How rough should you be when you make your turns during bulk fermentation? Should your dough be cold when you put it in the dutch oven or room temperature? Every recipe says something different and some of the beginner recipes are actually the most confusing.

It is a true desire of my heart to help others enjoy their time in the kitchen as much as I do, so I set out to test each variable. I spent several months making many, many loaves of bread, each with tiny differences in the process. I made pages of notes which evolved into the recipe below.

This recipe is by no means intended to replace Chad Robertson’s genius offering to the world of bread. If you use this recipe and catch the sourdough bug, you must invest in Tartine. The purpose of the method that follows is my effort to simplify and explain how to bake a loaf of bread, in plain English, that will work and thrill you the very first time. My greatest inspiration, Julia Child, is known for recipes that go on for pages and pages. Rather than this making a cook feel daunted, her detail is what carries you through to grand success. I hope what follows would make her proud (and want to make a loaf of bread)!

Before you cringe in fear of the measurements in this recipe, I will restate (although I’ve droned on about it in other blog posts) that the one piece of equipment that will make or break your success is a kitchen scale. Almost all of the other things on the equipment list have alternatives, but you really must have a kitchen scale to make this bread. The amounts for ingredients like starter and salt are very precise. The measurements do not translate well into teaspoons and cups. The scale will also save you a lot of dishes! When you measure the ingredients for the leaven and dough, you can add each one into the bowl used for mixing and tare (zero out) the scale between additions. When you are finished, you won’t have a bunch of measuring cups and spoons to wash!

One last note before we start – This recipe calls for an active sourdough starter. If you have a starter that you have been feeding and growing out on your counter, “discard” and feed it 24 hours before you make your leaven. If you have your starter in the refrigerator, pull it out 2 days before you make the leaven, discard and feed it, leaving it on the counter overnight twice. I’ve added lots of info to the Sourdough Starter post about how to do this and what to do with the discard. A highly active starter is what helps this dough develop a great, open crumb, so don’t begin until it’s bubbling away and happy.

*12/19

Since first posting this recipe, I’ve made innumerable loaves of bread! Every single time, I evaluate my last bake and make tiny adjustments to the process without fail. I’ve learned that how I do my turns has a great deal to do with how the crumb turns out. The pattern of the score impacts the height and shape of the final loaf… and there are some steps that can be adjusted and even skipped for simplicity.

I’m going to leave the recipe as it is because it is what helped me gain confidence and make great bread in the beginning but I’m also going to share some alternatives. I encourage you to try both and your own variations if you are interested in finding the perfect loaf at the end of your baking rainbow. You’ll find the new material by looking for *Alternate method as you read.

Equipment

Small Non-Metal Covered Bowl (leaven)

Large Non-Metal Bowl or 4 Quart Cambro (rising)

Kitchen Scale

Spatula & Dough Scraper

9.5 Inch Round Banneton or 10X4 Inch Rectangular Banneton or Bowl (rising)

Tea Towel If Using Bowl For Rising

Plastic Wrap

Lame or Very Sharp Knife

Covered Dutch Oven – 6 Quart or Larger

Parchment Paper

Cooling Rack

Leaven

The best time to make leaven is right before bed so that it is active and ready for your bread making when you wake up in the morning! If you put the leaven on late, expect to give it a few hours in the morning as well. Especially in the cooler months. The leaven should be bubbling with life before you start your loaves.

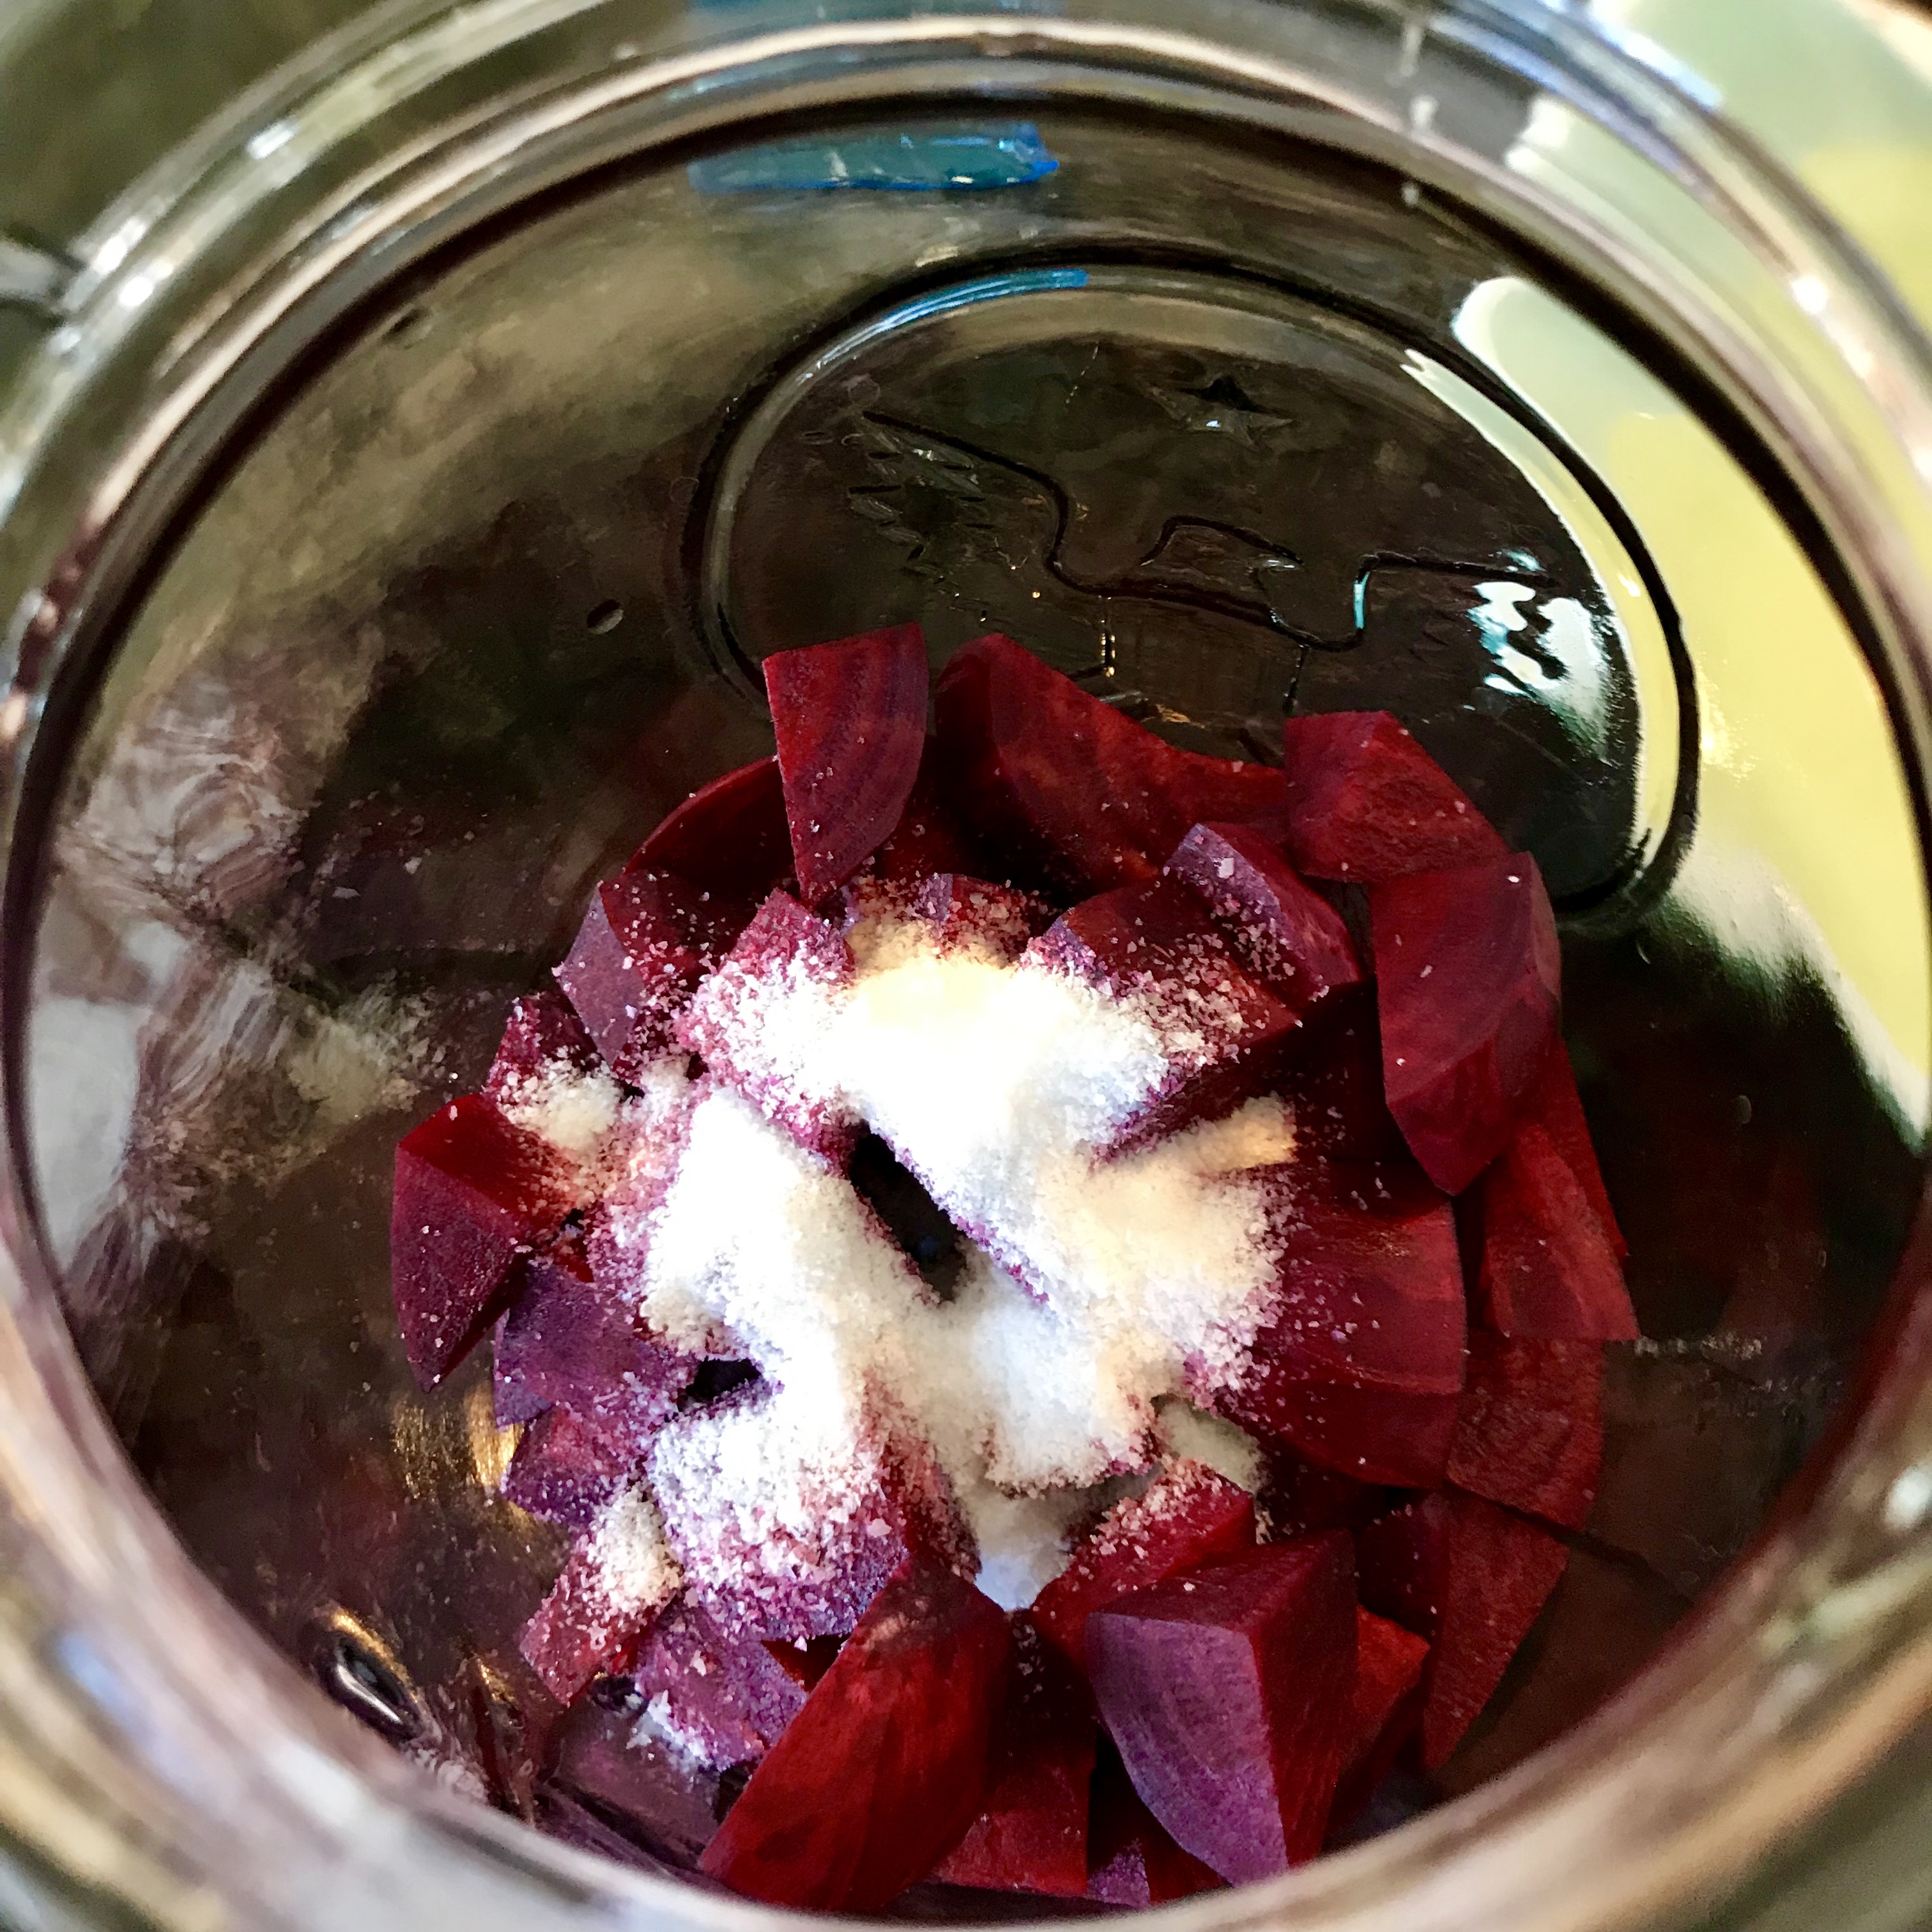
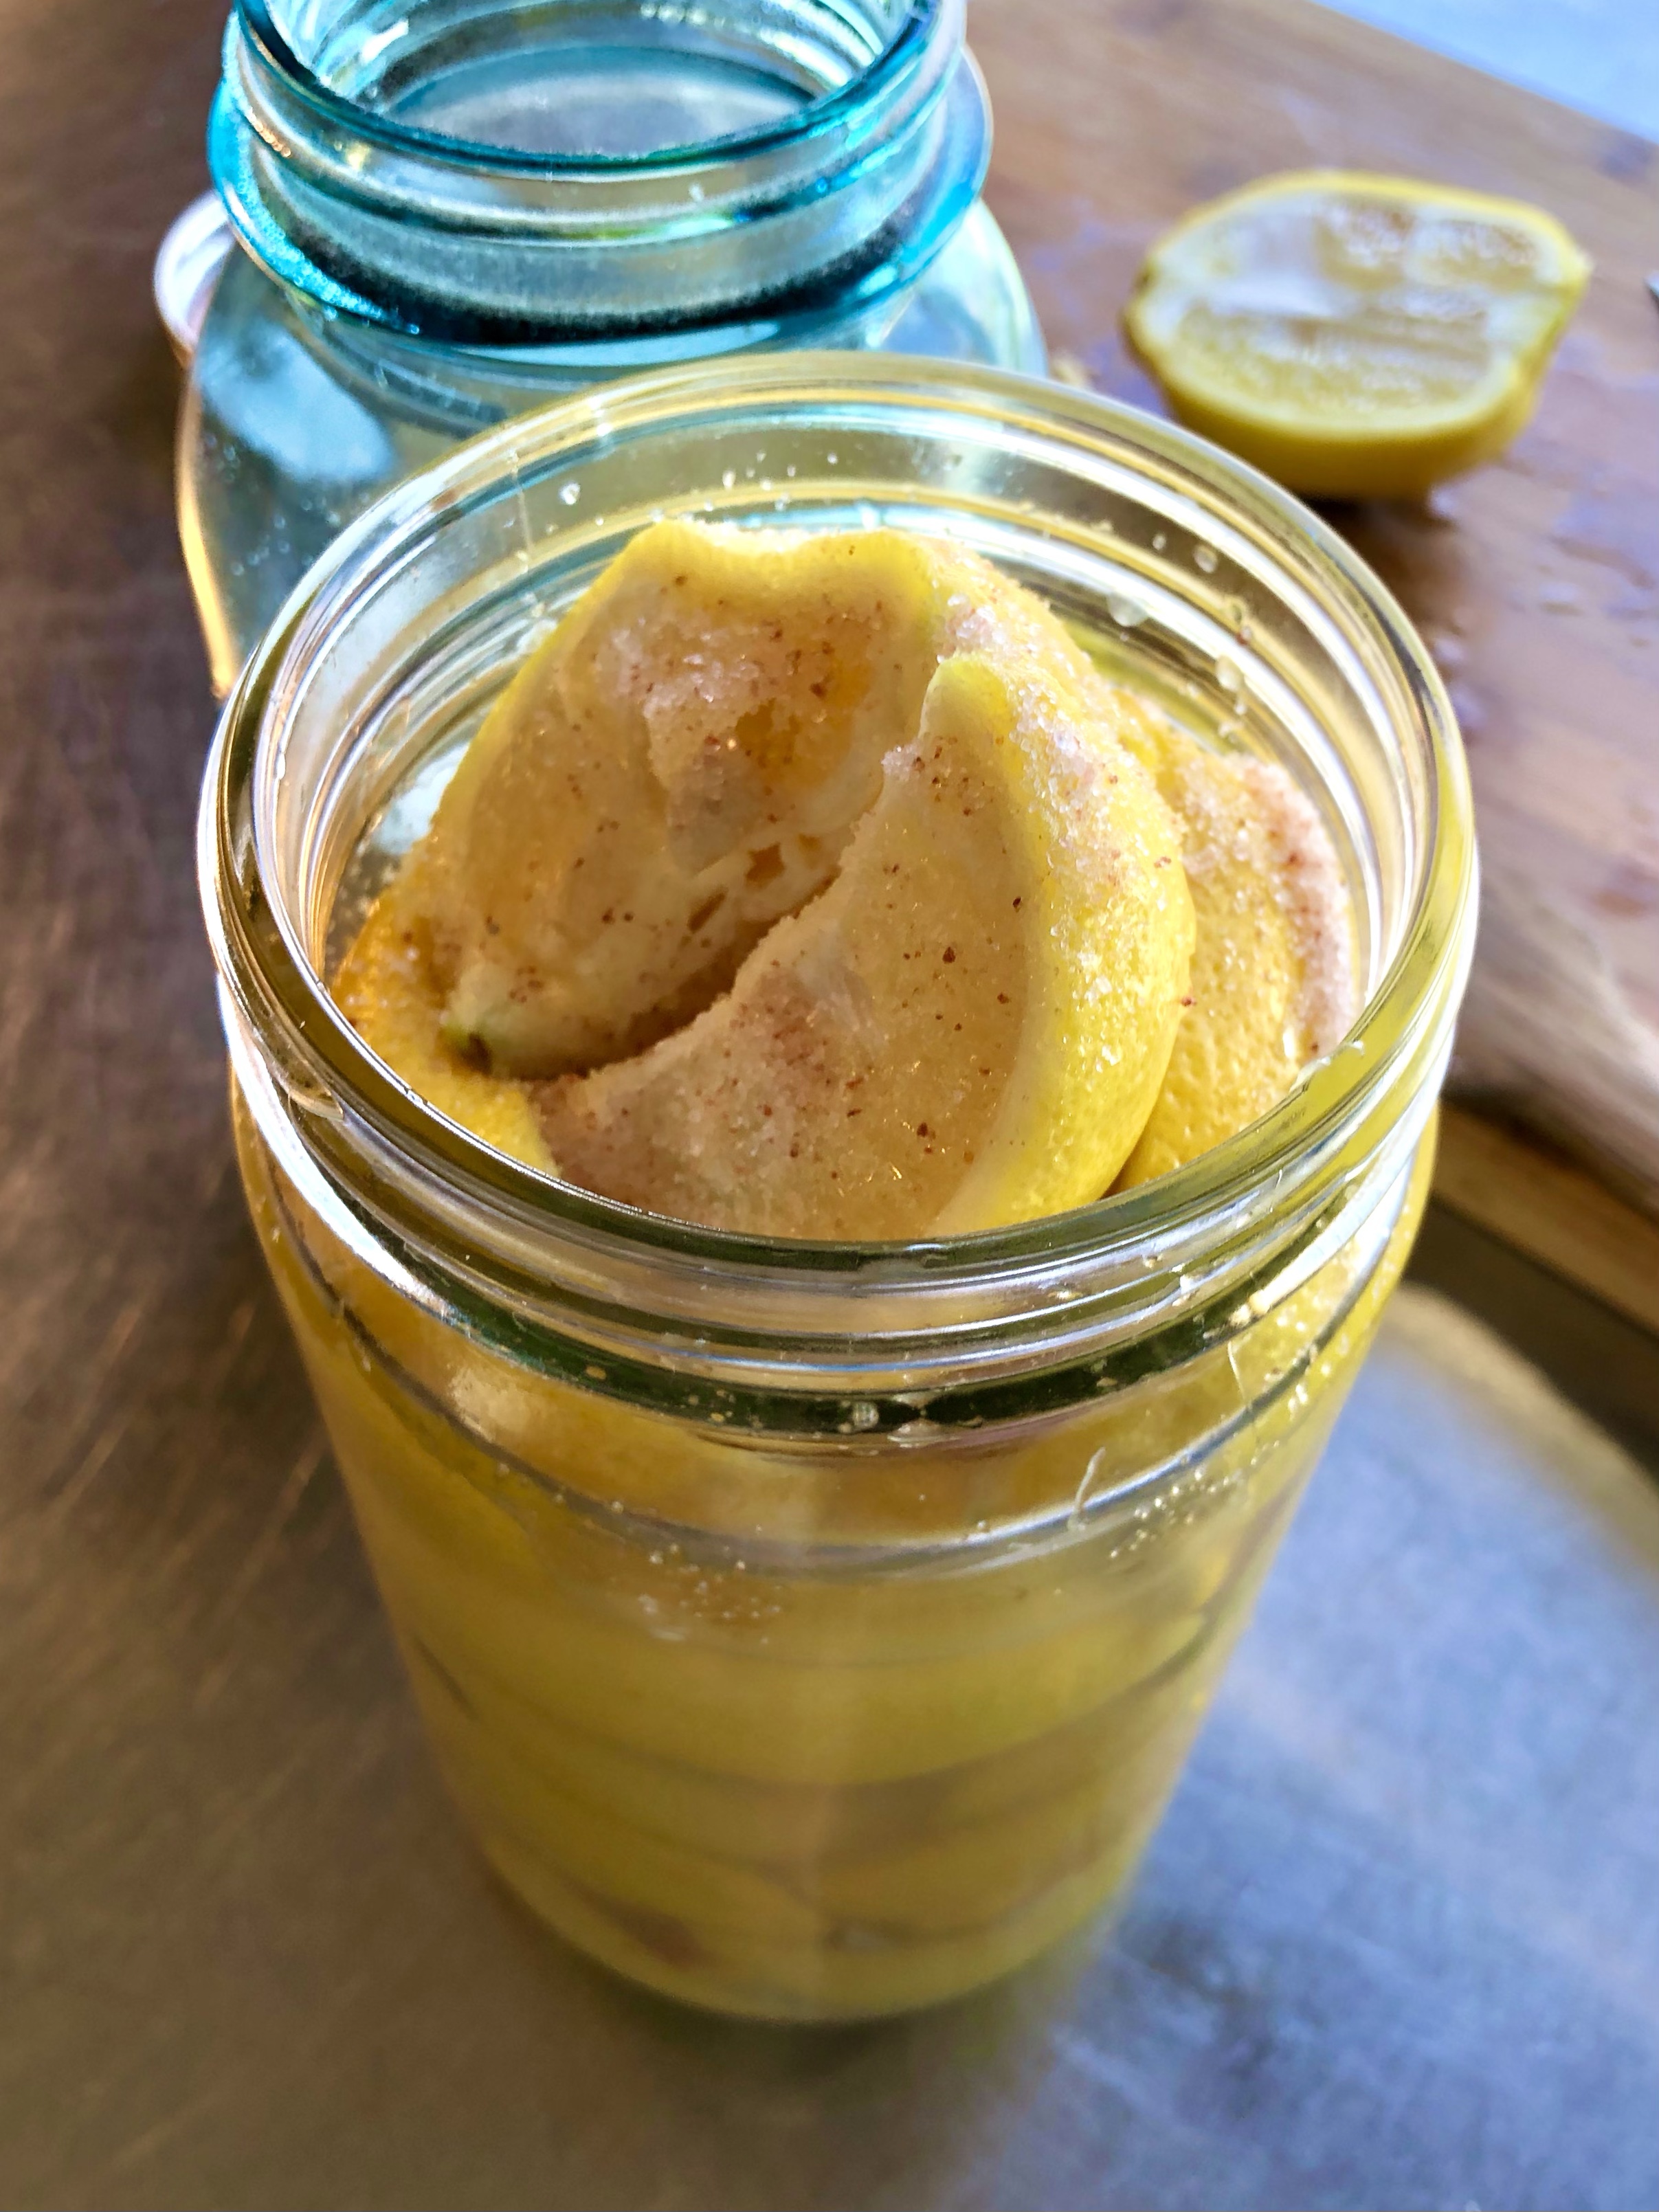
25 grams of Active Sourdough Starter

100 grams Water 78-80 degrees

50 grams Spelt Flour

50 grams Bread Flour

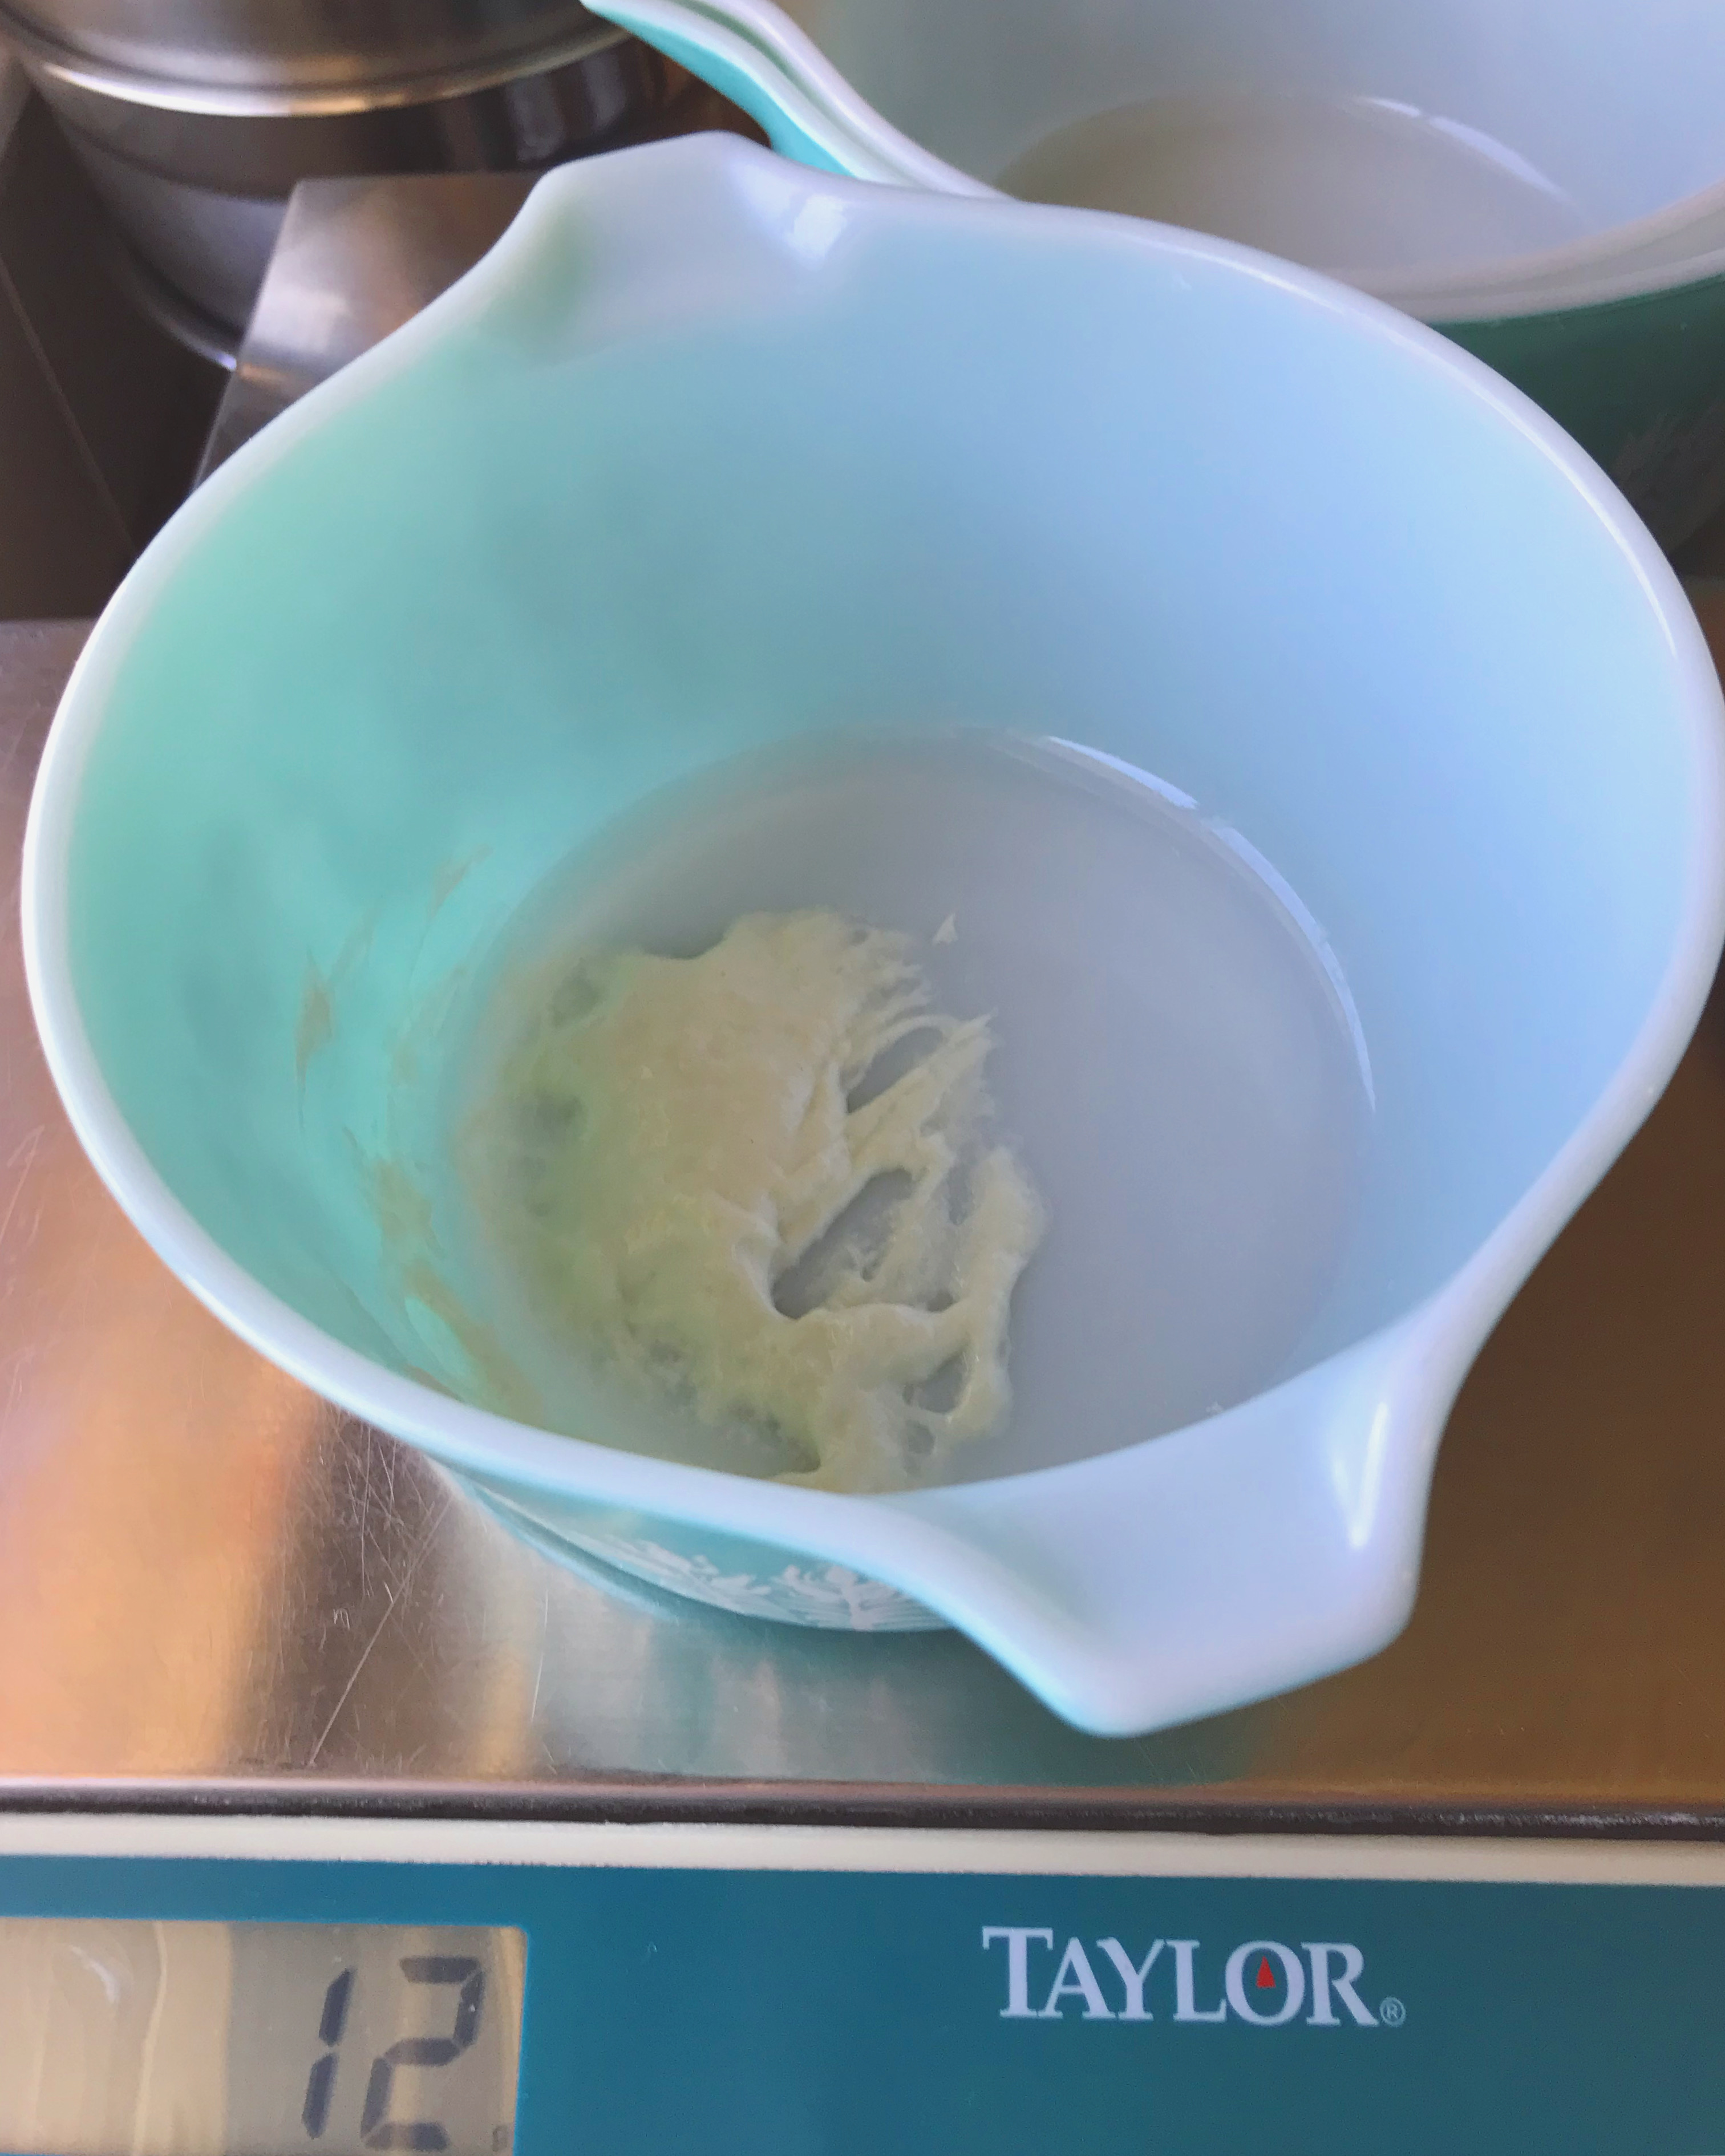
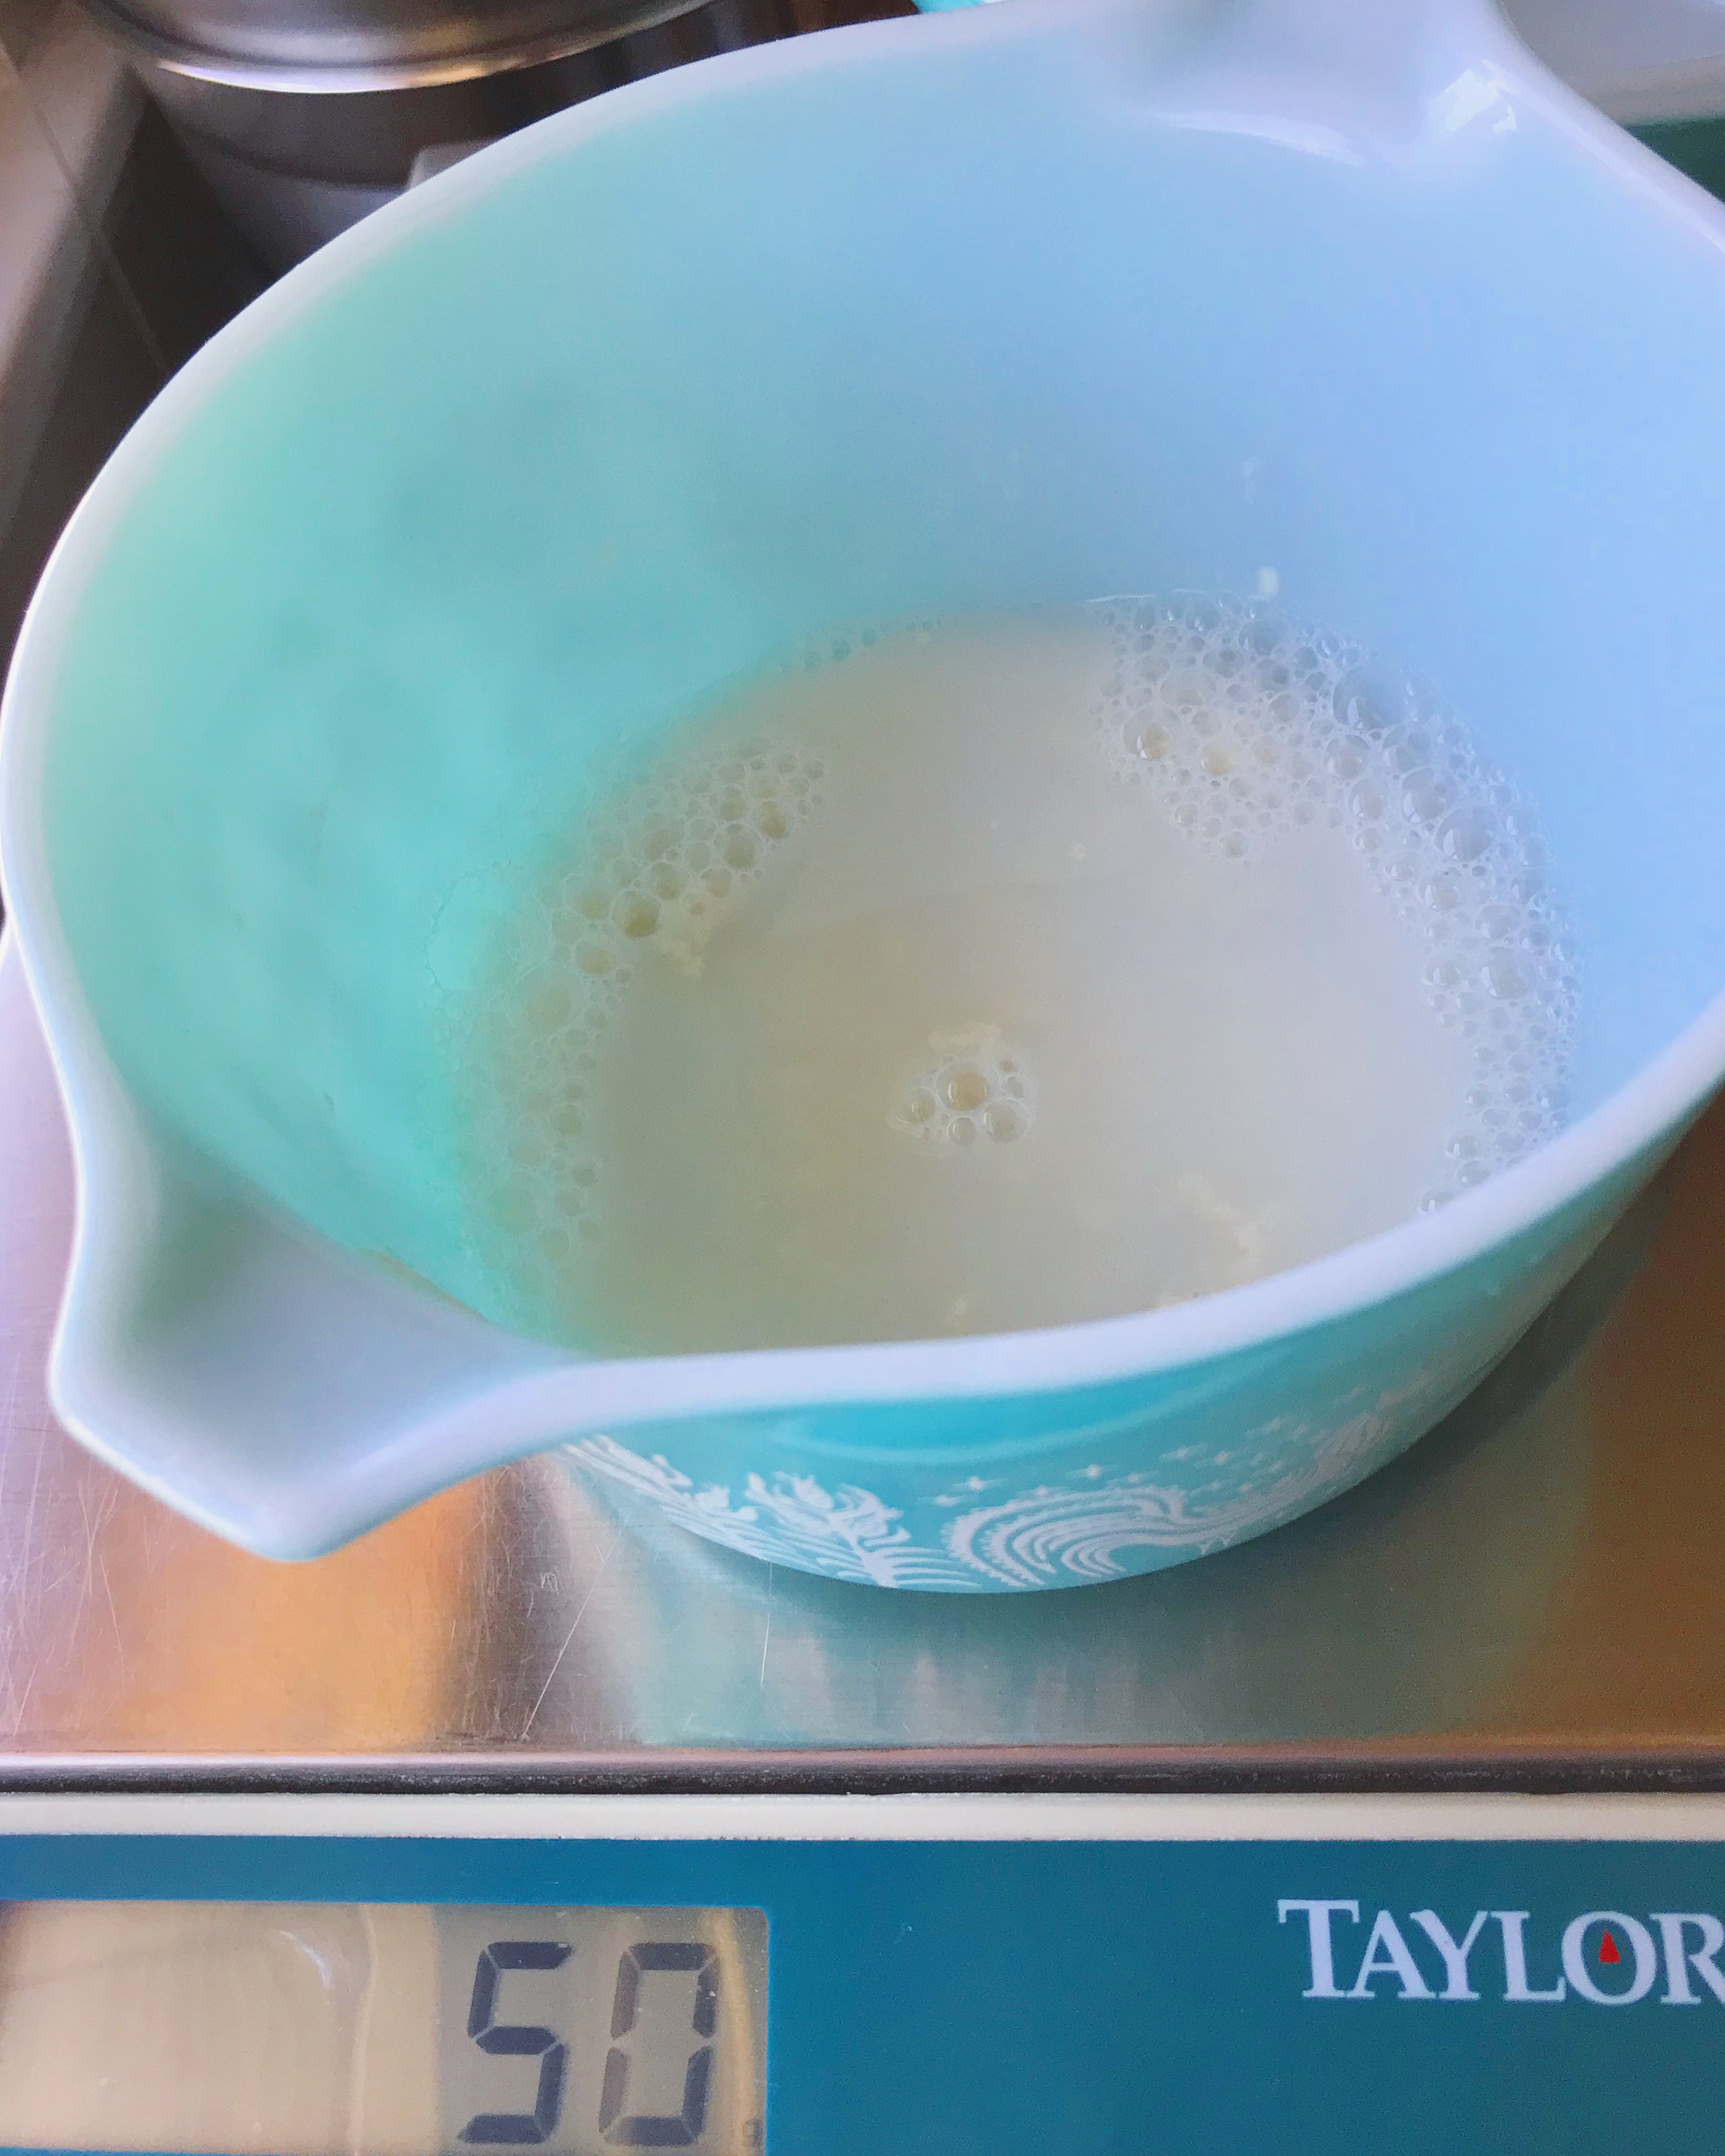
In a medium bowl, add 25 grams of starter and tare your scale. Now add 100 grams of water and move the bowl onto the counter. Place your clean fingers or non-metal whisk into the starter and water and swish it around until it is combined and has some bubbles. I’ve come to really like the whisk! Put the bowl back on the scale and add the 50 grams of spelt flour and 50 grams of bread flour. Keep using this method of tarring the scale for each ingredient for the remainder of this recipe.

I like to incorporate the flour into the starter and water for leaven with a spatula instead of my hands. Using the spatula will help you scrape down the sides of the bowl until they are nice and clean once the ingredients are combined. If you leave the sides of the bowl messy, the bits of leaven will dehydrate and turn it into difficult to clean cement.

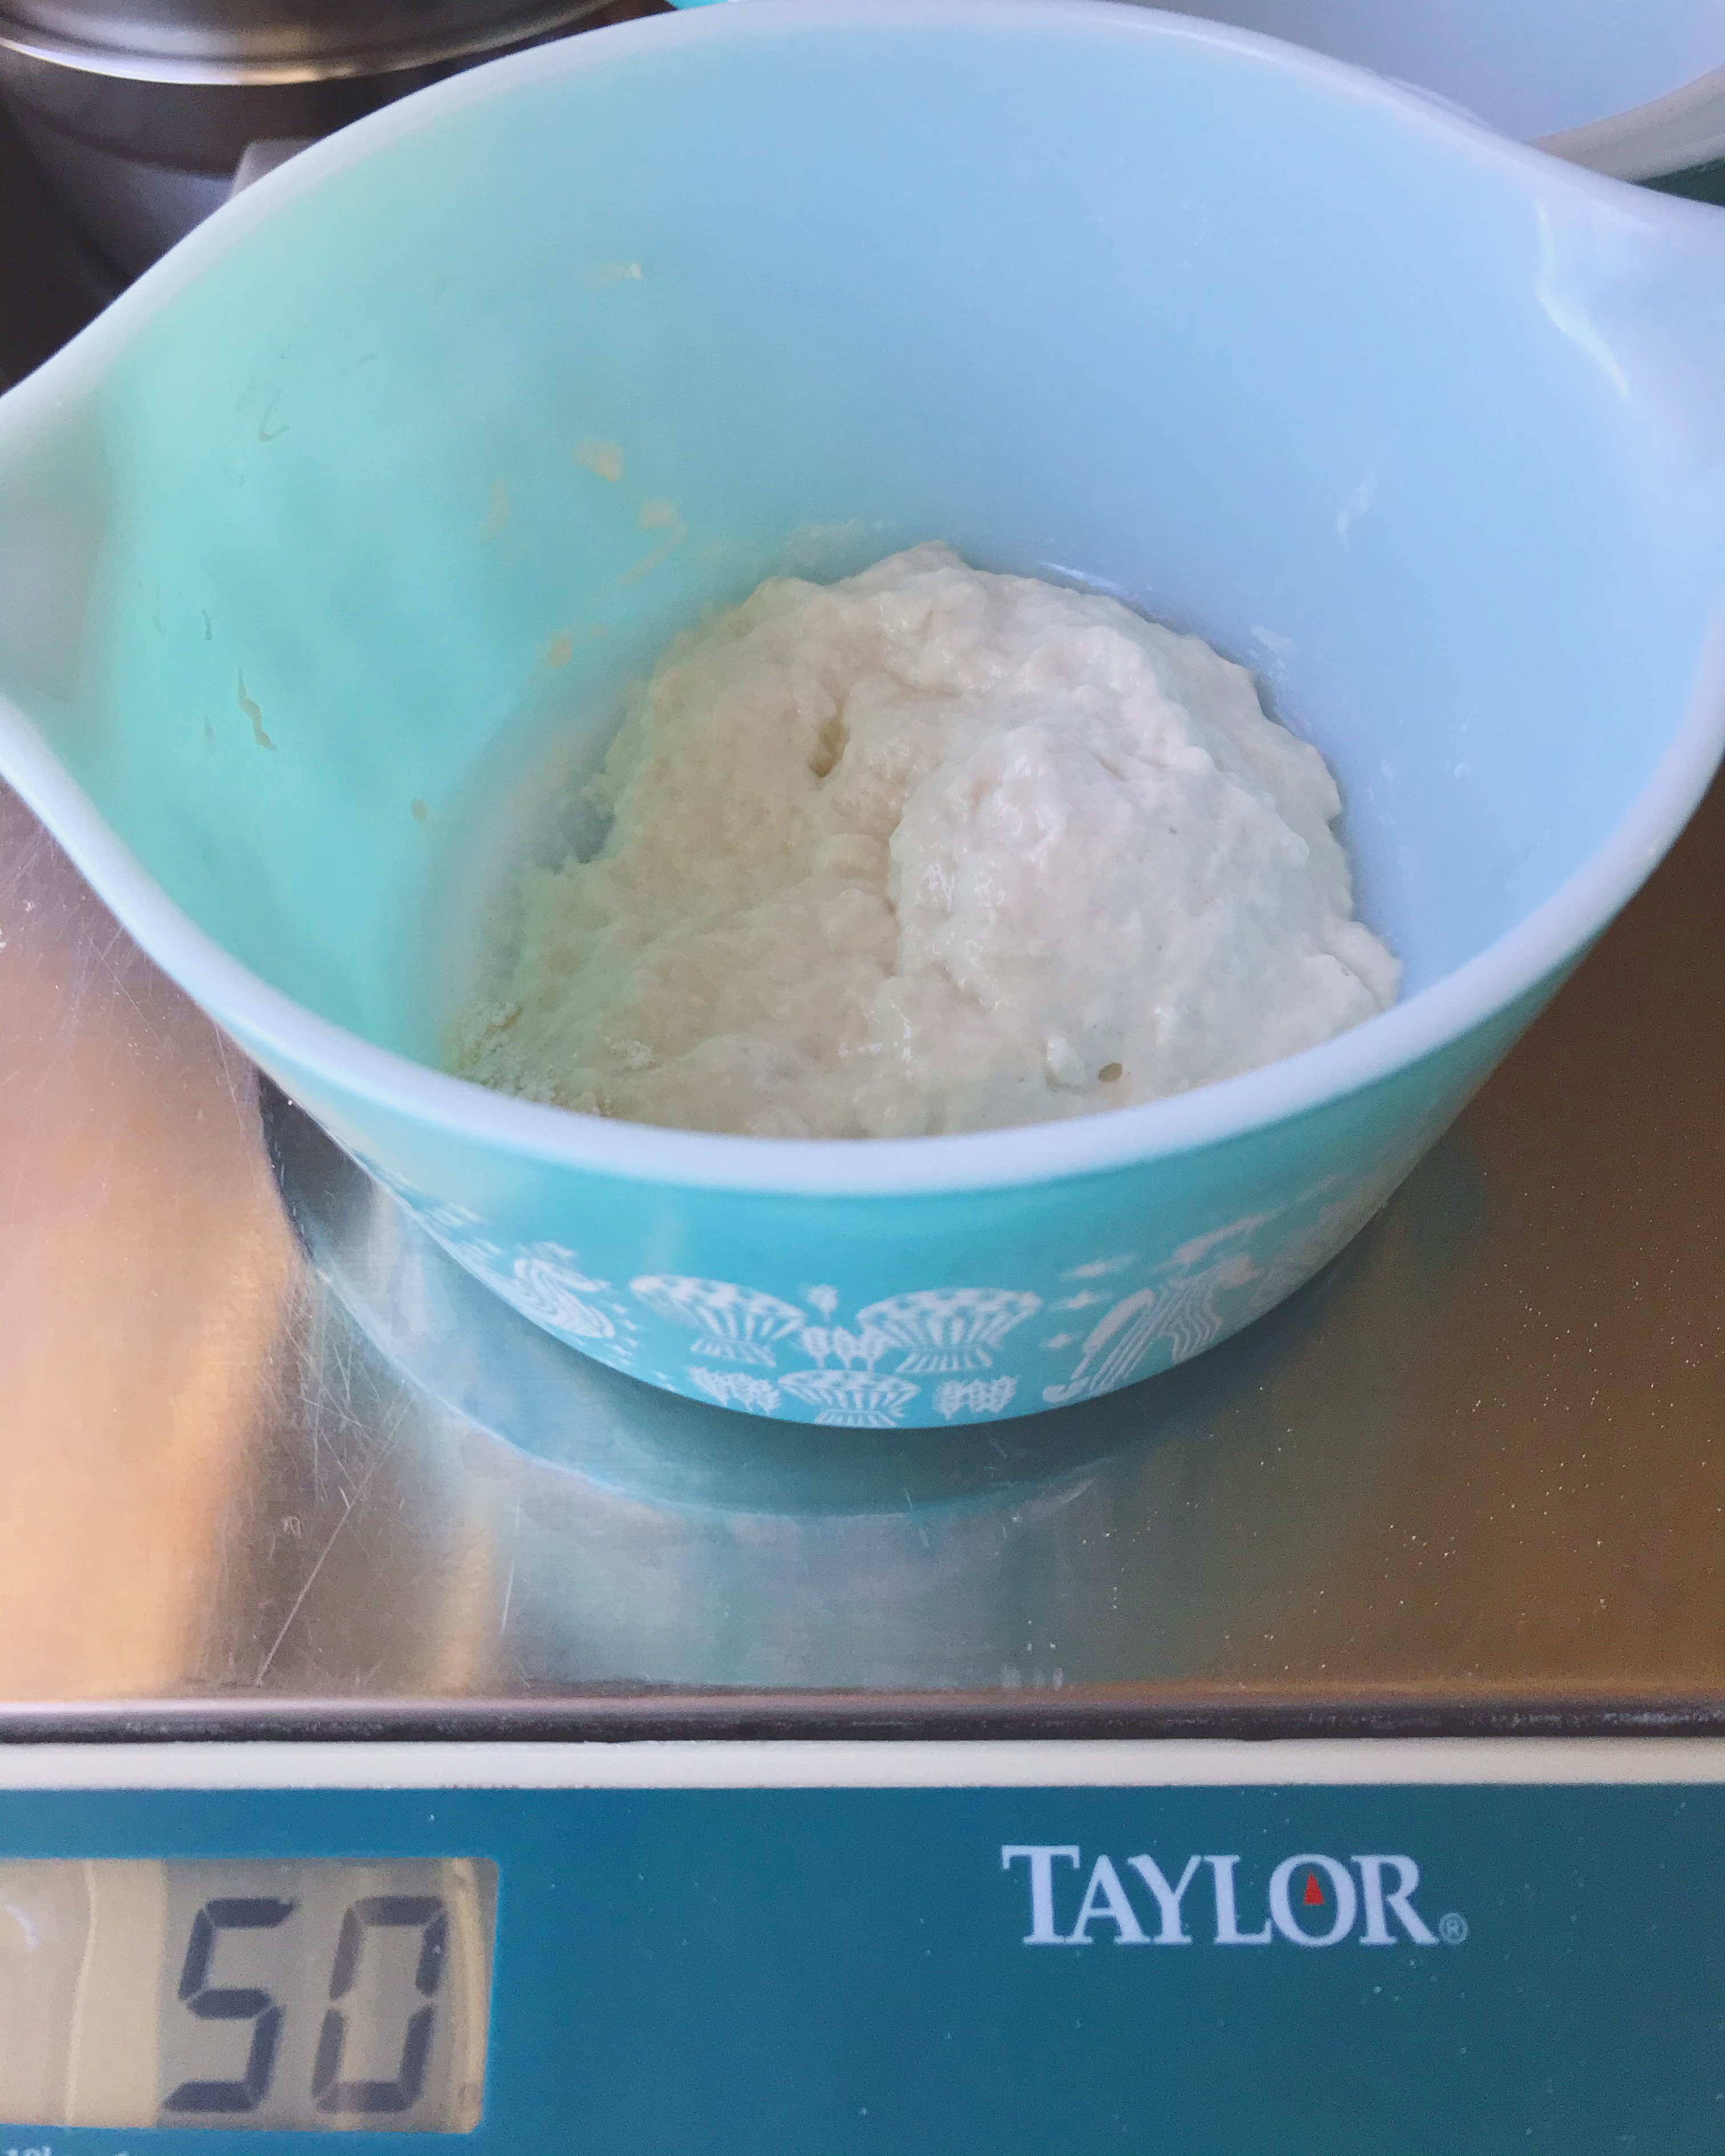
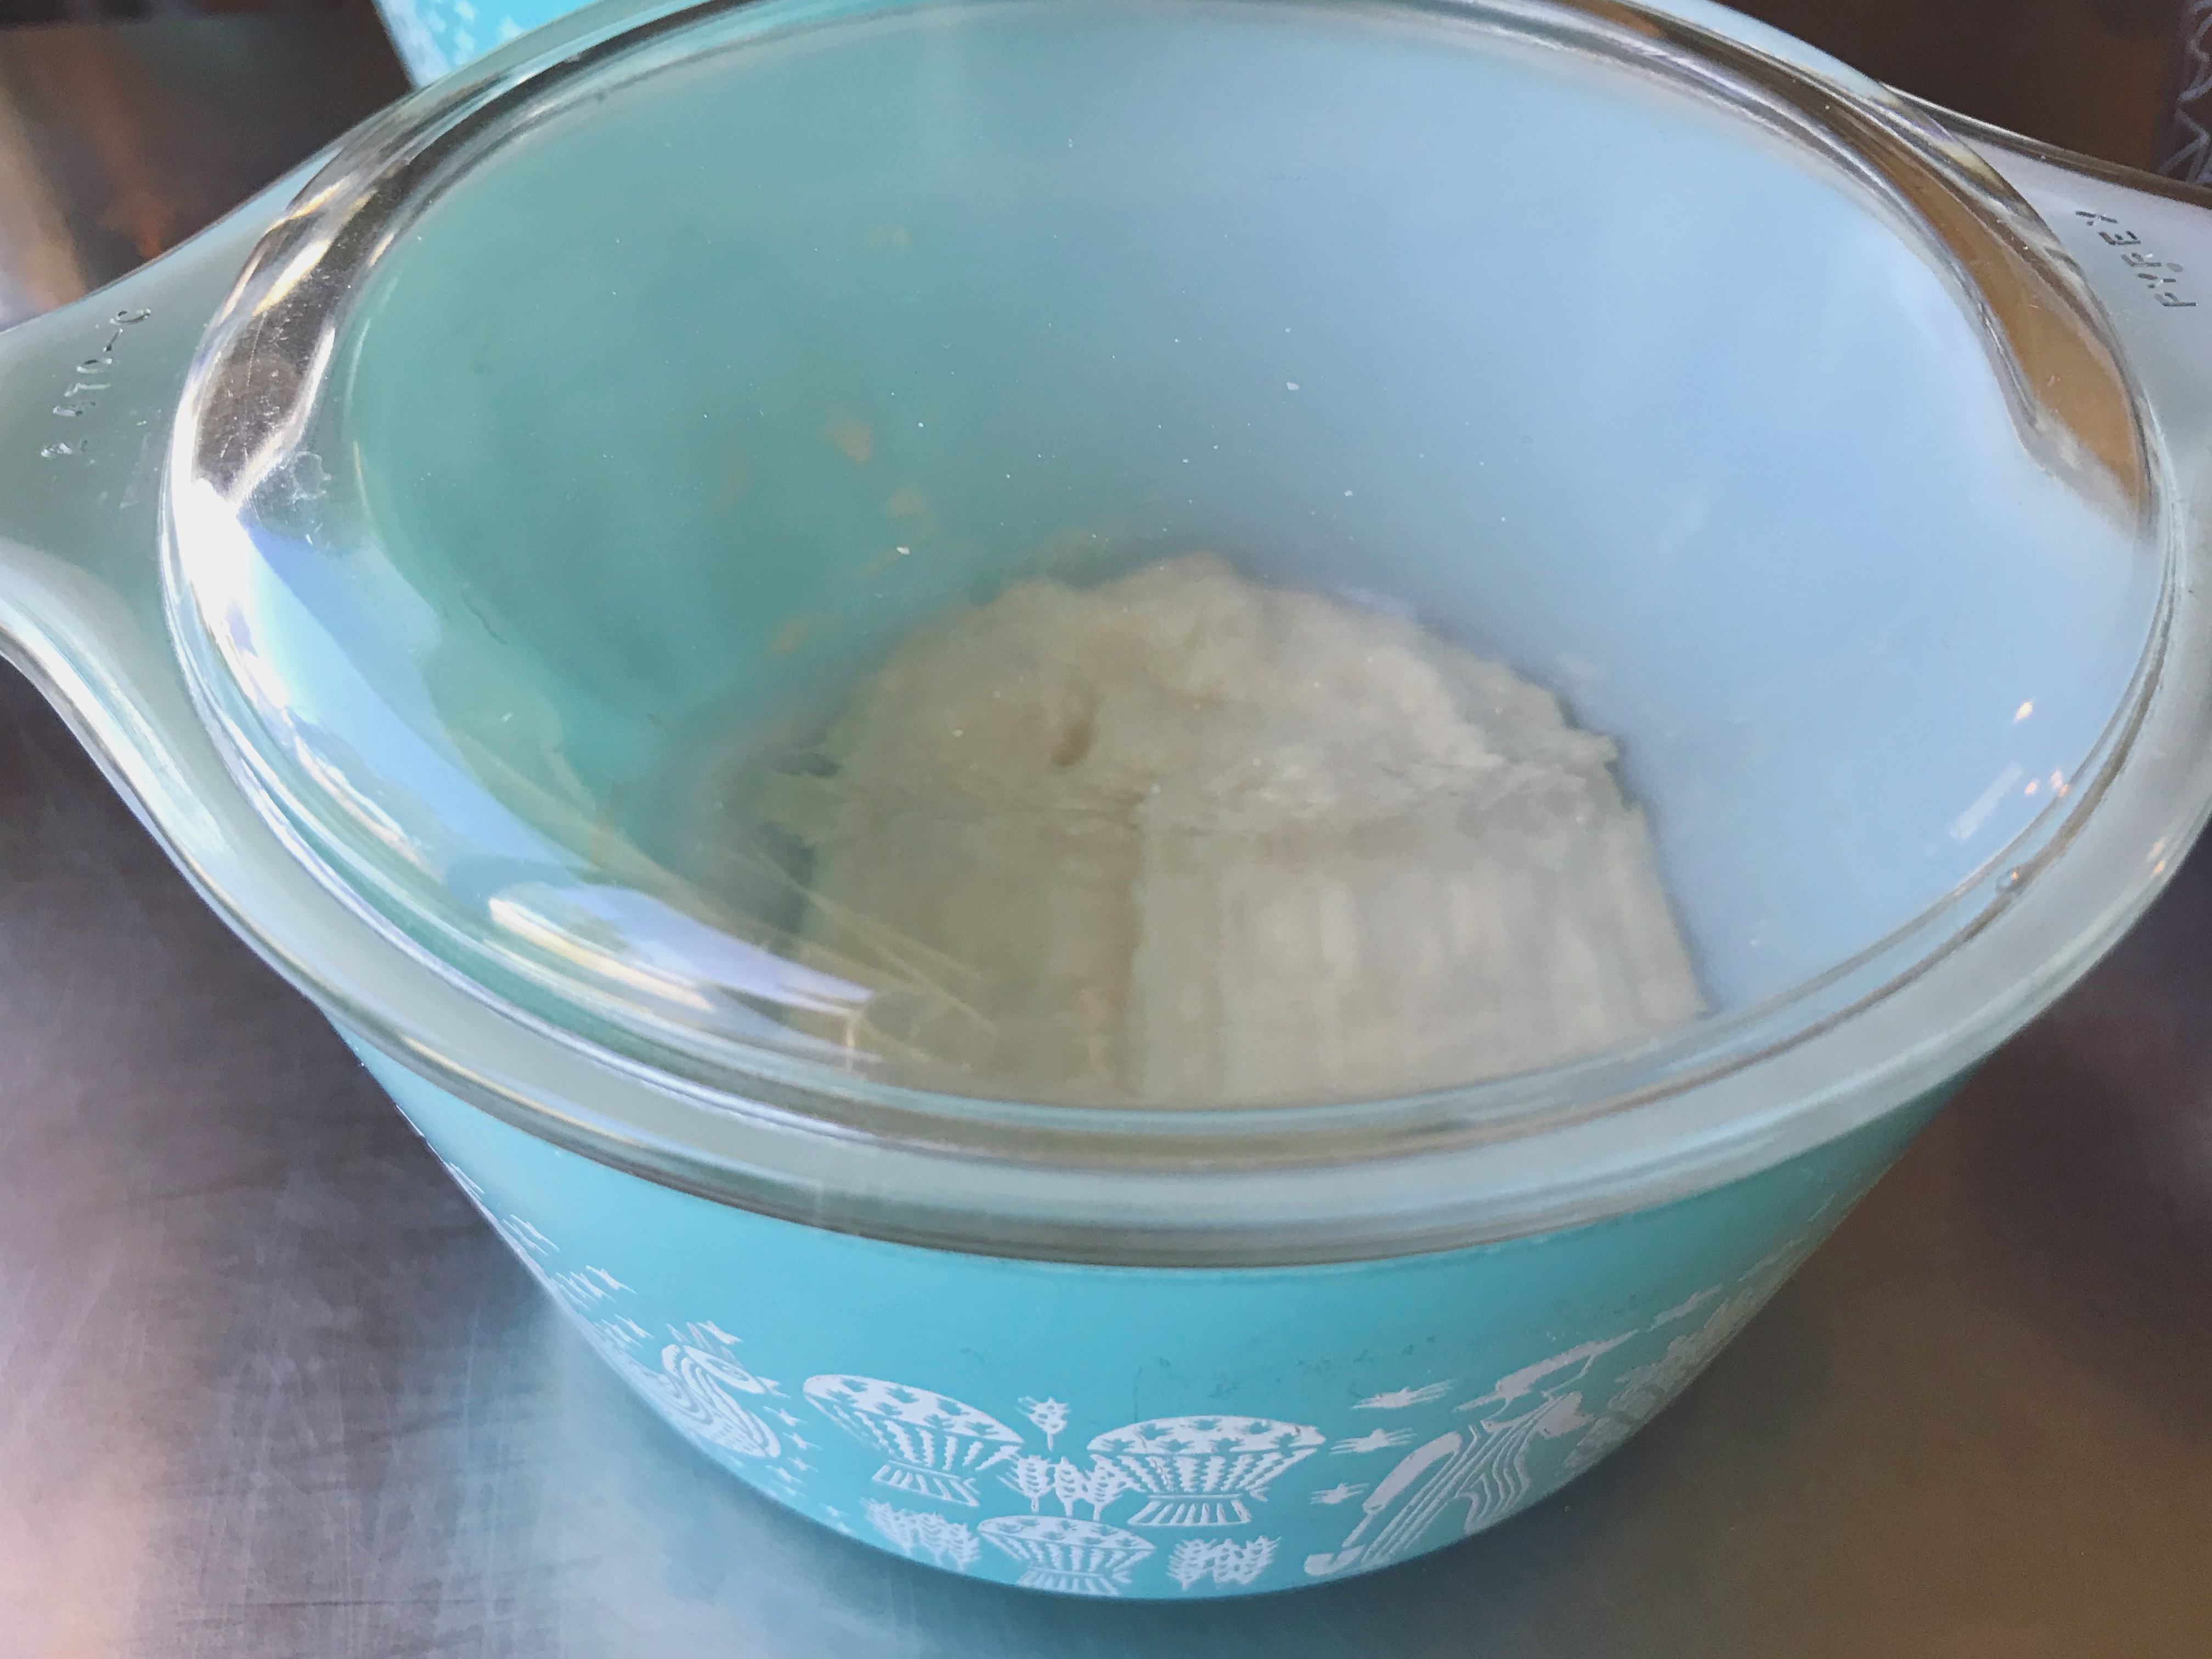
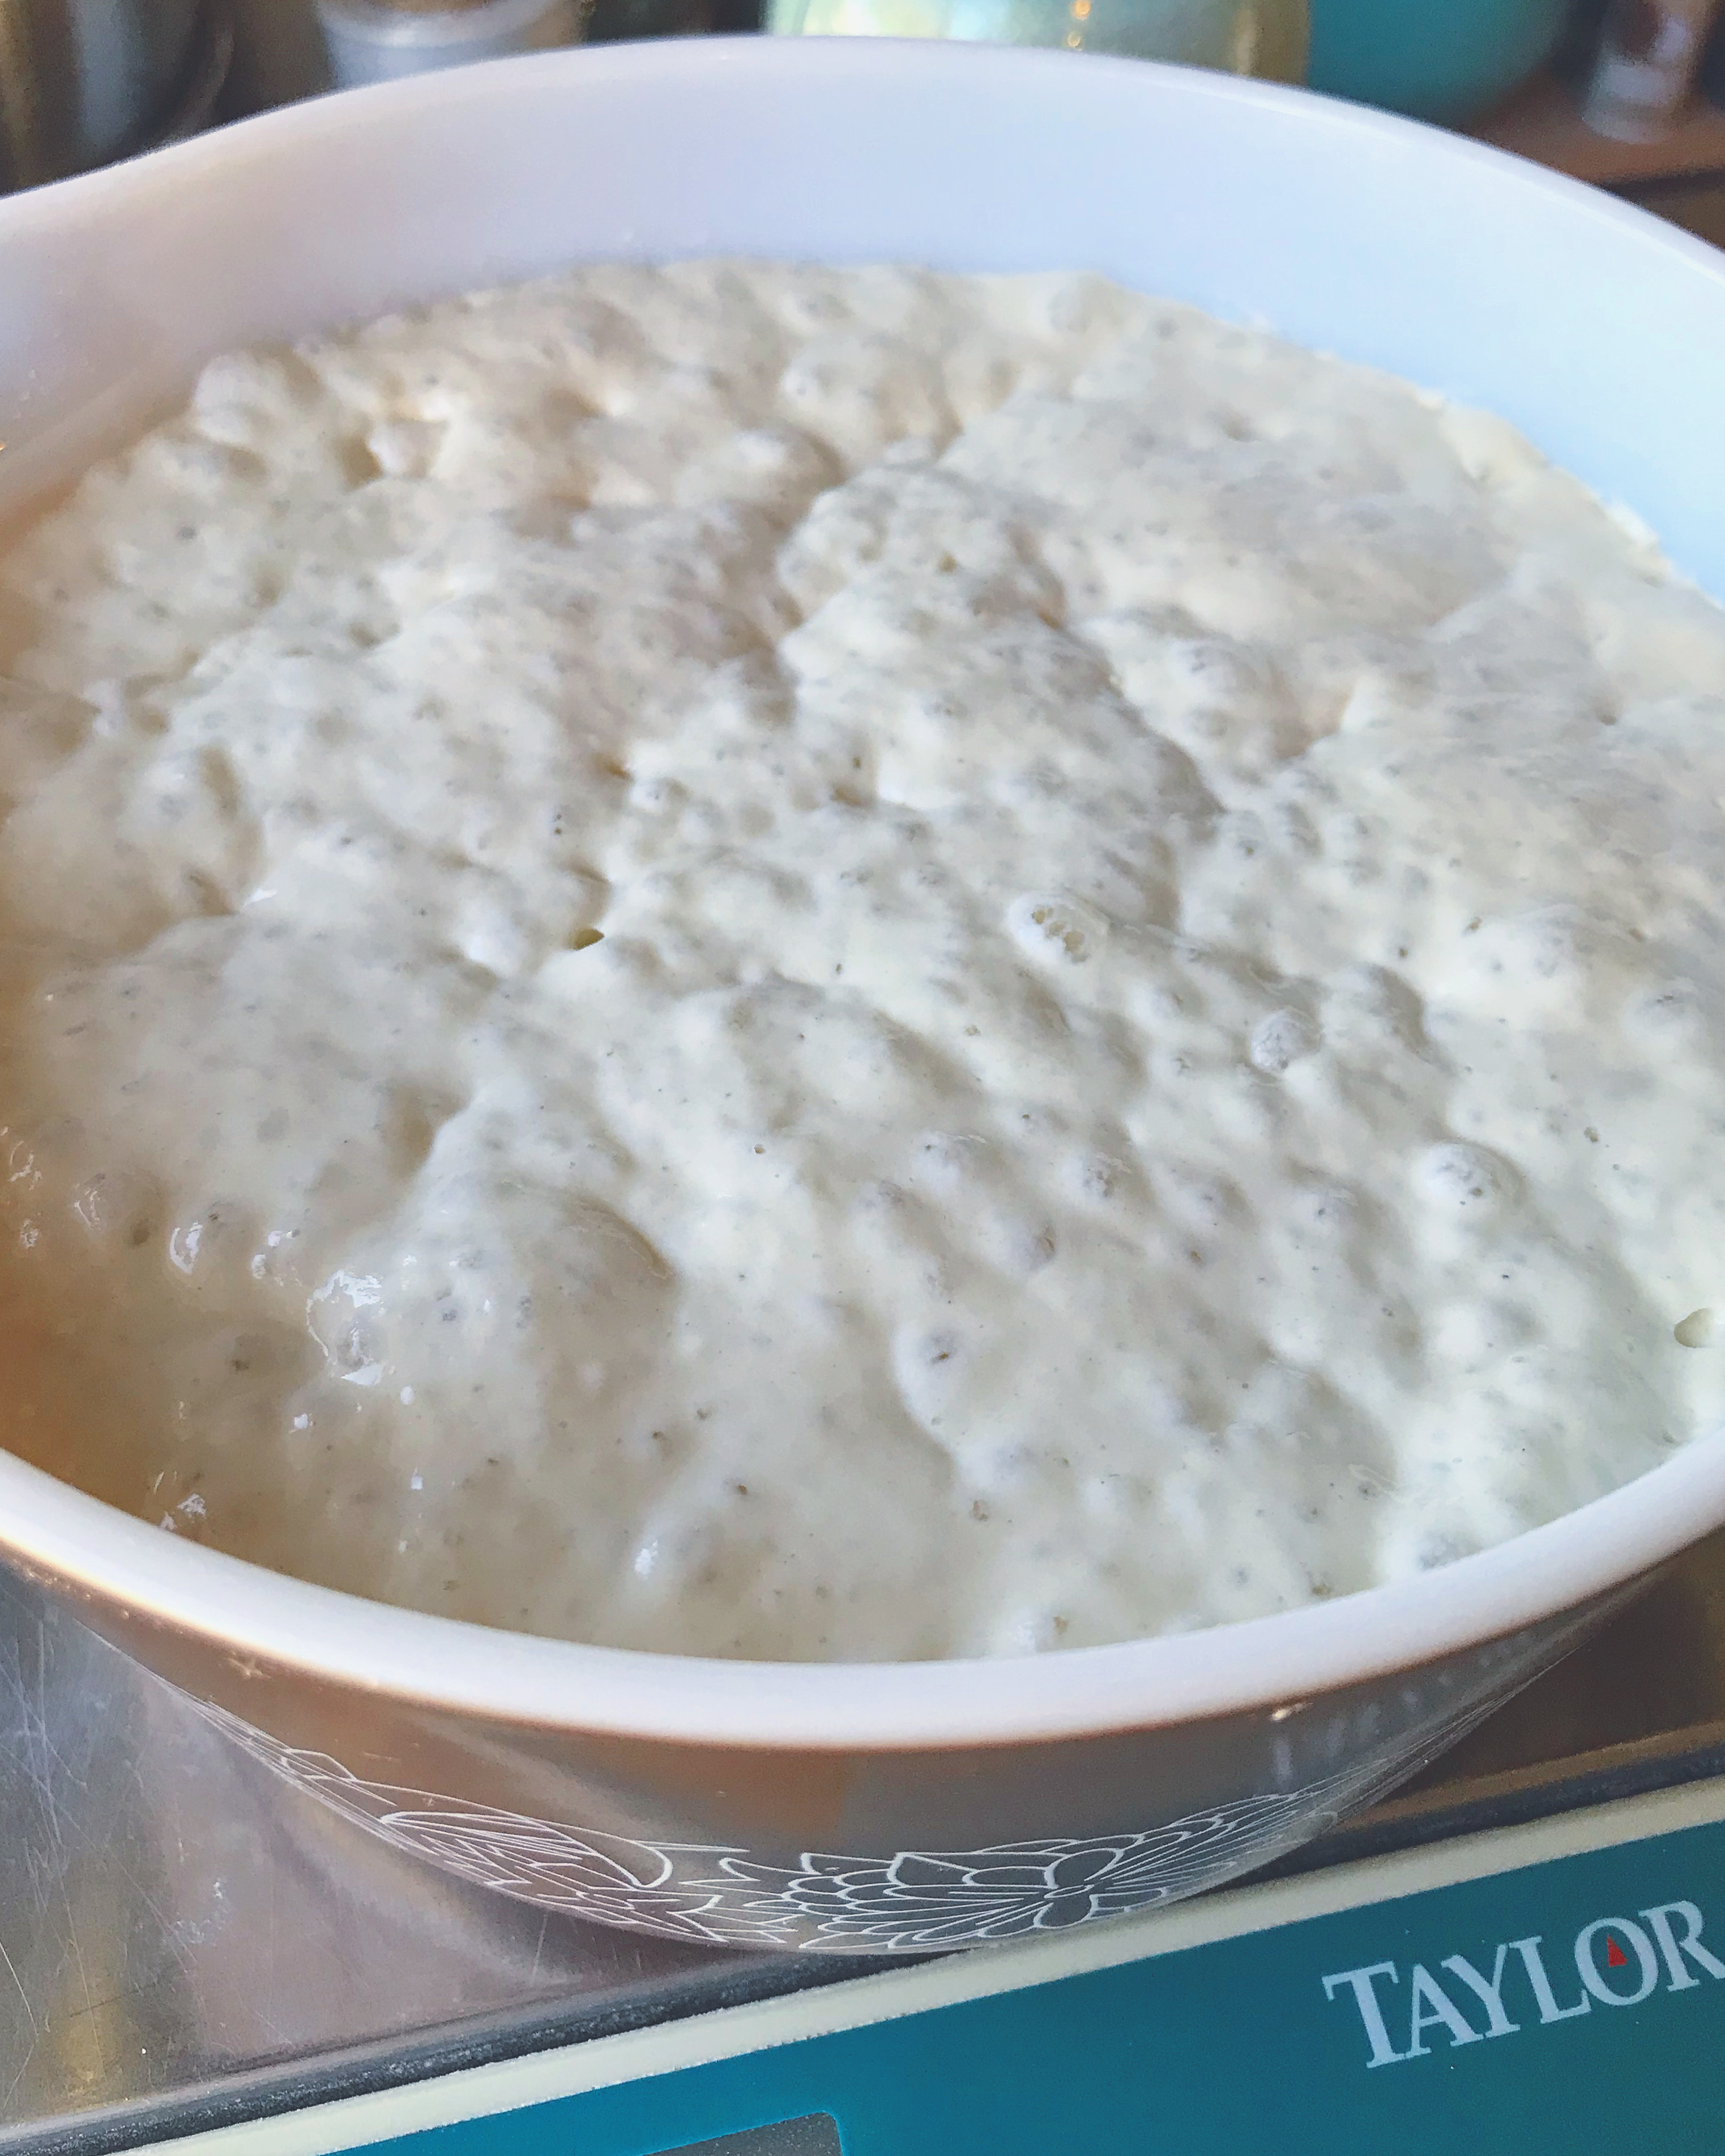
Once well combined, cover the leaven with plastic wrap (or use a bowl that has a top) and leave it on the counter for 8 hours or overnight. You will know that it has worked well because the leaven will smell sweet and have a wonderful lattice of bubbles when ready.

*Alternate method

The more leaven I’ve made and learned how vital it is to the rest of this process working well, the more I’ve come to prefer using only bread flour for my leaven. It starts the loaf out with a little safety belt of structure that makes my dough stronger. Now, even if I am making rye or spelt loaves, I start the leaven with 100 grams of bread flour rather than the mix suggested above. When mixed with the starter and water, everything with is quite thick almost like biscuit dough, but much stretchier.

Dough

Once your leaven is lovely and active, begin your bread. You may start this process in the morning and then bake bread on the same night you’ve made the dough. You can also place your loaves in the refrigerator to proof overnight and bake them the following morning. I will provide instructions for both schedules.

My preference is to start my loaves at about 11:30 AM. It takes a few minutes to pull out the ingredients and get everything measured and mixed. By 12:00, the dough is ready for its first rest and so the process continues. At 2, I do my final turn and then a 2-4 hour rise until 6PM. I like a 4-hour rise in the winter. It can be as little as 2 in the summer.

I form the loaves as explained below and have them taking a long winter’s nap in the fridge by 7ish. This makes them perfectly ready to bake when I rise in the morning. I preheat the oven while I make coffee and bake them off during my morning tasks. This way they are done before the day really gets going and I’m not stuck in the house waiting for timers to go off. There’s more below about scheduling bread into your life.

200 grams Leaven

700 grams Water 78-80 degrees

900 grams Bread Flour (add up to 140 grams of flour to adjust for humidity)

100 grams Spelt Flour

Place a large bowl or container on your kitchen scale. I like to use a 6-quart cambro for this purpose. Measure 200 grams of mature leaven and 700 grams of water into the container. Use clean fingers or a spatula (use an all silicone spatula) to disperse the starter into the water until it is mostly combined and bubbly. Now measure 900 grams of bread flour and 100 grams of spelt flour into the leaven and water.

Place the container onto a firm surface and use your hands to fully incorporate the flour into the liquid. This will take a few minutes and the dough will stick terribly to your hands. Hang in there because the final result is worth the trouble. When I go about this process, I put my cambro on a stool that is quite a bit lower than my kitchen counter so that I can reach into it easily. I also use just one hand for mixing. That way, I have a clean hand free to move the cambro around and scrape dough off of my sticky hand, into the container at the end.


At this stage, your dough will be quite rough and clumpy. If you must, add another tablespoon of water to hydrate all of the flour. However, keep in mind that in the next step, you may add more water to properly incorporate the salt. You don’t want to end up with dough that is too wet. Humidity really does have a serious impact on how much water you need so pay attention to the weather. If it’s pouring rain when you are making the dough, cut back on the water a bit. You can always add more.

Cover your bowl or container and allow the dough to sit undisturbed for 30 minutes. This process, called autolyse, gives the flour time to fully absorb liquid, allowing the glutens to swell and form the chains that trap gas released during fermentation. It also is important to start the fermentation without added salt which retards its natural process.This is what causes your naturally fermented dough to rise so don’t skip this step!

Some really successful bakers do add salt during the first mixing and skip the next step altogether. I’ve tried this enough times to know it’s not my preference. If you want to try too, go for it!

After Autolyse Add –

50 grams Water 78-80 degrees

25 grams Fine Sea Salt

Place your bowl or container back on the scale and add 50 grams of water and 25 grams of salt. Use your hand to squeeze the dough firmly between your fingers. It is helpful to sweep around the sides of the bowl or container and scrape the bottom, bringing the dough into the middle and squeezing again.

At first, it will seem that the water will never incorporate into the dough. Just keep going! After a few minutes, it will start to magically mix together. The dough will develop a bit of a stretchy texture now. Continue turning and stretching until you have a large mass that holds vaguely into a ball. It is helpful to try to leave the sides of the container as clean as possible by scraping it down well at this stage.


Set a timer for 30 minutes.

*Alternative method

I have stopped adding any water with this step in the last few months and like the result much better! There is a fine line between high hydration dough that still has plenty of structure for amazing lift during baking and dough that is just too wet. I’ve decided I think it’s too wet when I add the extra water and the salt incorporates into the dough perfectly without it.

If you want to try this, sprinkle the salt all across the surface of the dough when you measure it into the container. Squeeze and turn the dough as described above. You will feel when it has melted and there are nary is a crunchy salt grain between your fingers. That’s when you’re done!

Bulk Fermentation

The next stage of making this sourdough boule, called bulk fermentation, takes 4 hours. During this stage, you will be developing the structure of your dough by turning it every 30 minutes for 2 hours and then letting it sit undisturbed 2-4 more hours. By turning the dough, you will gently disperse the pockets filling with carbon dioxide during fermentation into layers throughout the dough. These turns, along with the dough forming technique, described later, are essential for an even, open crumb.

When the timer that you set after adding the salt and water goes off, you will do the first set of turns. This is a simple process. Starting at the right of your container, run your fingers under the edge of the dough and stretch it across to the opposite side. Pinch the edges of the dough together gently if needed to cause the two sides to adhere. Repeat this same movement stretching the top edge to the bottom, the left across to the right, and then the bottom up to the top. If the dough is very smooth, you can stop. If there are shaggy spots, do another few turns until the mass is shiny and smooth.


Repeat this turning process 3 more times in 30-minute intervals. Each time you will notice that the dough has more structure and is developing lots of good bubbles. Take care as you stretch it out, that you are not popping these bubbles. After the last set of turns, set a timer for 2-4 hours (shorter in a warm house and longer if it’s chilly as I discussed above) and leave the dough undisturbed. When it goes off, you will be ready for bench rest and loaf forming.

Loaf Forming

Flour two banneton or clean tea towels inside of 2 medium sized bowls.

When the timer goes off, flour your work surface and very gently remove the fermented dough from its container. I like to remove the dough like another series of turns so that I encourage the final shape during this steep. Use a bench scraper or long, sharp knife to cut the mass of dough in half. Push the dough pieces away from each other a bit so they don’t spread and stick back together and stretch them out ever so gently. Cover over the dough gently with plastic wrap or a tea towel and bench rest (let the disturbed dough relax) for 20 minutes.

Loaf forming is similar to dough turning in that you will stretch each side across to its opposite and adhere the edges. When the 20 minutes of bench rest have elapsed, start on the first loaf. Stretch the right-hand border of the dough far to the right and then over itself to the left. Press the edges together to adhere if needed. Now move to the bottom edge. Stretch it toward your body and then up to adhere to the top edge. Repeat left to right, and then top to bottom. If necessary, pinch any stray bits together, making sure that the dough feels tight and firm. Place the loaf into the floured banneton or bowls lined with a floured tea towel.

*Alternative method

Plain bread flour works just fine for flouring your banneton or tea towel-lined bowls. I much prefer to do this with fine rice flour though. It is super inexpensive and helps create a more defined pattern when you score and bake the loaf because it doesn’t brown as fast as wheat flour.

I also don’t usually do a 20 min bench rest anymore. I pull the dough out as described and then assemble my bowls and tea towels while it sits on the counter uncovered. I see no noticeable difference in the final result and shave a good 15 min off of my bread prep time.


Final Rise

Once your dough is safely in its floured banneton or bowl, it needs to rise. You can do this out on the counter and bake it off the evening that you formed the loaves OR place the dough in the fridge overnight for a slower proofing.

I prefer the overnight proof for three reasons. First, the taste of this bread is slightly more complex and zesty with the longer ferment. Second, I bake sourdough for health benefits! The longer fermentation gives the starter more time to transform antinutrients in the flour, making it healthier and easier to digest. Last, I like to score (mark before baking) cold, firmer dough. It is easier to handle than room temperature dough and I find my final product is more beautiful. If you are in a hurry, please go ahead and bake your bread the day you formed the loaves. It works wonderfully! 

If you would like to bake the same day as you ferment and proof your loaves, the dough will rise best in a warm room between 75 & 80 degrees. Place your covered bowls of dough aside and set the timer for 4 hours. When the time has elapsed, proceed to the baking section of this recipe.

If you would like to retard the fermentation, place your covered dough in the refrigerator overnight. It can continue to rise slowly for up to 12 hours. This will slow, but not stop, the fermentation process. The longer you leave it, the more complex in flavor it will become.

Baking

One of the key tools of the success of this bread is that it is baked in a dutch oven. Since home ovens do not have the steam features of a baker’s oven, the dutch oven allows us to mimic it, creating incredible rise and crumb in your loaf. The banneton or bowl you choose needs to be an inch or two smaller in circumference than your dutch oven so that your loaf has plenty of room to grow as it bakes.

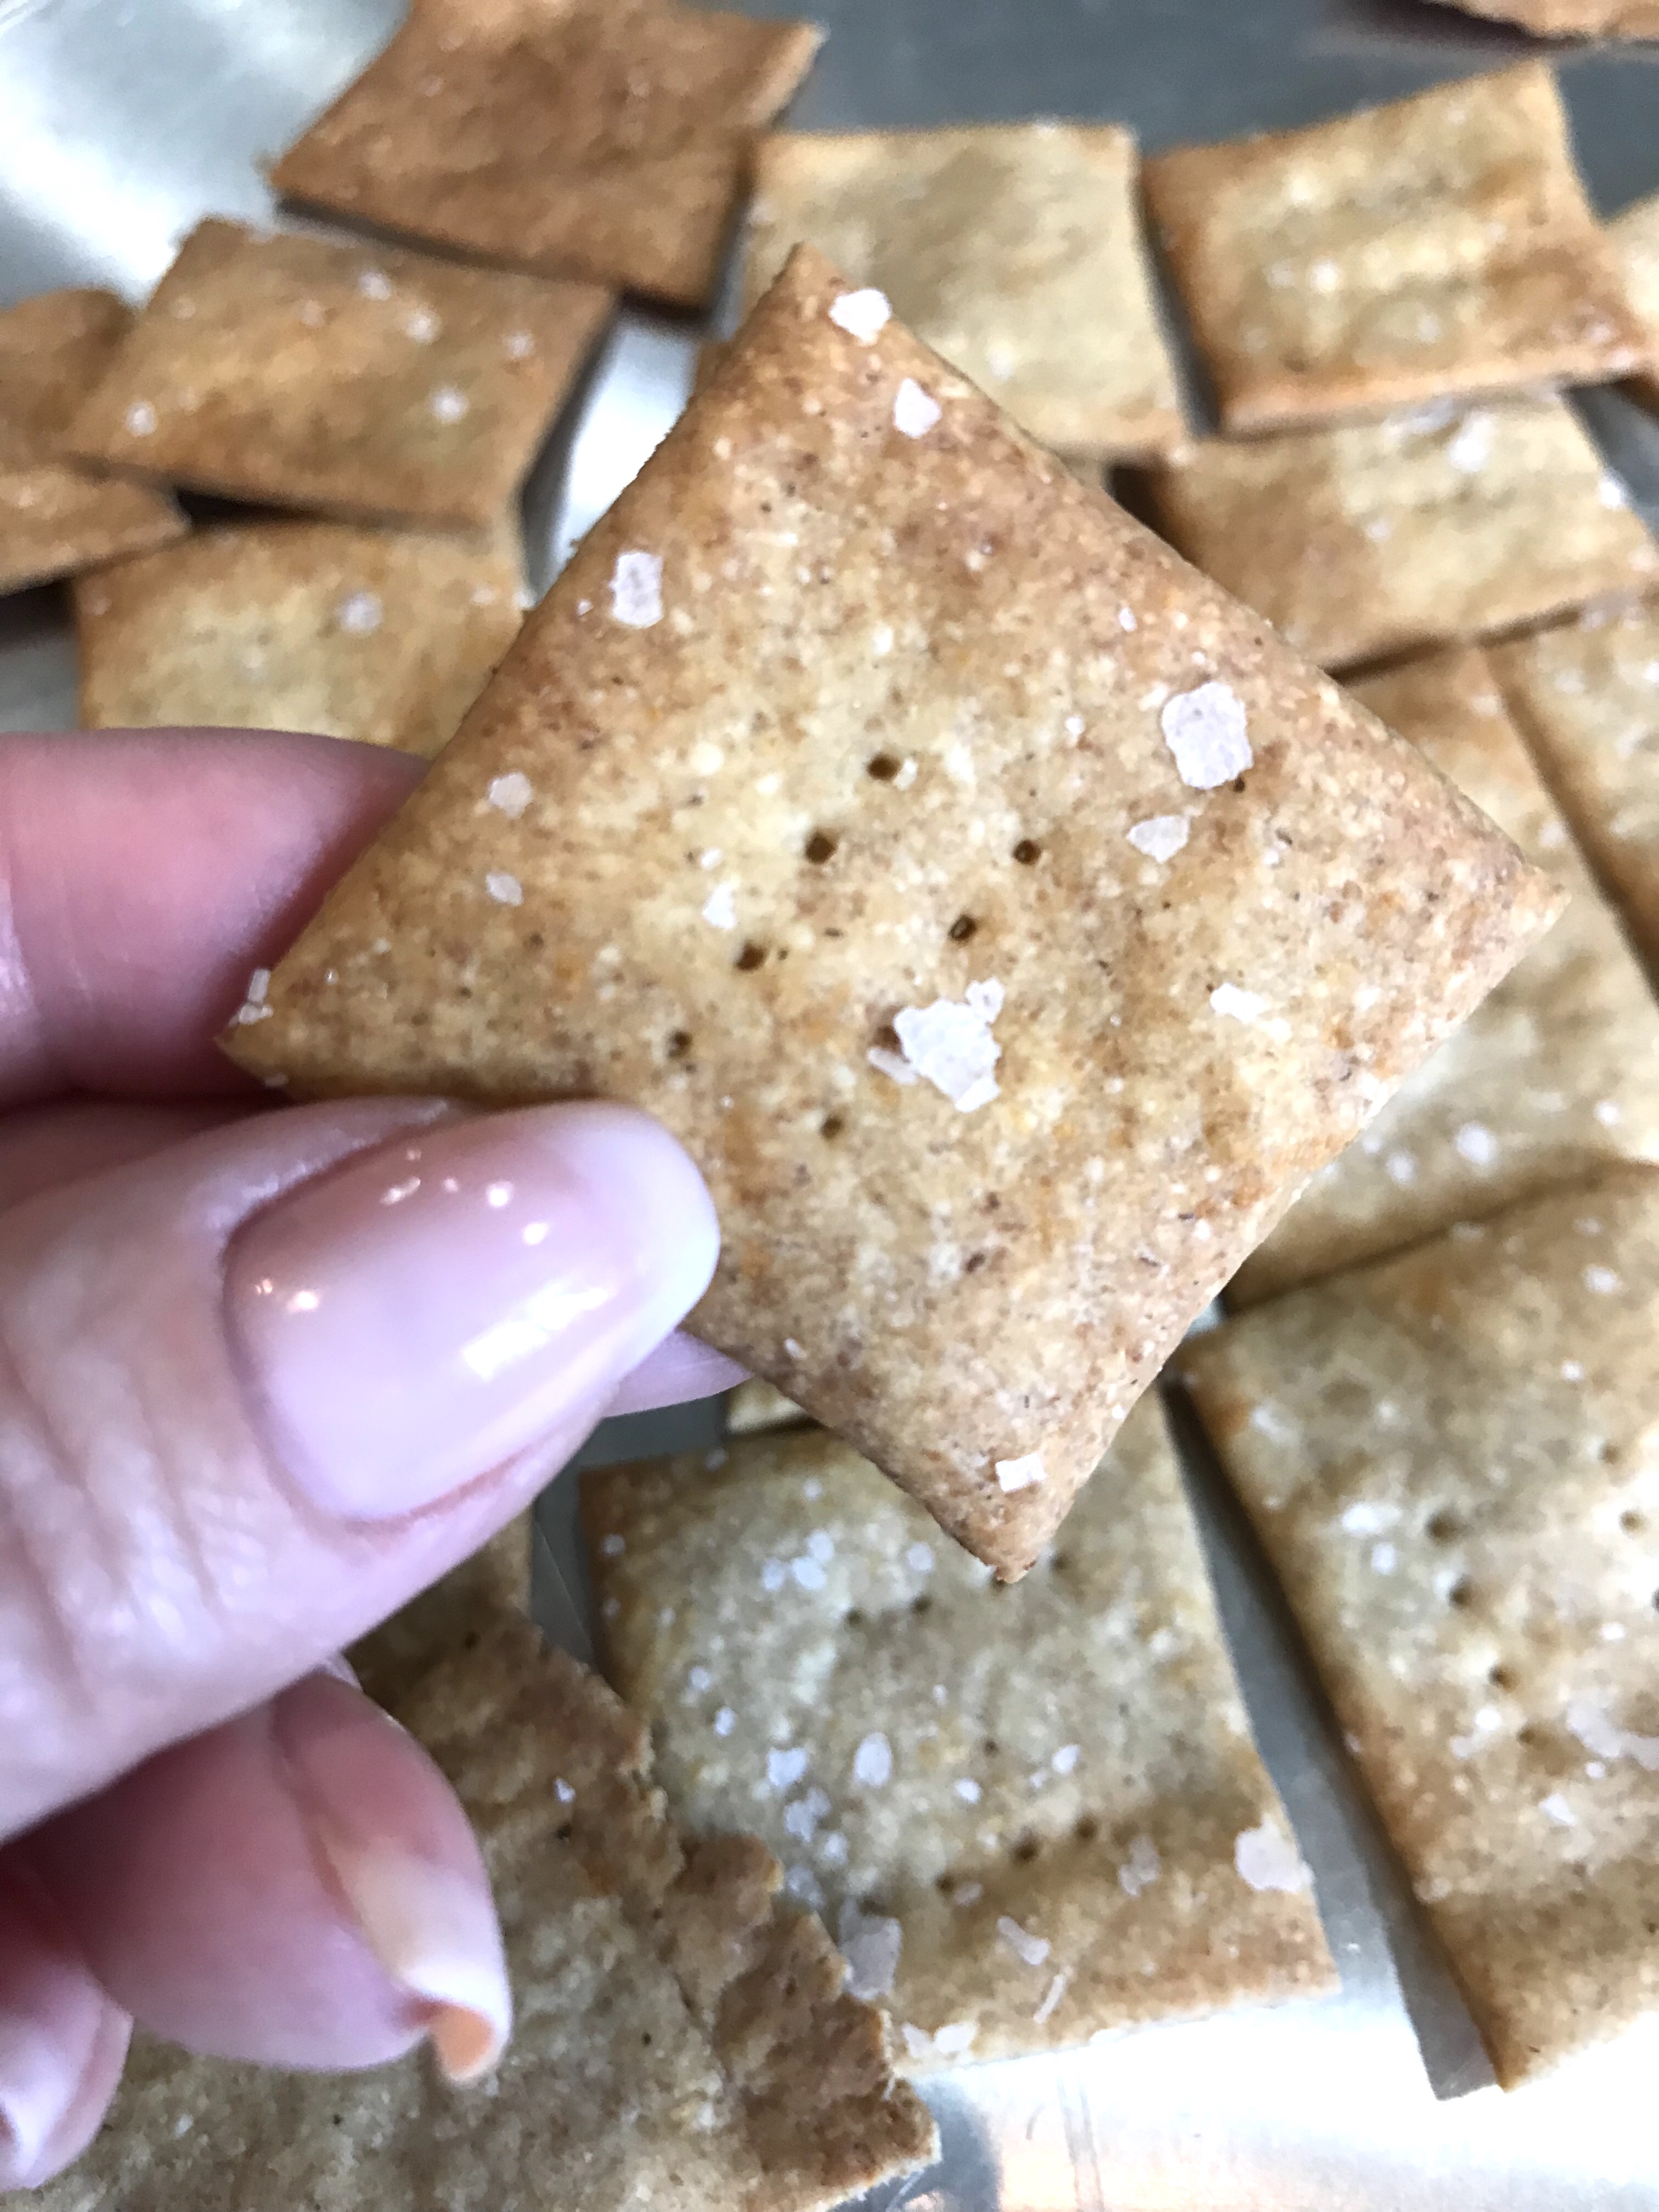
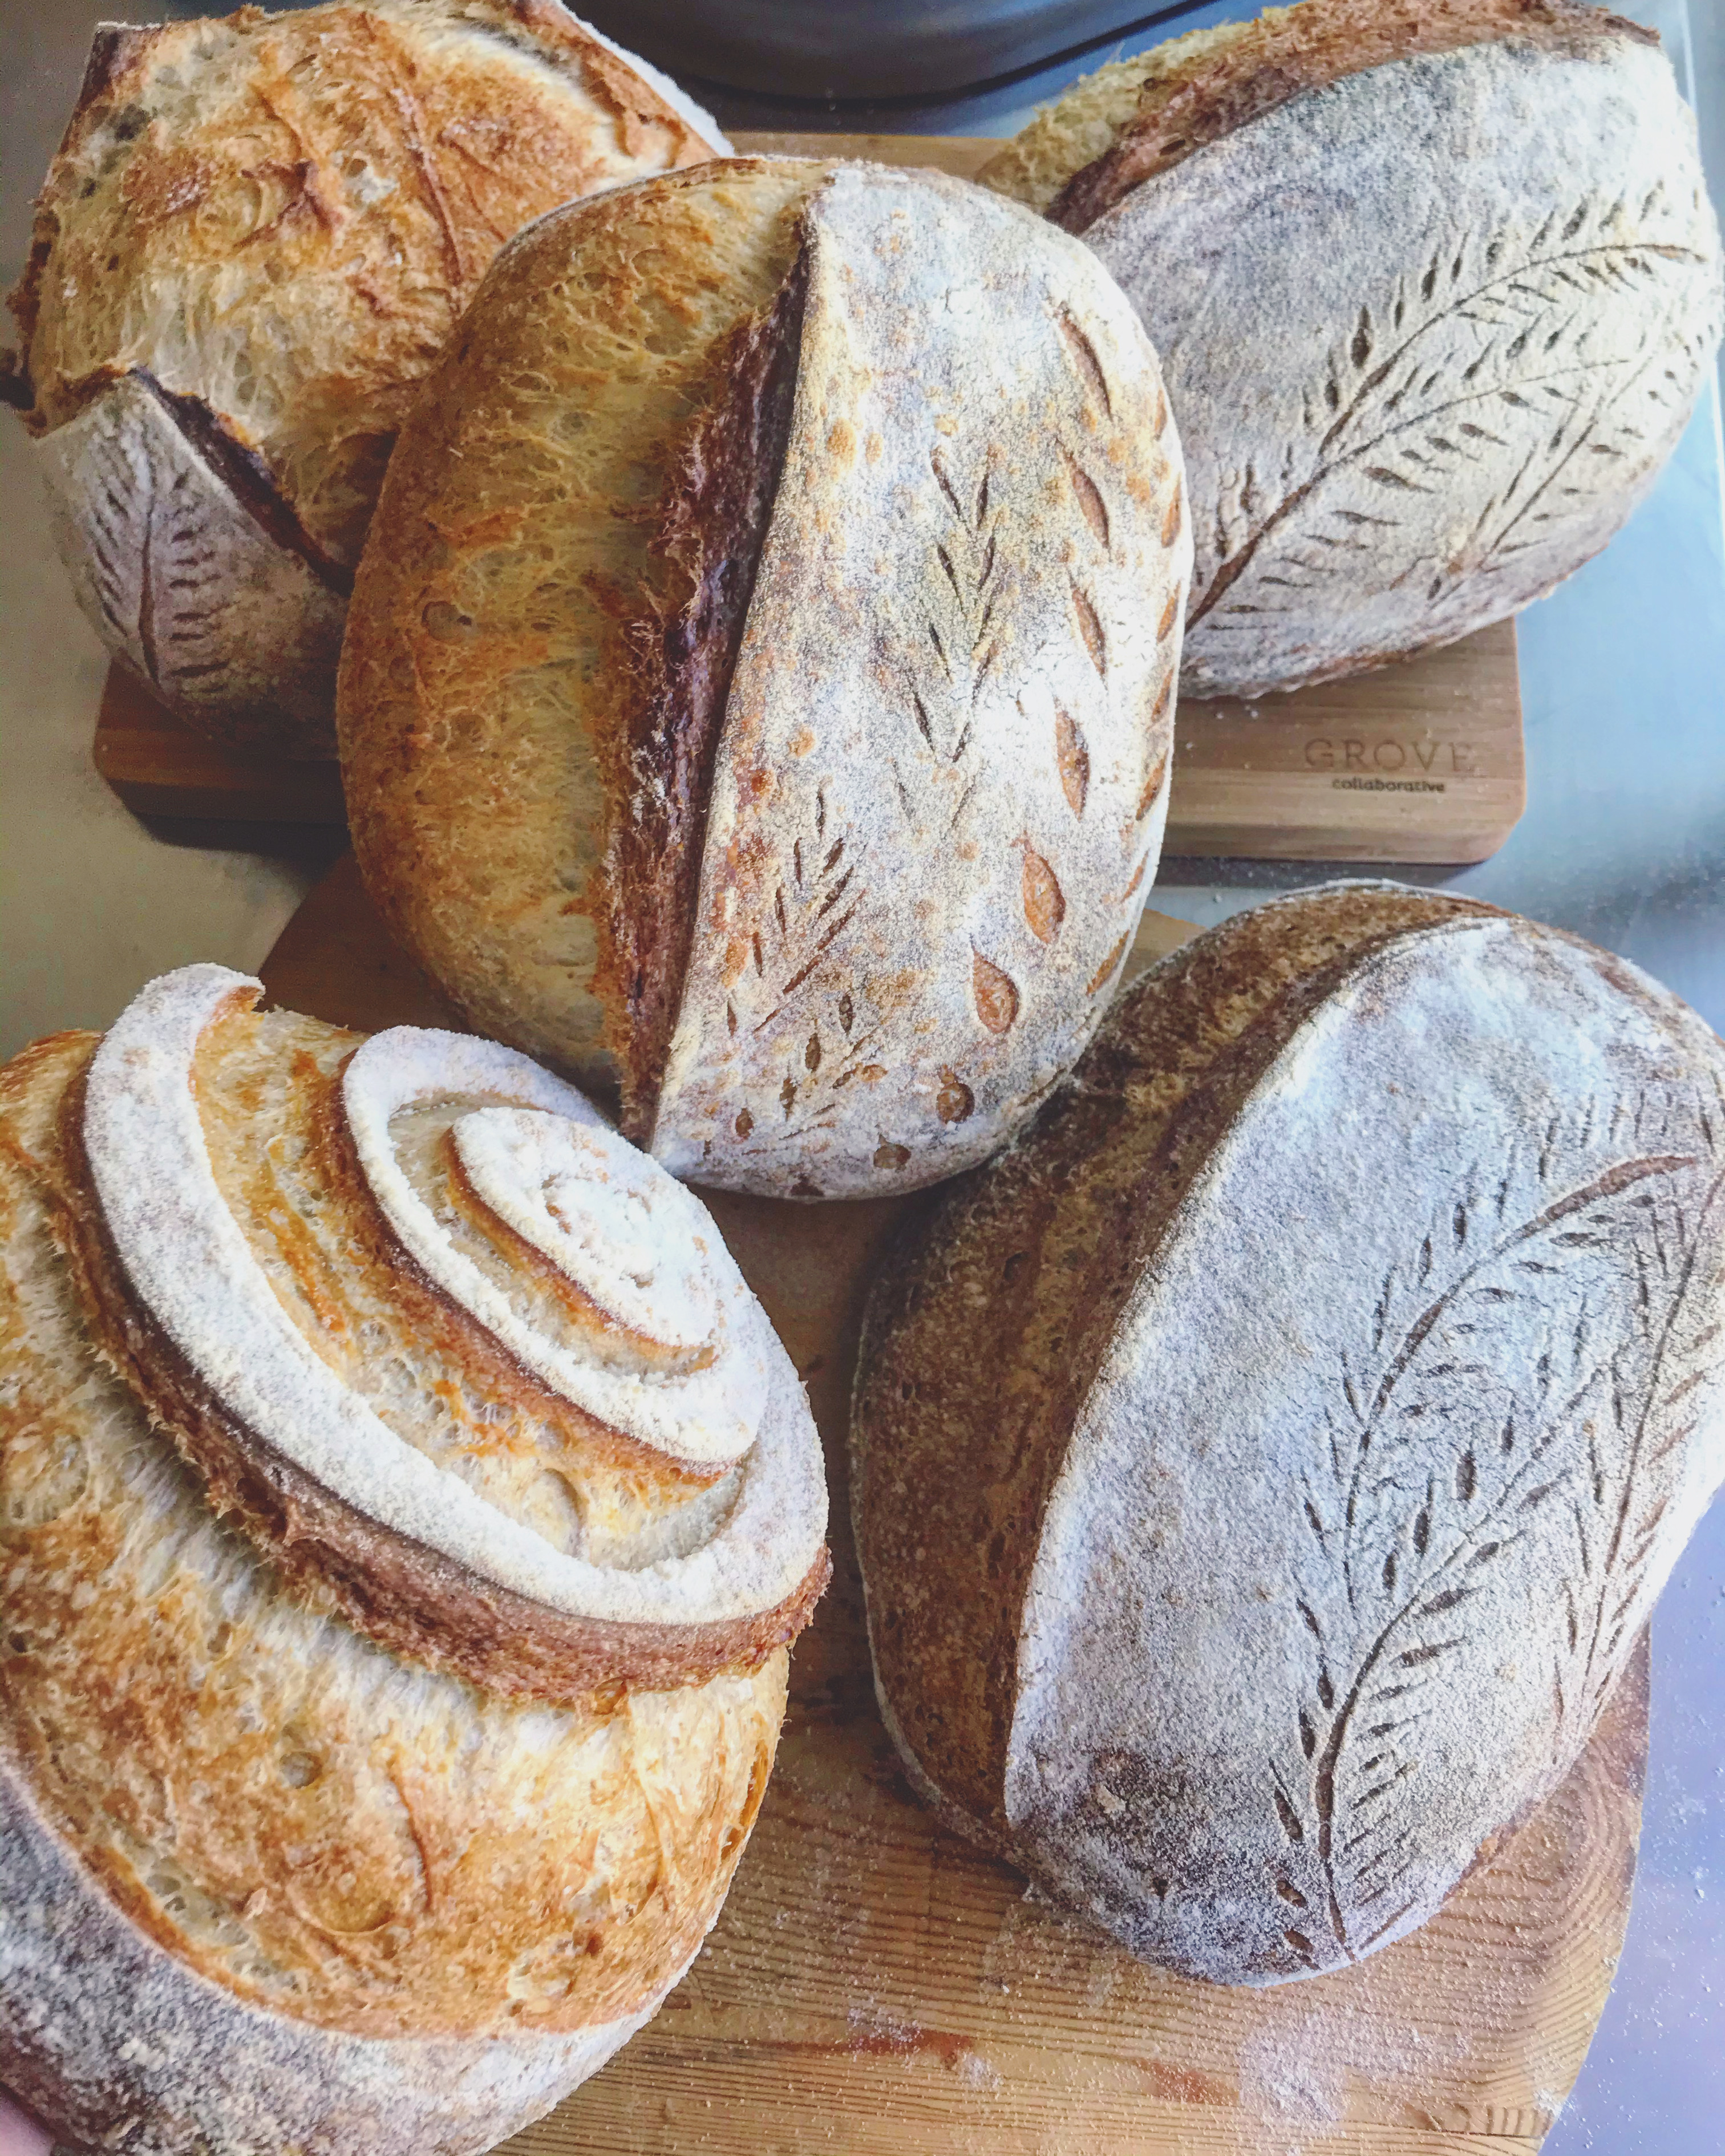
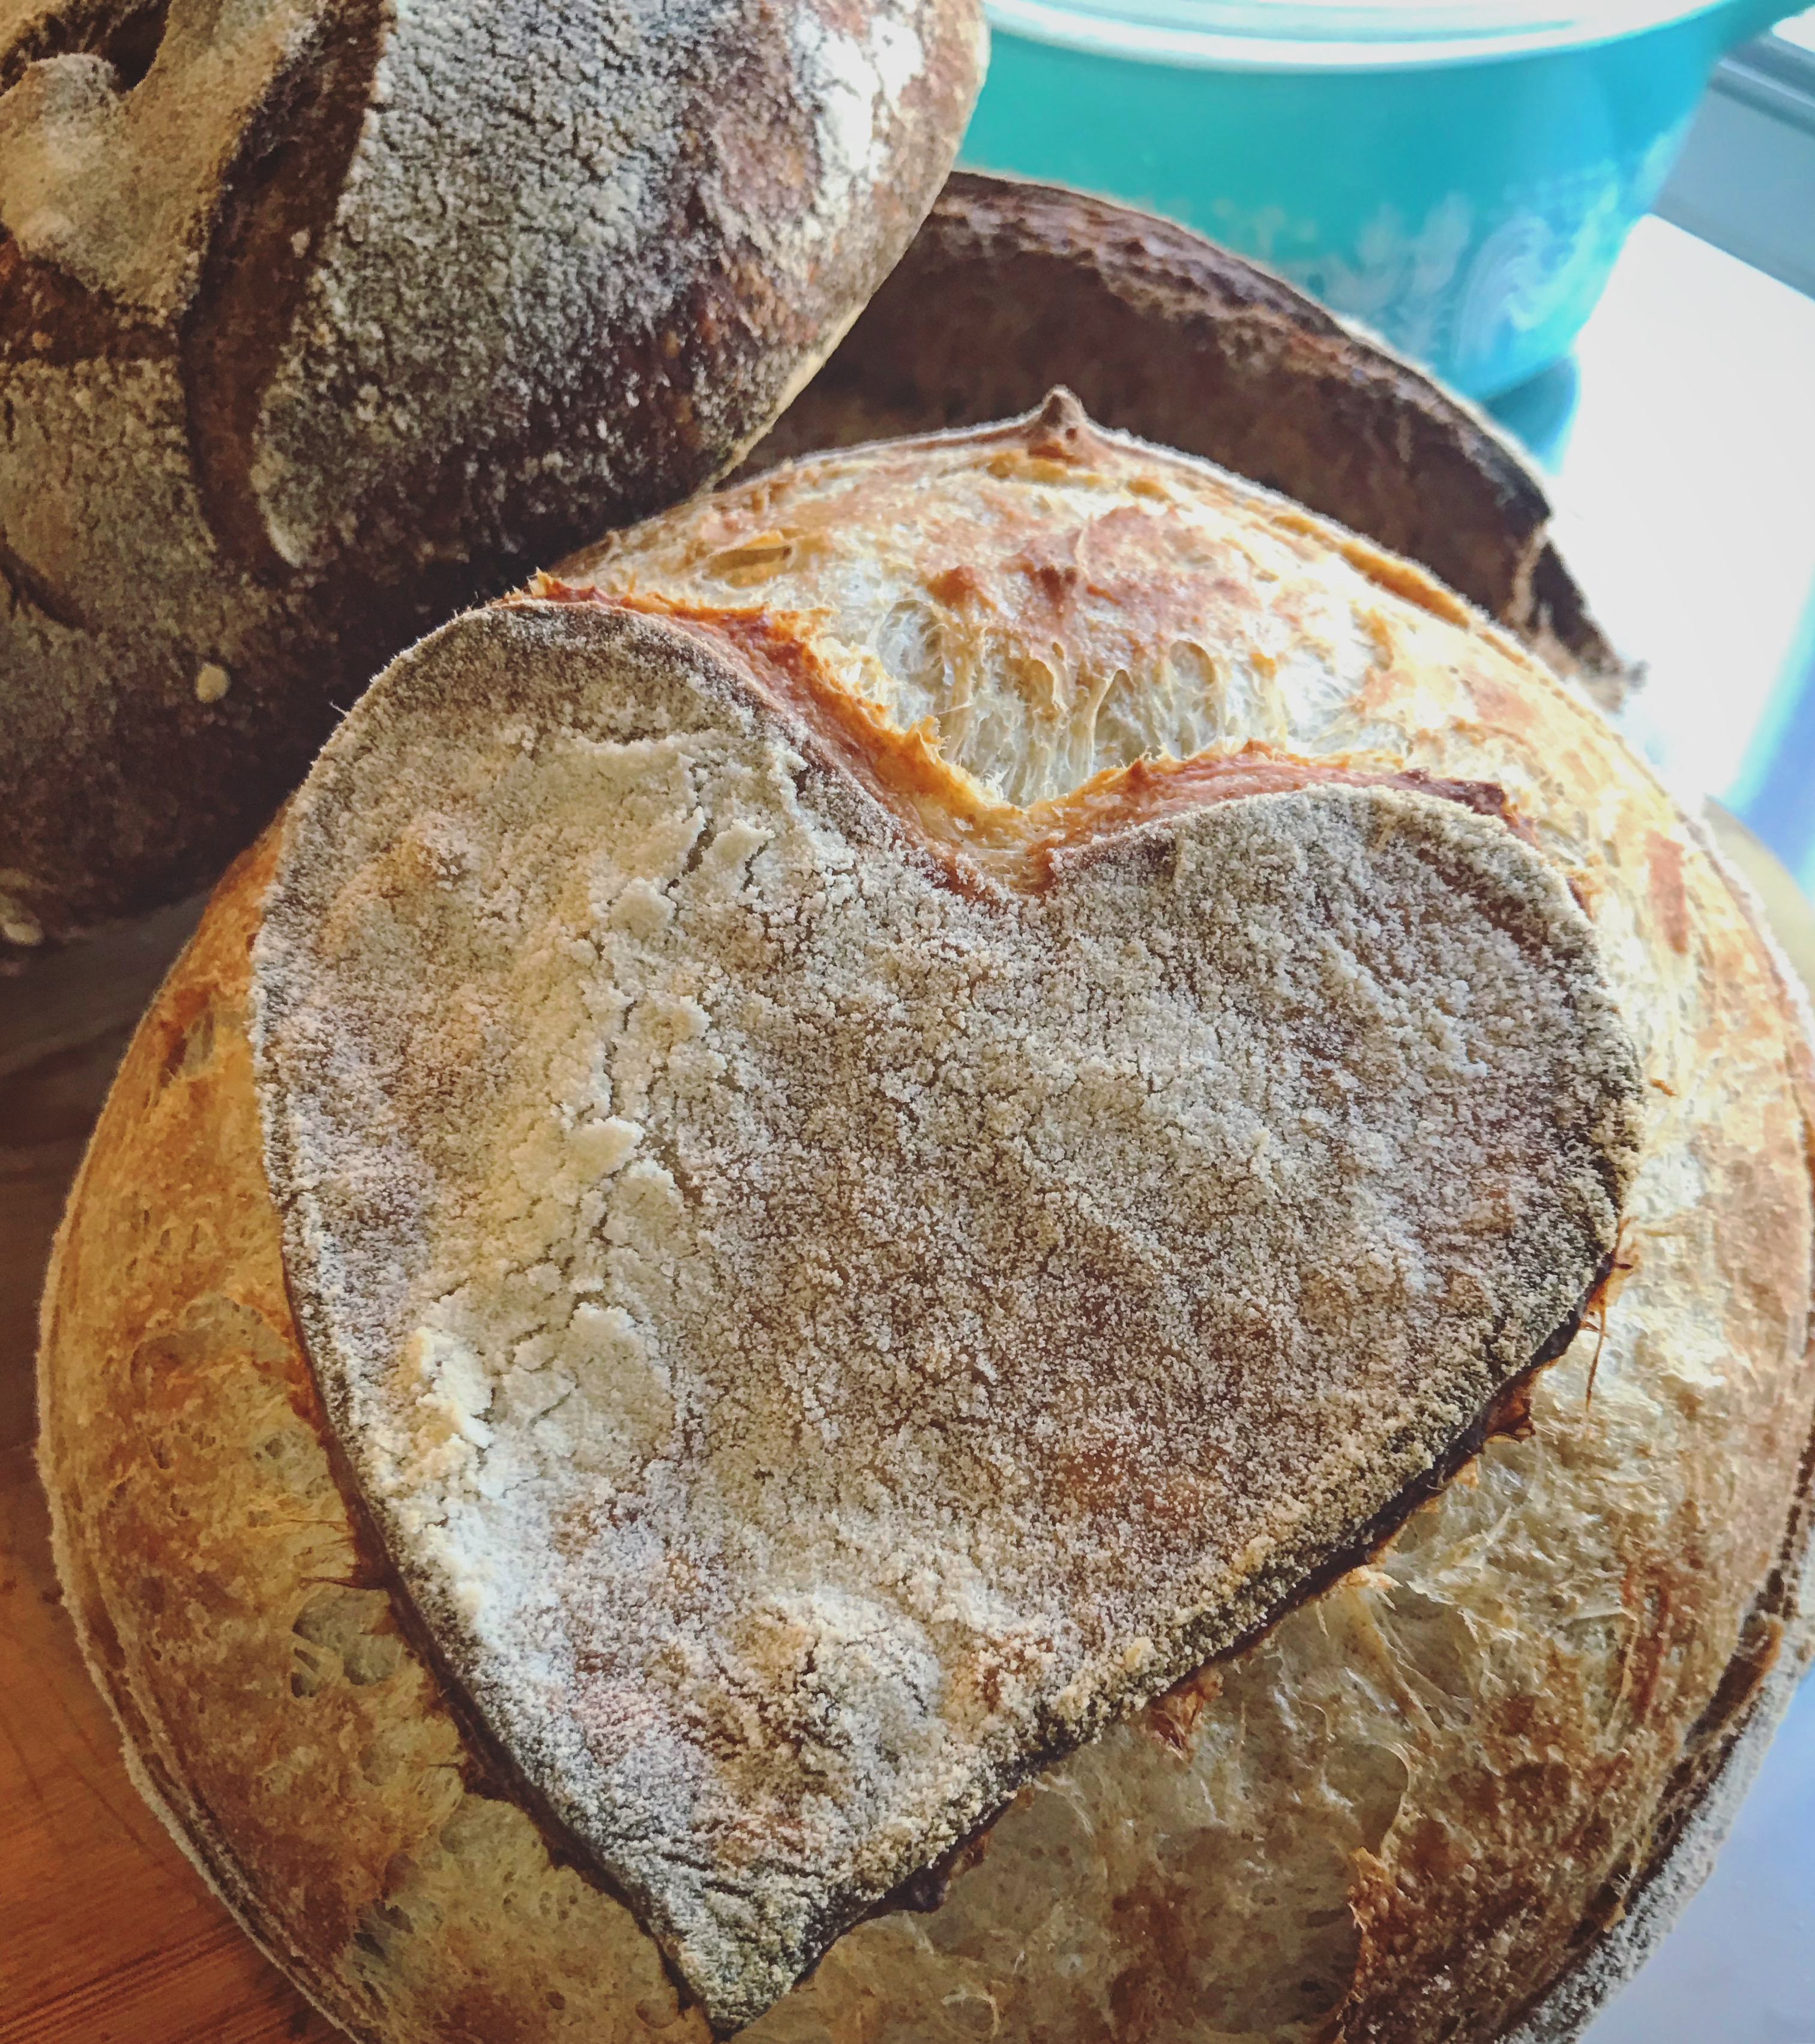
You will need two additional tools for baking. Before placing the dough into the oven, you will need to score your bread. Scoring is cutting slashes into the loaf before baking to allow for expansion. These cuts can be very serviceable lines across the top of the bread or beautifully decorative. If you’ve used rice flour, you can smooth out what sticks to the loaf so that the surface has a uniform amount everywhere. I also use a lame, a baker’s scoring tool that was gifted to me from a lovely friend, to make my cuts. It gives me great control and is easily made sharp again by replacing the blade.

Neither of these tools are needed for great bread! You can use regular flour before you score and your bread will still be beautiful. You can also use a very sharp kitchen knife instead of a lame. I find that it is most fun to try things first without fancy equipment because I can relax and experiment without the pressure of a big investment. Enjoy the process and don’t look for perfection. Even bread that doesn’t look like a magazine cover is delicious!

When you are ready to bake, place the covered dutch oven on the lower, middle rack of your oven and set the temperature to 500 degrees. Allow the oven to heat for about 30 minutes, even if the preheat signal sounds before this. While you are waiting, prepare your tools. You’ll want to dust the loaf with more flour if needed and score it quickly once you remove the dutch oven so that it stays very hot. Have everything ready to go!

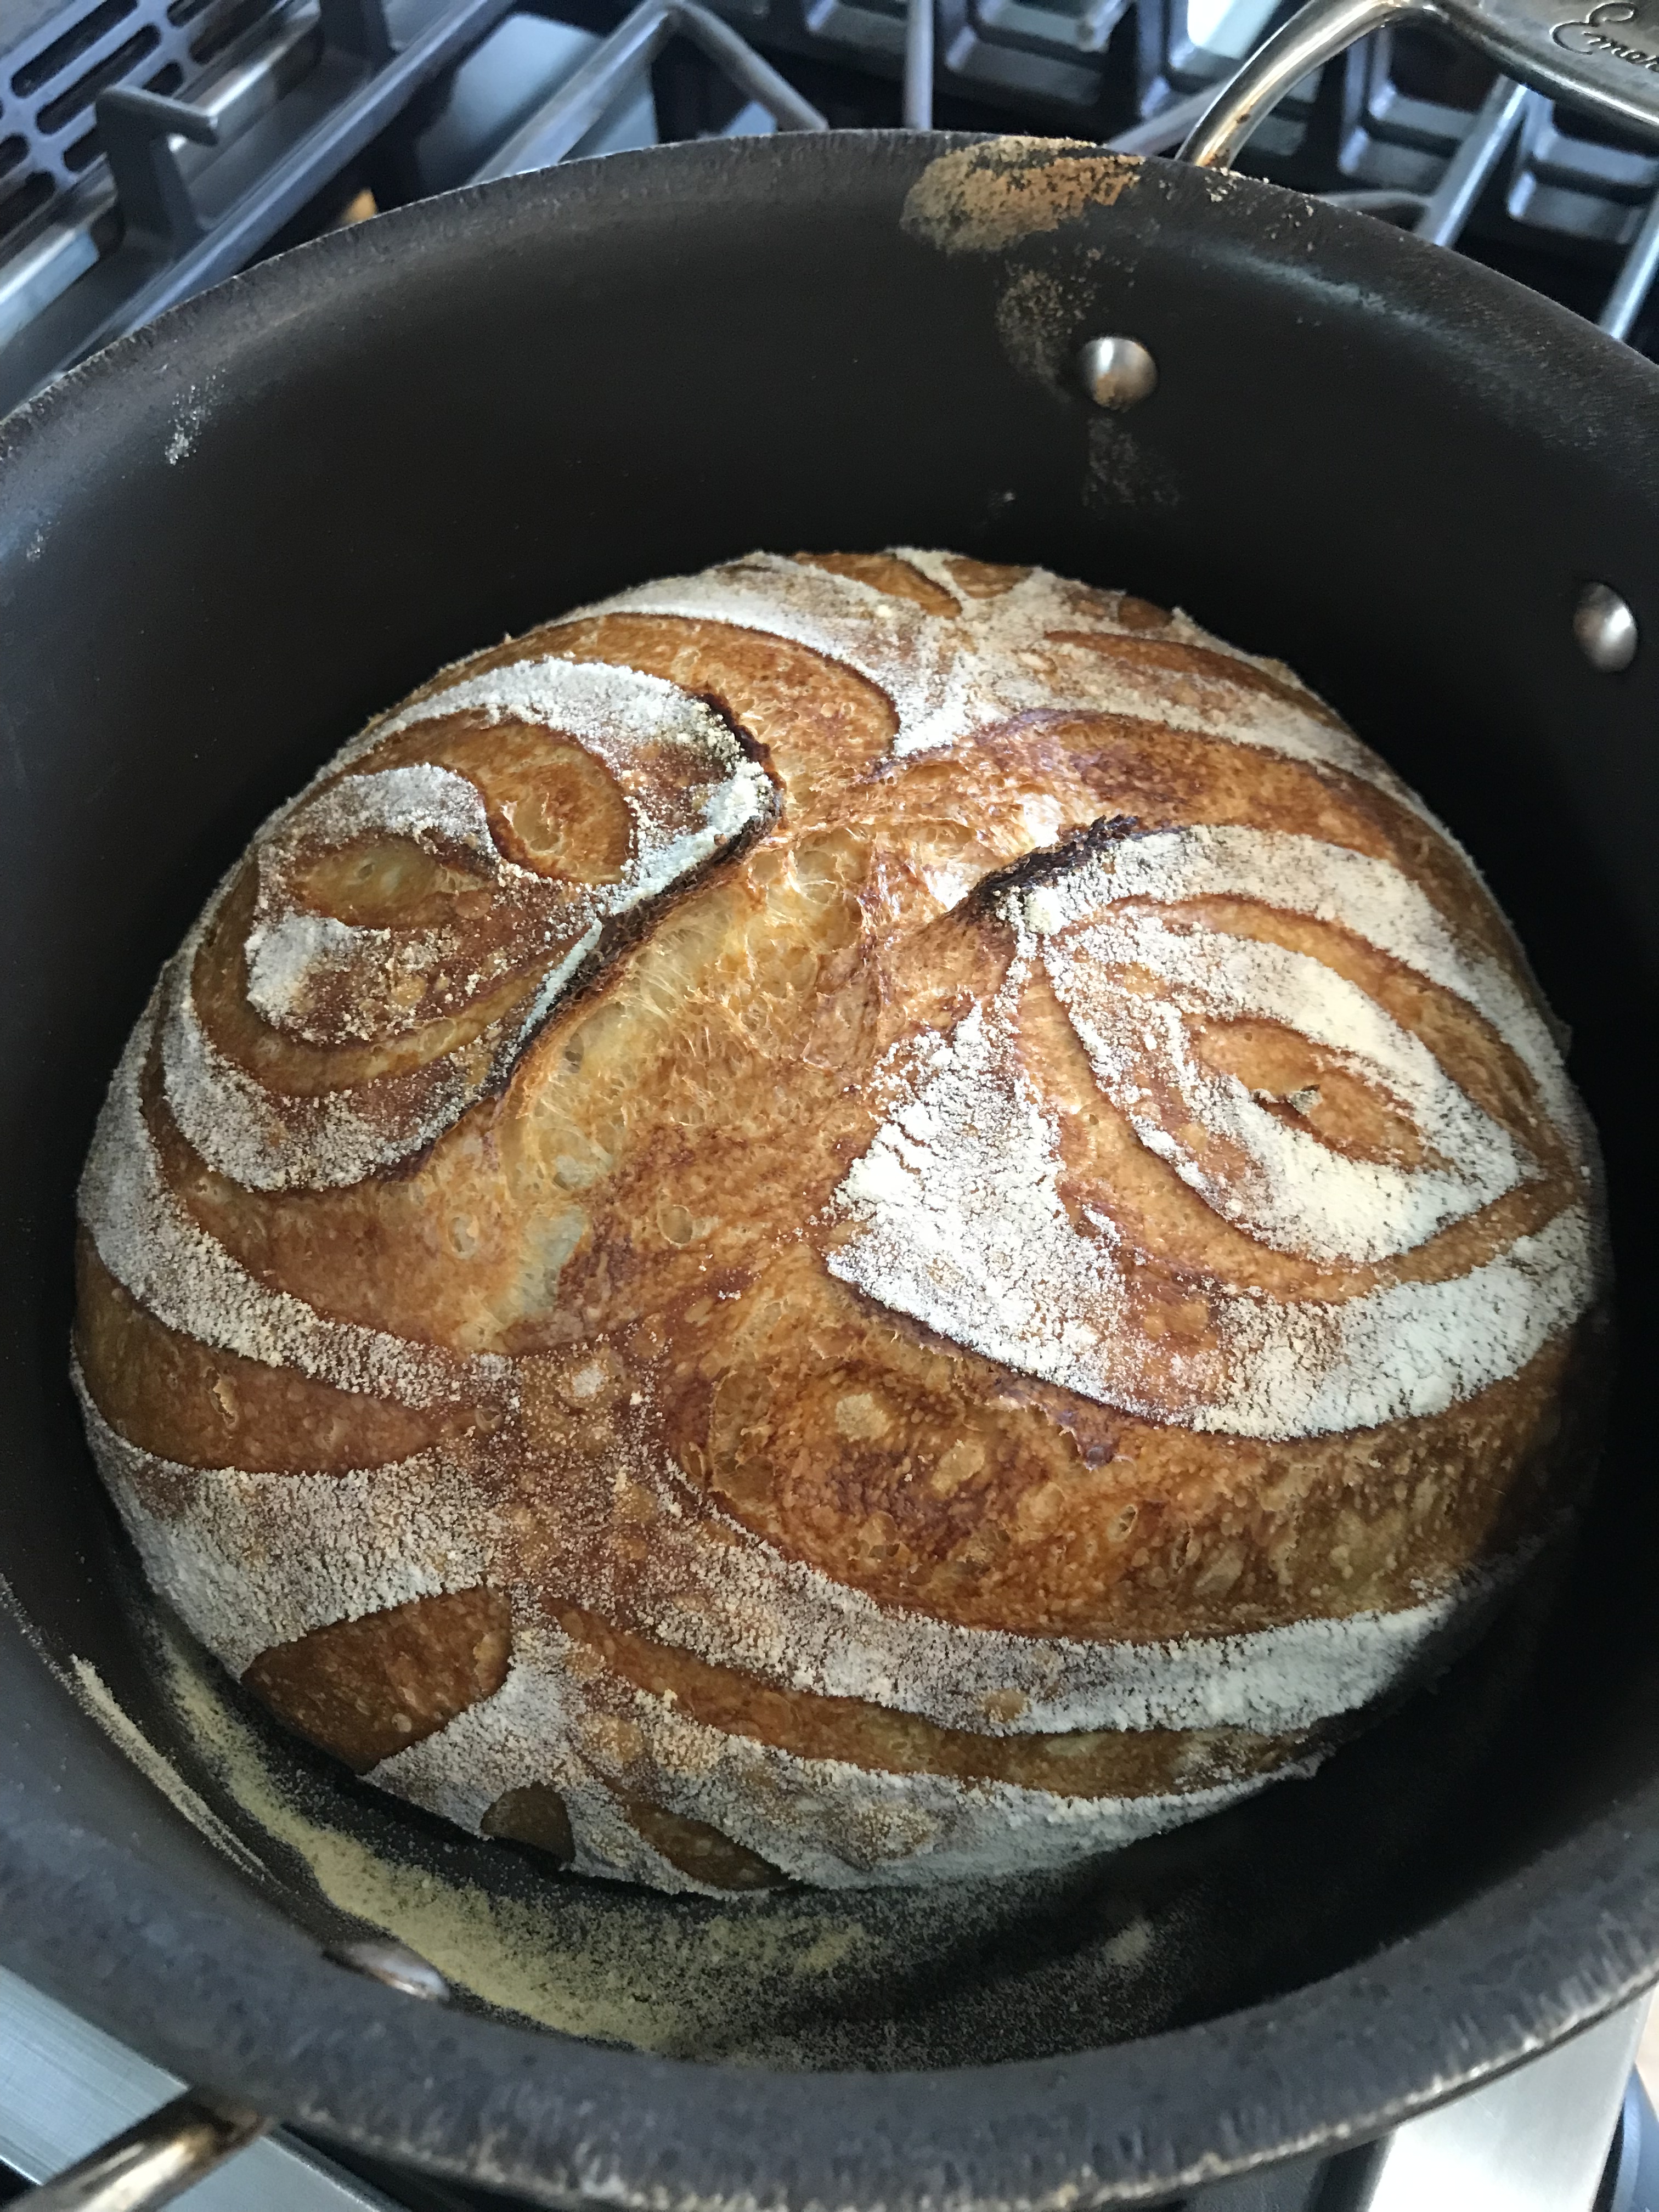
When your timer goes off, CAREFULLY remove the dutch oven and place it on a heat-proof surface. I always put mine on the stove using heavy, silicone oven mitts. (Make sure you close the oven door during this point or you will lose all the heat) Turn the dough into the uncovered dutch oven, doing your best to get it centered. This will be terrifying the first time you do it and second nature with a little practice.

Dust the loaf with flour, score it with the design of your choosing, and replace the dutch oven top with a mitted hand. Return the covered dutch oven to the oven now and close the door. Immediately turn the temperature down to 450 degrees and set the timer for 30 minutes. When the 30-minute timer goes off, remove the dutch oven cover. Set the timer again for 20 more minutes.

When the 20 minutes have elapsed, your bread may be done or may need just a few more minutes, depending on your oven. It’s important to note that this type of bread gets quite dark during baking and this does not mean its burnt. Baking a cold loaf in a covered pot gives you some flexibility in how dark you make the bread. You can pull it out when it is golden brown, or wait until it is dark caramel. Try it both ways and note how long the second phase of baking takes for your version of perfect.

img_6349

When the loaf is baked perfectly for you, pull it out onto a heat-safe surface and remove the loaf from the dutch oven onto a cooling rack. Now the hardest part in the whole baking process… You must wait at least an hour before slicing and eating your loaf! The bread will actually continue to bake during this time and will be gummy and very difficult to slice if cut into too early.

img_6166

To continue baking your second loaf, cover the dutch oven and place it back in the oven, increasing the heat to 500 degrees. Wait at least 10 minutes and then repeat the process above. If the dutch oven has lots of flour in it, carefully shake it out into the sink so that it doesn’t burn before doing this preheat process.

*Alternate method

I have started to leave the oven at 500 degrees for just the first 10 minutes of the baking process before I turn it down to 450. This tiny bit of extra time at higher heat seems to give my loaves extra lift. I watch it more carefully at the end so that I can pull it out at just the right moment which for me is golden brown which some extra dark bits on the edges of the score. If setting the timer 3 times during one bake for adjustments seems like too much, then it probably is and your loaves will be beautiful without the extra step. Try it both ways if you are interested in the difference.

Final Comments

If you have made it this far in this recipe, you may feel daunted! There are lots of little steps and details that seem complicated when you first read about them. I want to encourage you that with a little practice, you can fit these steps easily into your day!

I usually make 2 of these kinds of loaves a week for my family. Friday and Saturday are the days that I have the most time to give it my attention. Knowing this, I take my starter out of the refrigerator Wednesday and feed it. This takes less than 5 minutes. On Thursday, I make my leaven right before bed. This also literally takes 5 minutes since I keep my scale, flour, and bowl together.

Friday morning, I make my dough. It takes about 15 minutes to measure my ingredients and mix it together by hand. While I’m waiting to add the salt and extra water, I eat breakfast and do the family’s dishes. Once the salt is added, I set my timer for turns and just carry my container of dough around with me. I’ve even taken it in the car when I have to go places. The only thing I need is a place to wash my hands. Later in the day, it takes me about 10 minutes to form the loaves and clean the counter.

Saturday morning is when I bake. This requires me to be home for a few hours but there are only about 15 minutes of active work for the flour dusting and scoring. The rest of the time, everything is happening in the oven. Once the bread is cooled all day, one or both loaves can be wrapped tightly and frozen without any loss of quality. I do this sometimes if we will be busier than usual and not home to eat both loaves within five to seven days.

The reason that I go into my personal baking schedule here is that I want you to see how easily the little spurts of effort required to make bread, can fit into a day. Once you invest some energy to learn the steps I’ve described here (in very fine detail), you will only need to briefly refer to the measurements as you bake. The rest will come to you with the same second nature as riding a bike or driving a car. Baking bread is relaxing, even meditative, and will bring you great satisfaction. Please do not be intimidated and message me your questions. I want your loaves to be a grand success!

DD0BD724-7762-4B26-BCFF-7574FB01740C