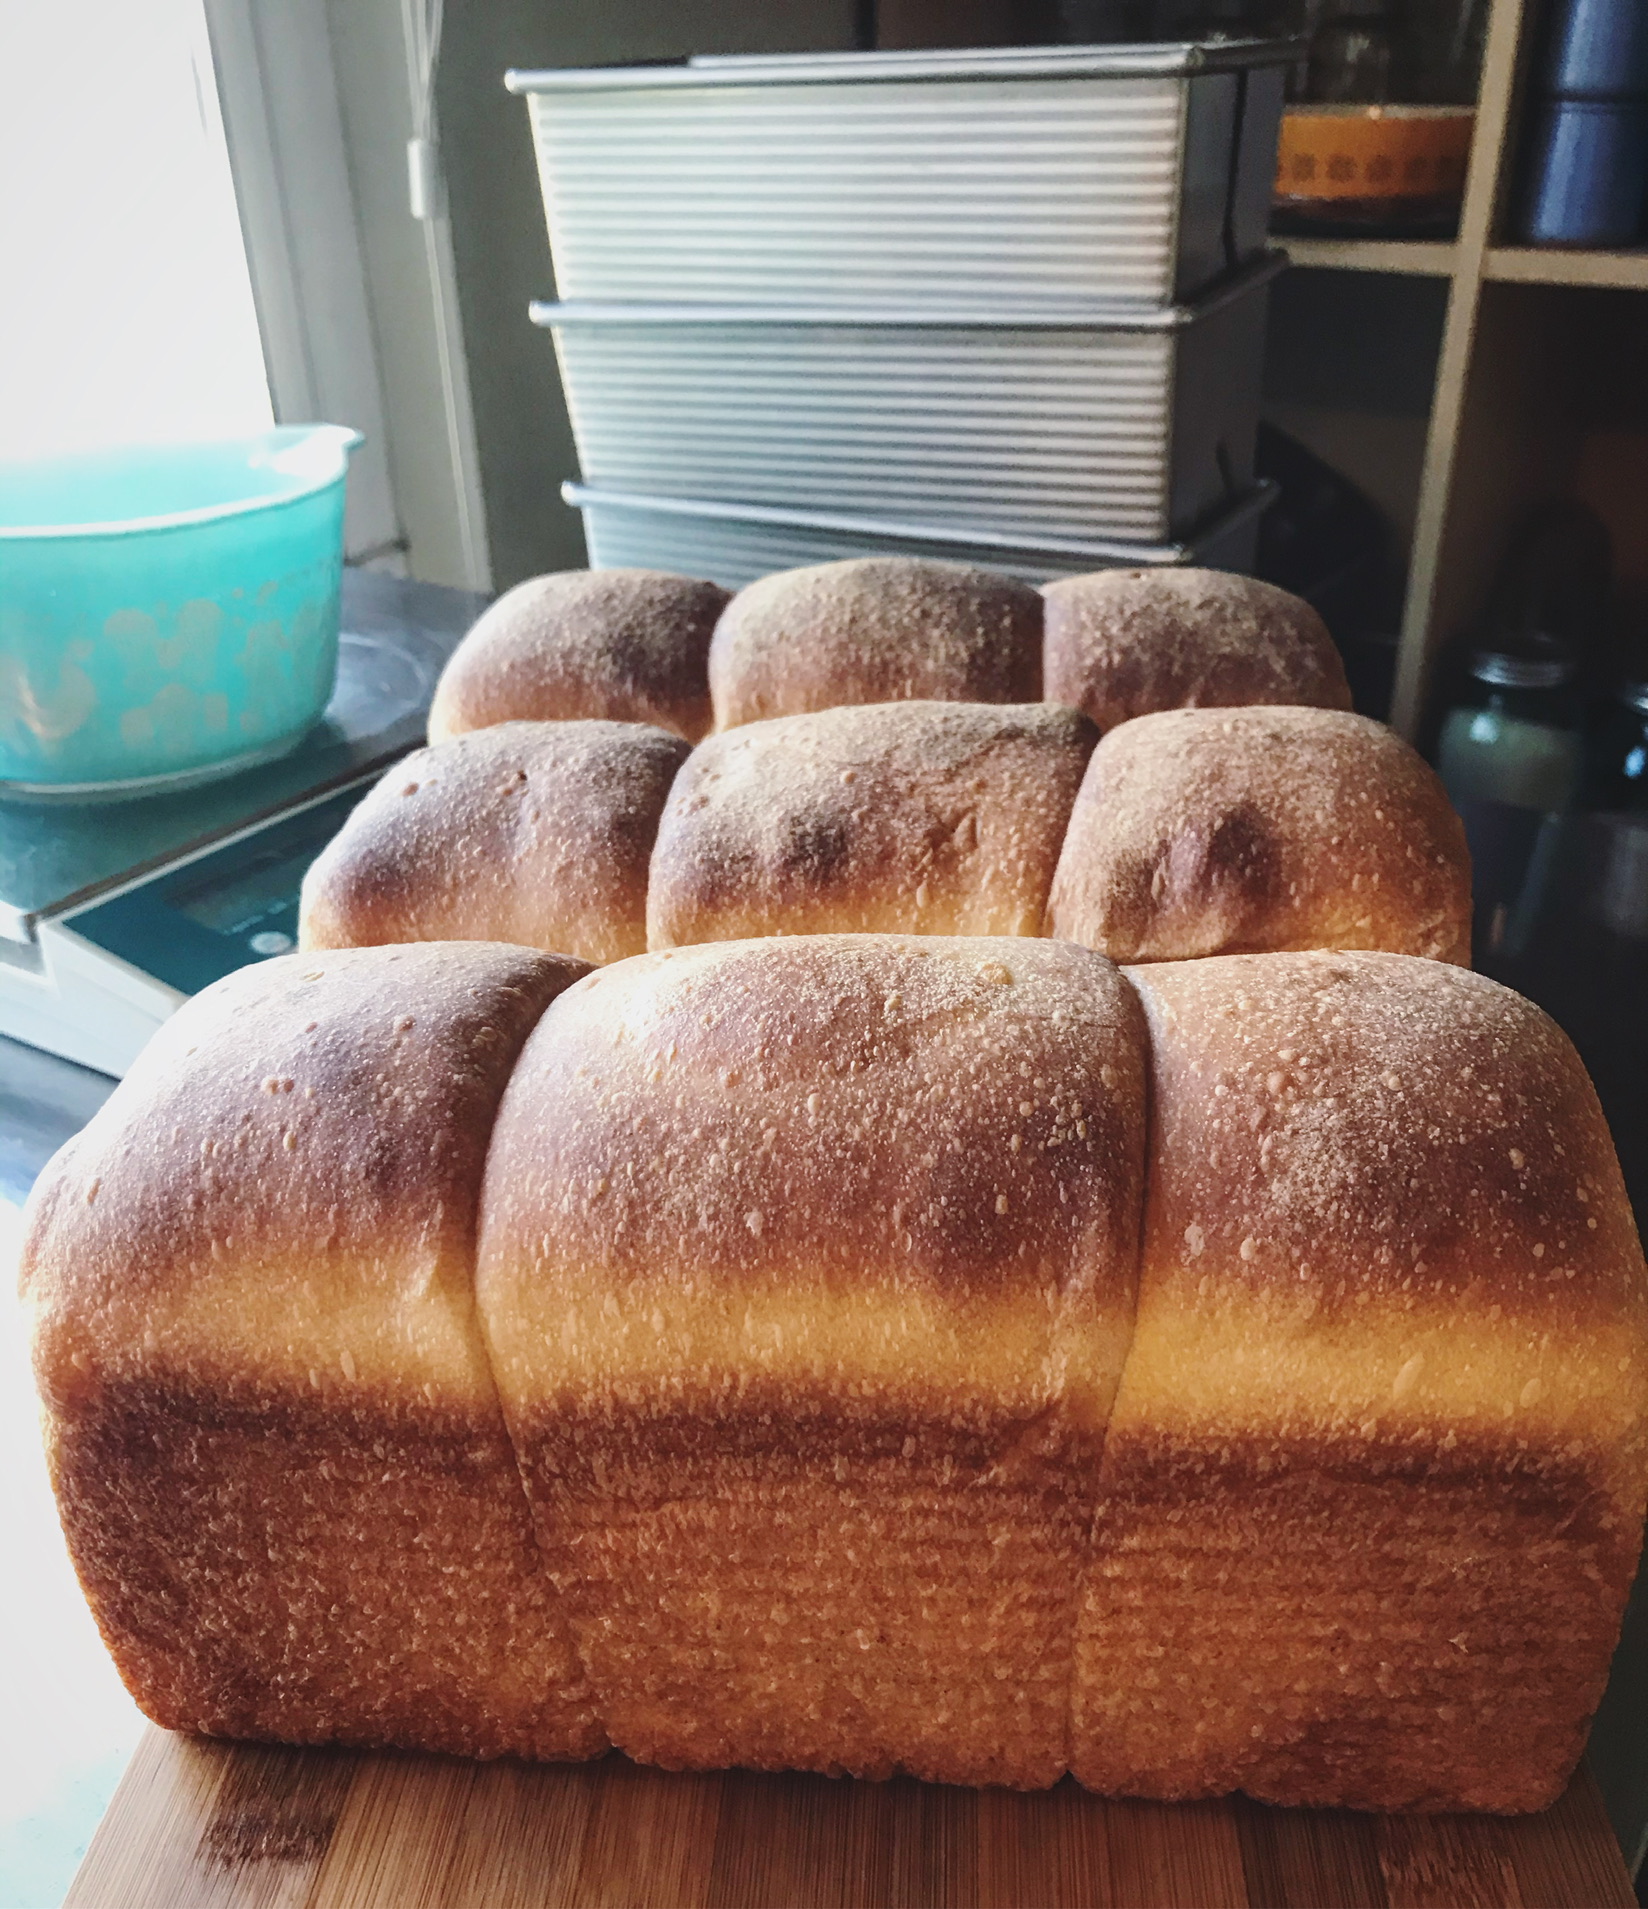
This enriched sandwich bread is a loaf that I developed for the grilled cheese and pb&j eaters in my life. The rustic, country loaf is my personal favorite but all the holes in its beautiful, open crumb don’t hold mayo or jelly very well. It also has a crunchy crust that can be undesirable for certain sandwiches. I had to perfect a loaf that is very soft and has a fine crumb so that we could completely opt out of buying bread at the grocery store.
Let me quickly explain why this is important to me. Almost none of the bread that you can buy at grocery stores is naturally leavened. No matter how much you pay for a beautiful, organic, (expensive) whole grain loaf of bread, if it was risen with commercial yeast, it’s just not that healthy. I want to restate that… breads made with whole grains are not healthier than white bread if they aren’t naturally leavened. It was worth it to me to figure out how to make a soft sandwich loaf because what I want to feed my family is simply not available to buy.
I need to be real with you about how long it takes to make this bread! Since the leaven is really best when it sits overnight AND the bread has the best nutrition and flavor when the formed loaf also sits in the refrigerator overnight, this is a 3 DAY loaf of bread. Luckily, during almost all of those 3 days, the dough is sitting on the counter or in the fridge. It will take a couple of loaves for you to get the feel for how the process works, but once you get going, you can easily schedule the mixing and folding into a busy day. So since this is a 3 day loaf, I usually make two loaves at once. It is hardly any extra effort and then I only have to do it once a week.
One last note – You really must have a kitchen scale to make this bread. The amounts of ingredients like starter or milk are very precise. The measurements do not translate well into teaspoons and cups. The scale will also save you a lot of dishes! When you measure the ingredients for the leaven and dough, you can add each one into the bowl used for mixing, taring (zeroing out) the scale between additions. When you are finished, you won’t have a bunch of measuring cups and spoons to wash!
Leaven
Start this leaven one day before you would like to make bread
40 grams Active Sourdough Starter
50 grams Whole Milk
50 grams Bread Flour
Mix ingredients together using a spatula or wooden spoon.
Adjust with a small amount of extra flour or milk (if needed) so that the consistency resembles thick pancake batter. Keep the sides of the bowl as clean as possible by scraping it down with the spatula. Cover and allow the leaven to sit until very active and full of bubbles, at least 8 hours or overnight.


Dough
All of the Leaven
200 grams Bread Flour
76 grams All Purpose Flour
34 grams Sugar
1 Large Egg
134 grams Whole Milk
Add all of the dough ingredients to the bowl of a standing mixer. This is where having the scale comes in so handy. Put your mixing bowl with the leaven already in it on the scale and tare it out. Add the 200 grams of flour and tare the scale again… Keep doing this as you add the ingredients and when you are done, no extra dishes!


Now a Attach the dough hook and begin mixing on the lowest speed. As the dough comes together, increase the speed to medium until the ingredients are just combined. It’s ok if there are still a few specks of dry flour showing because you will be doing a lot more kneading soon. Turn off the mixer and let the dough sit for about 10 minutes to autolyse.
After Autolyse Add –
34 grams Butter, Softened
10 grams Fine Sea Salt
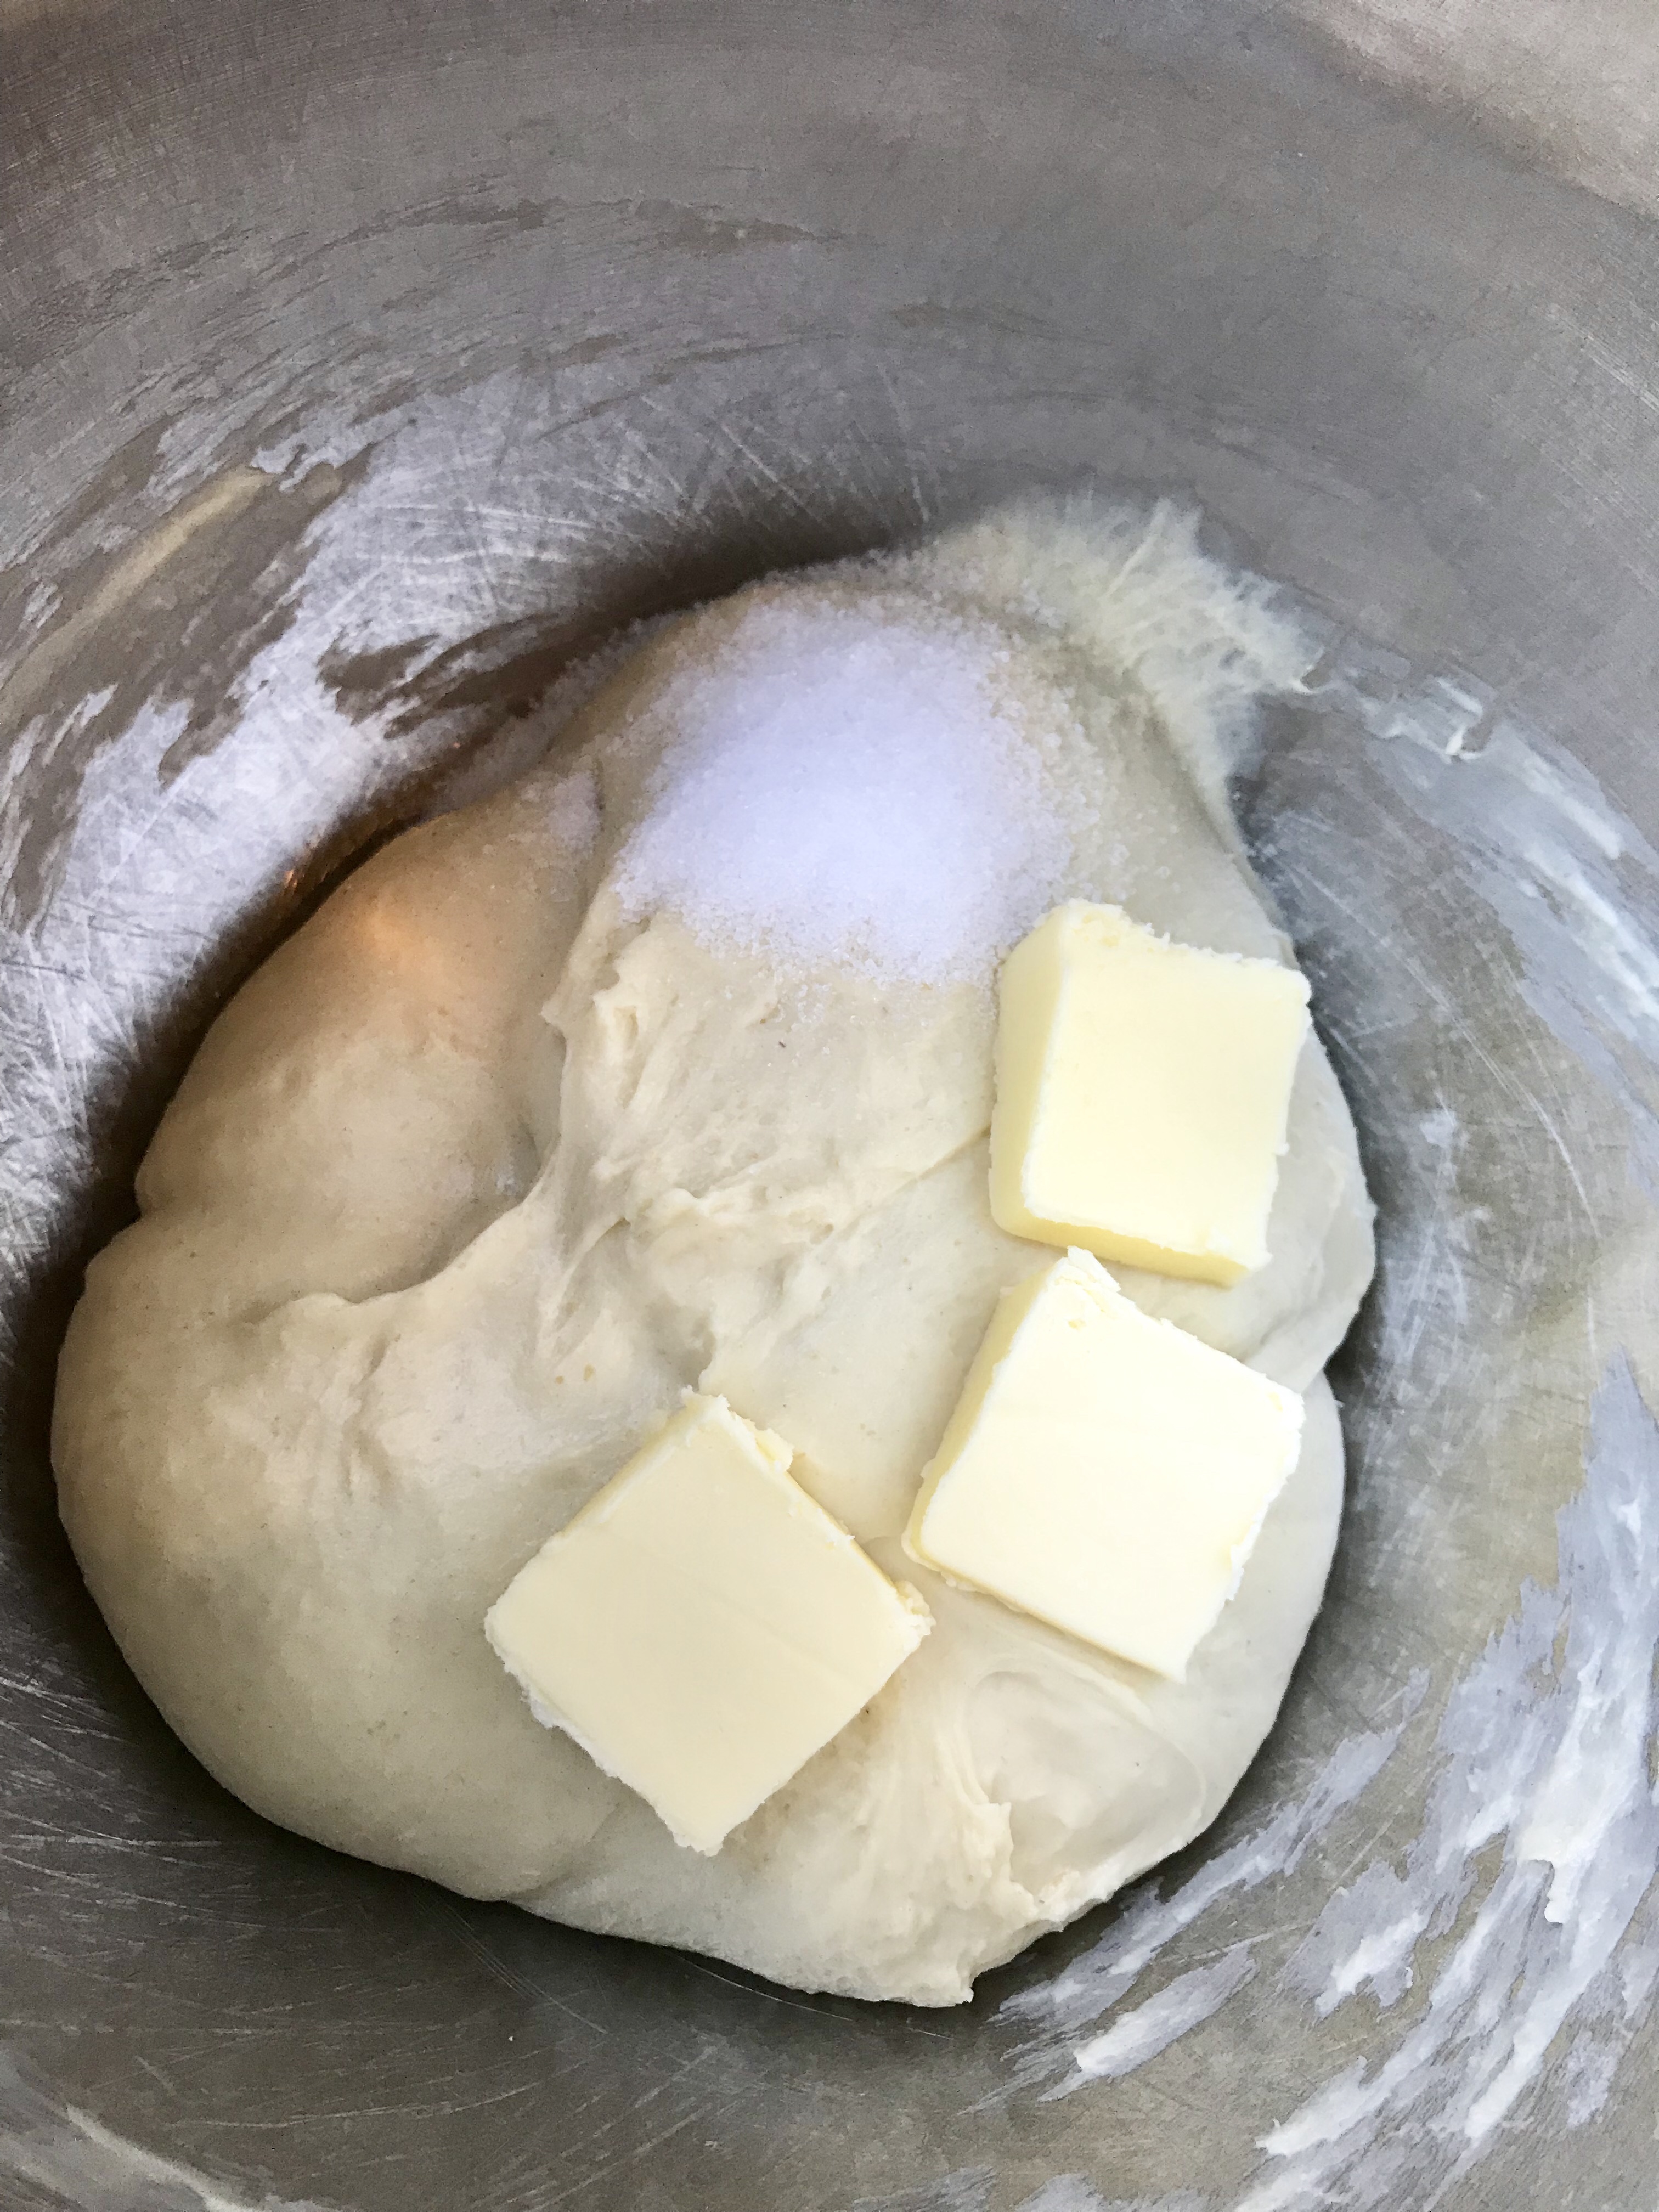
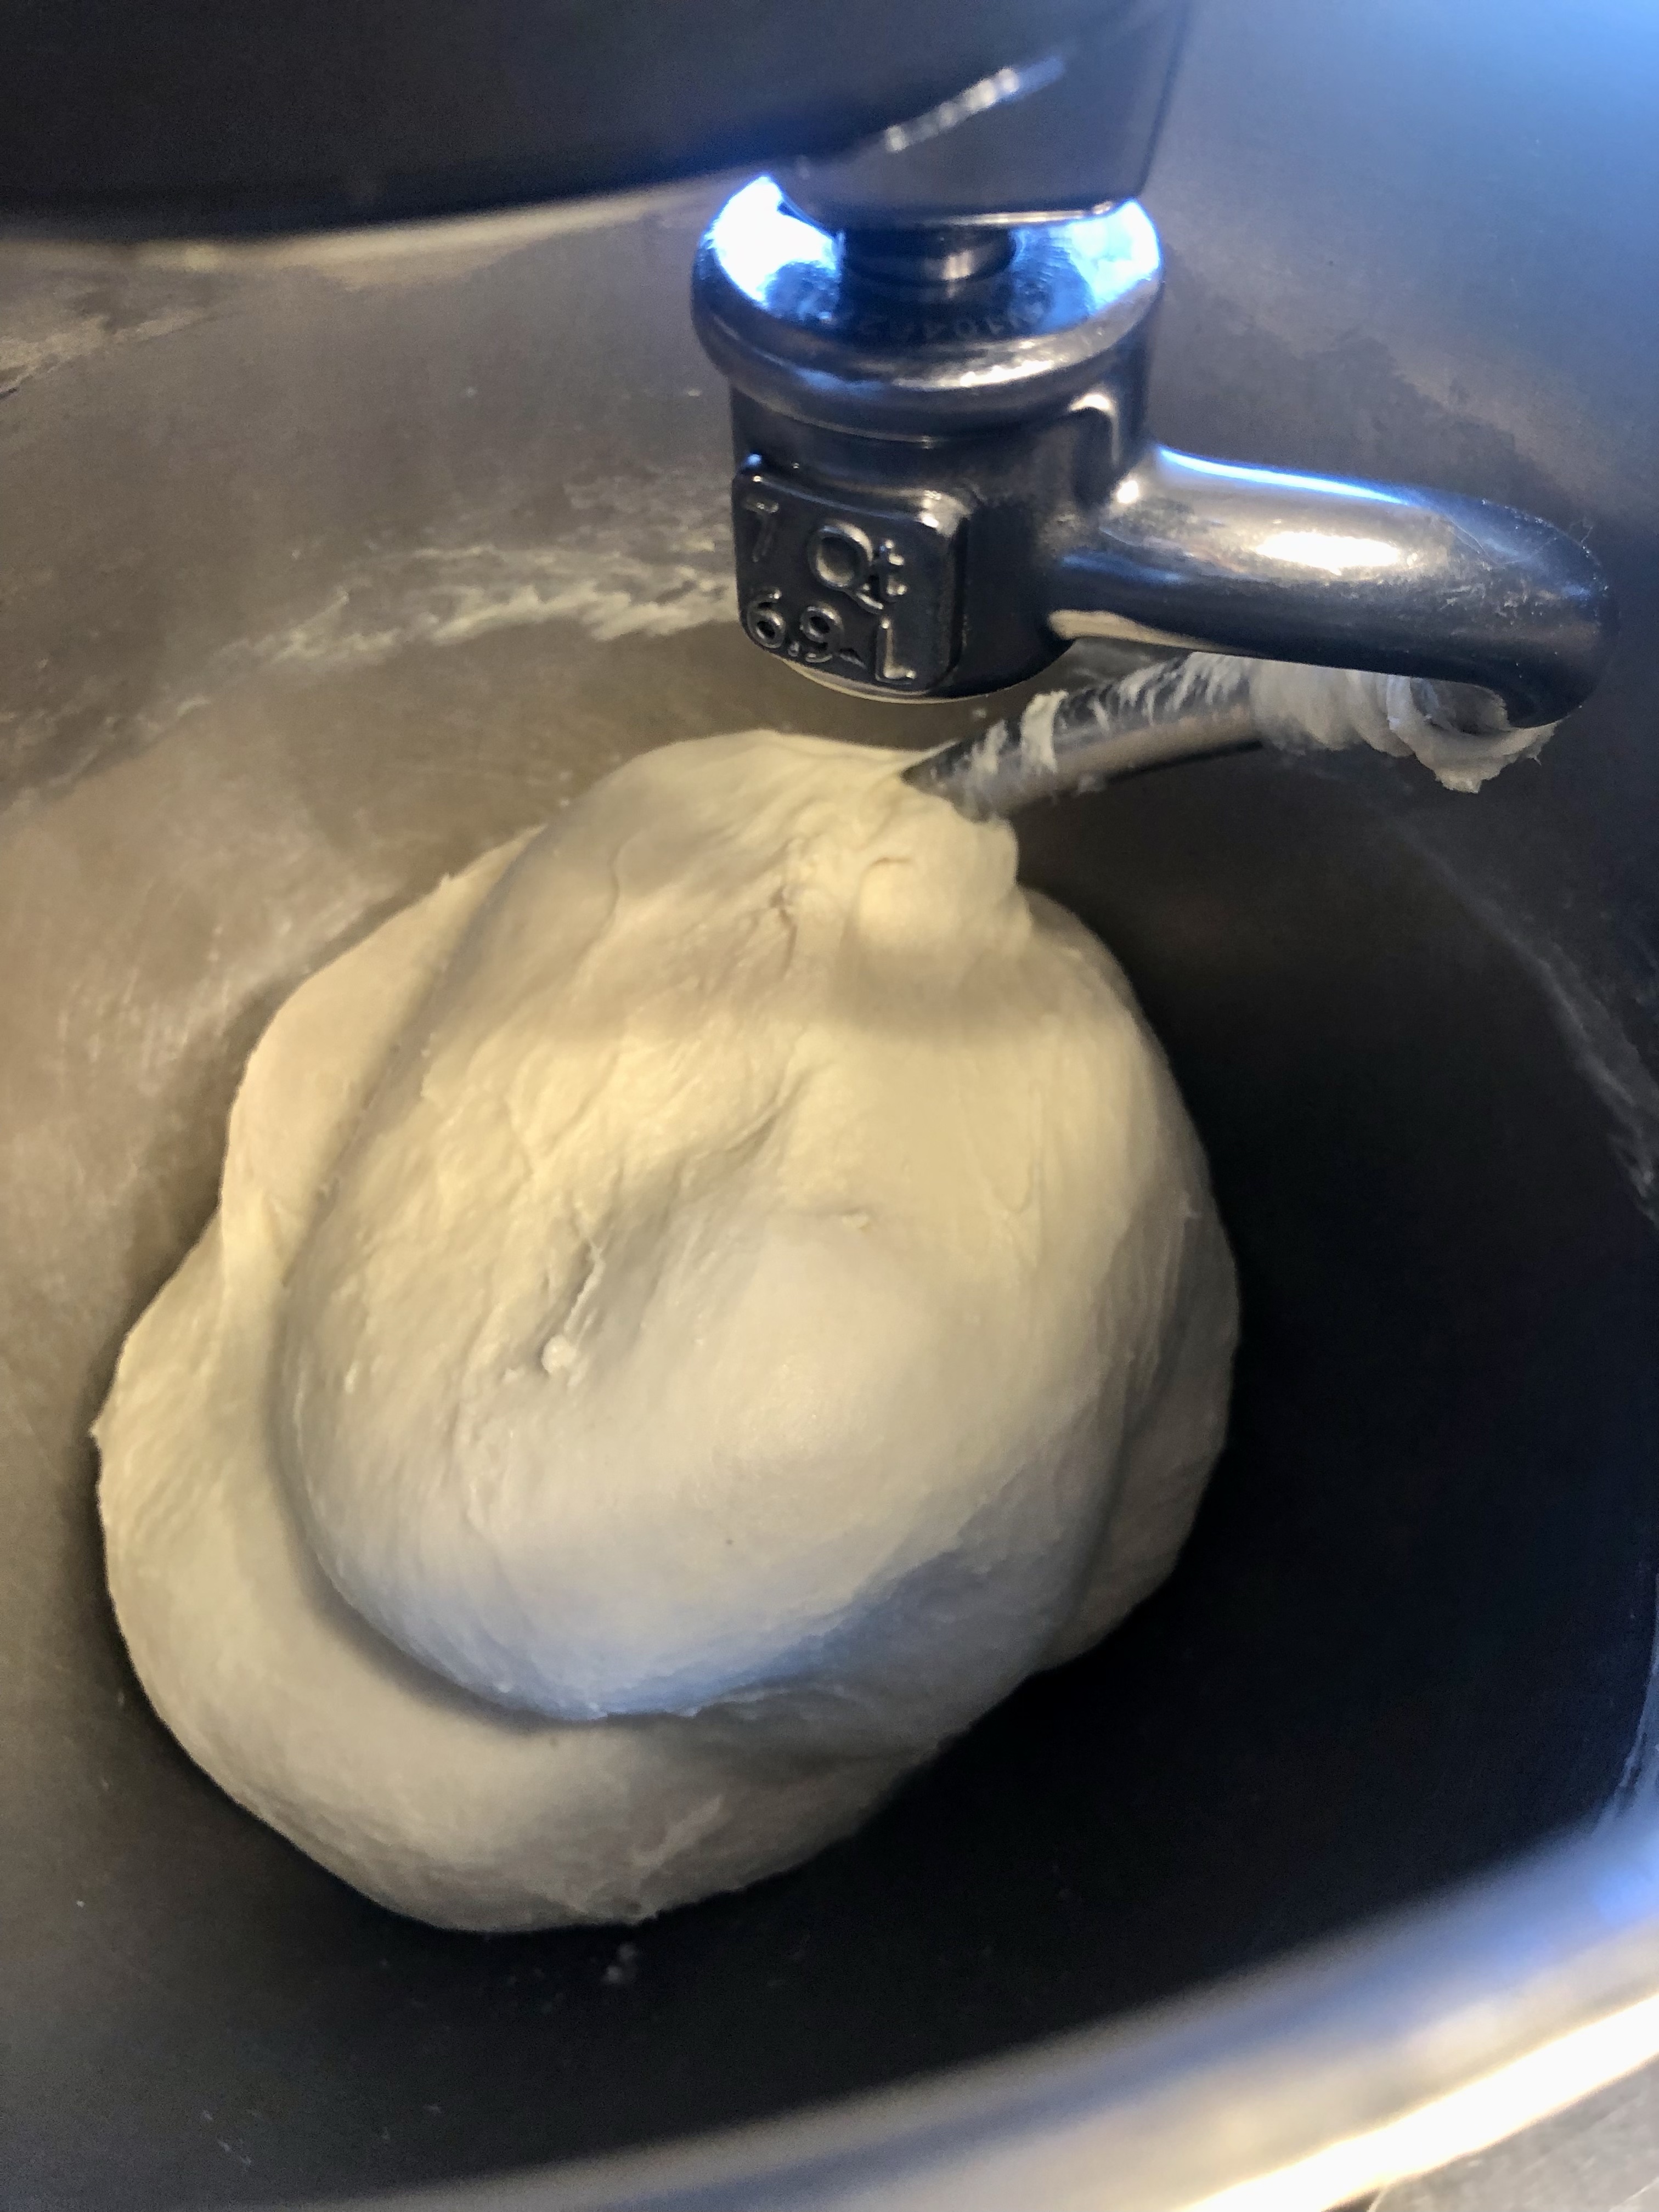
Mix on medium speed allowing the mixer to knead the dough until it becomes absolutley smooth. And by this I mean, you have to beat the tar out of this dough for your loaf to bake up beautifully without a bunch of air bubbles on the surface. It can take as long as 30 minutes. Your patience will be rewarded.

This dough has been mixing for about 10 minutes and is still a little shaggy so we know that the gluten strands are not well developed yet.
At about 20 minutes, I’m still not quite there! Just keep mixing.


Now it’s perfectly smooth and shiny!
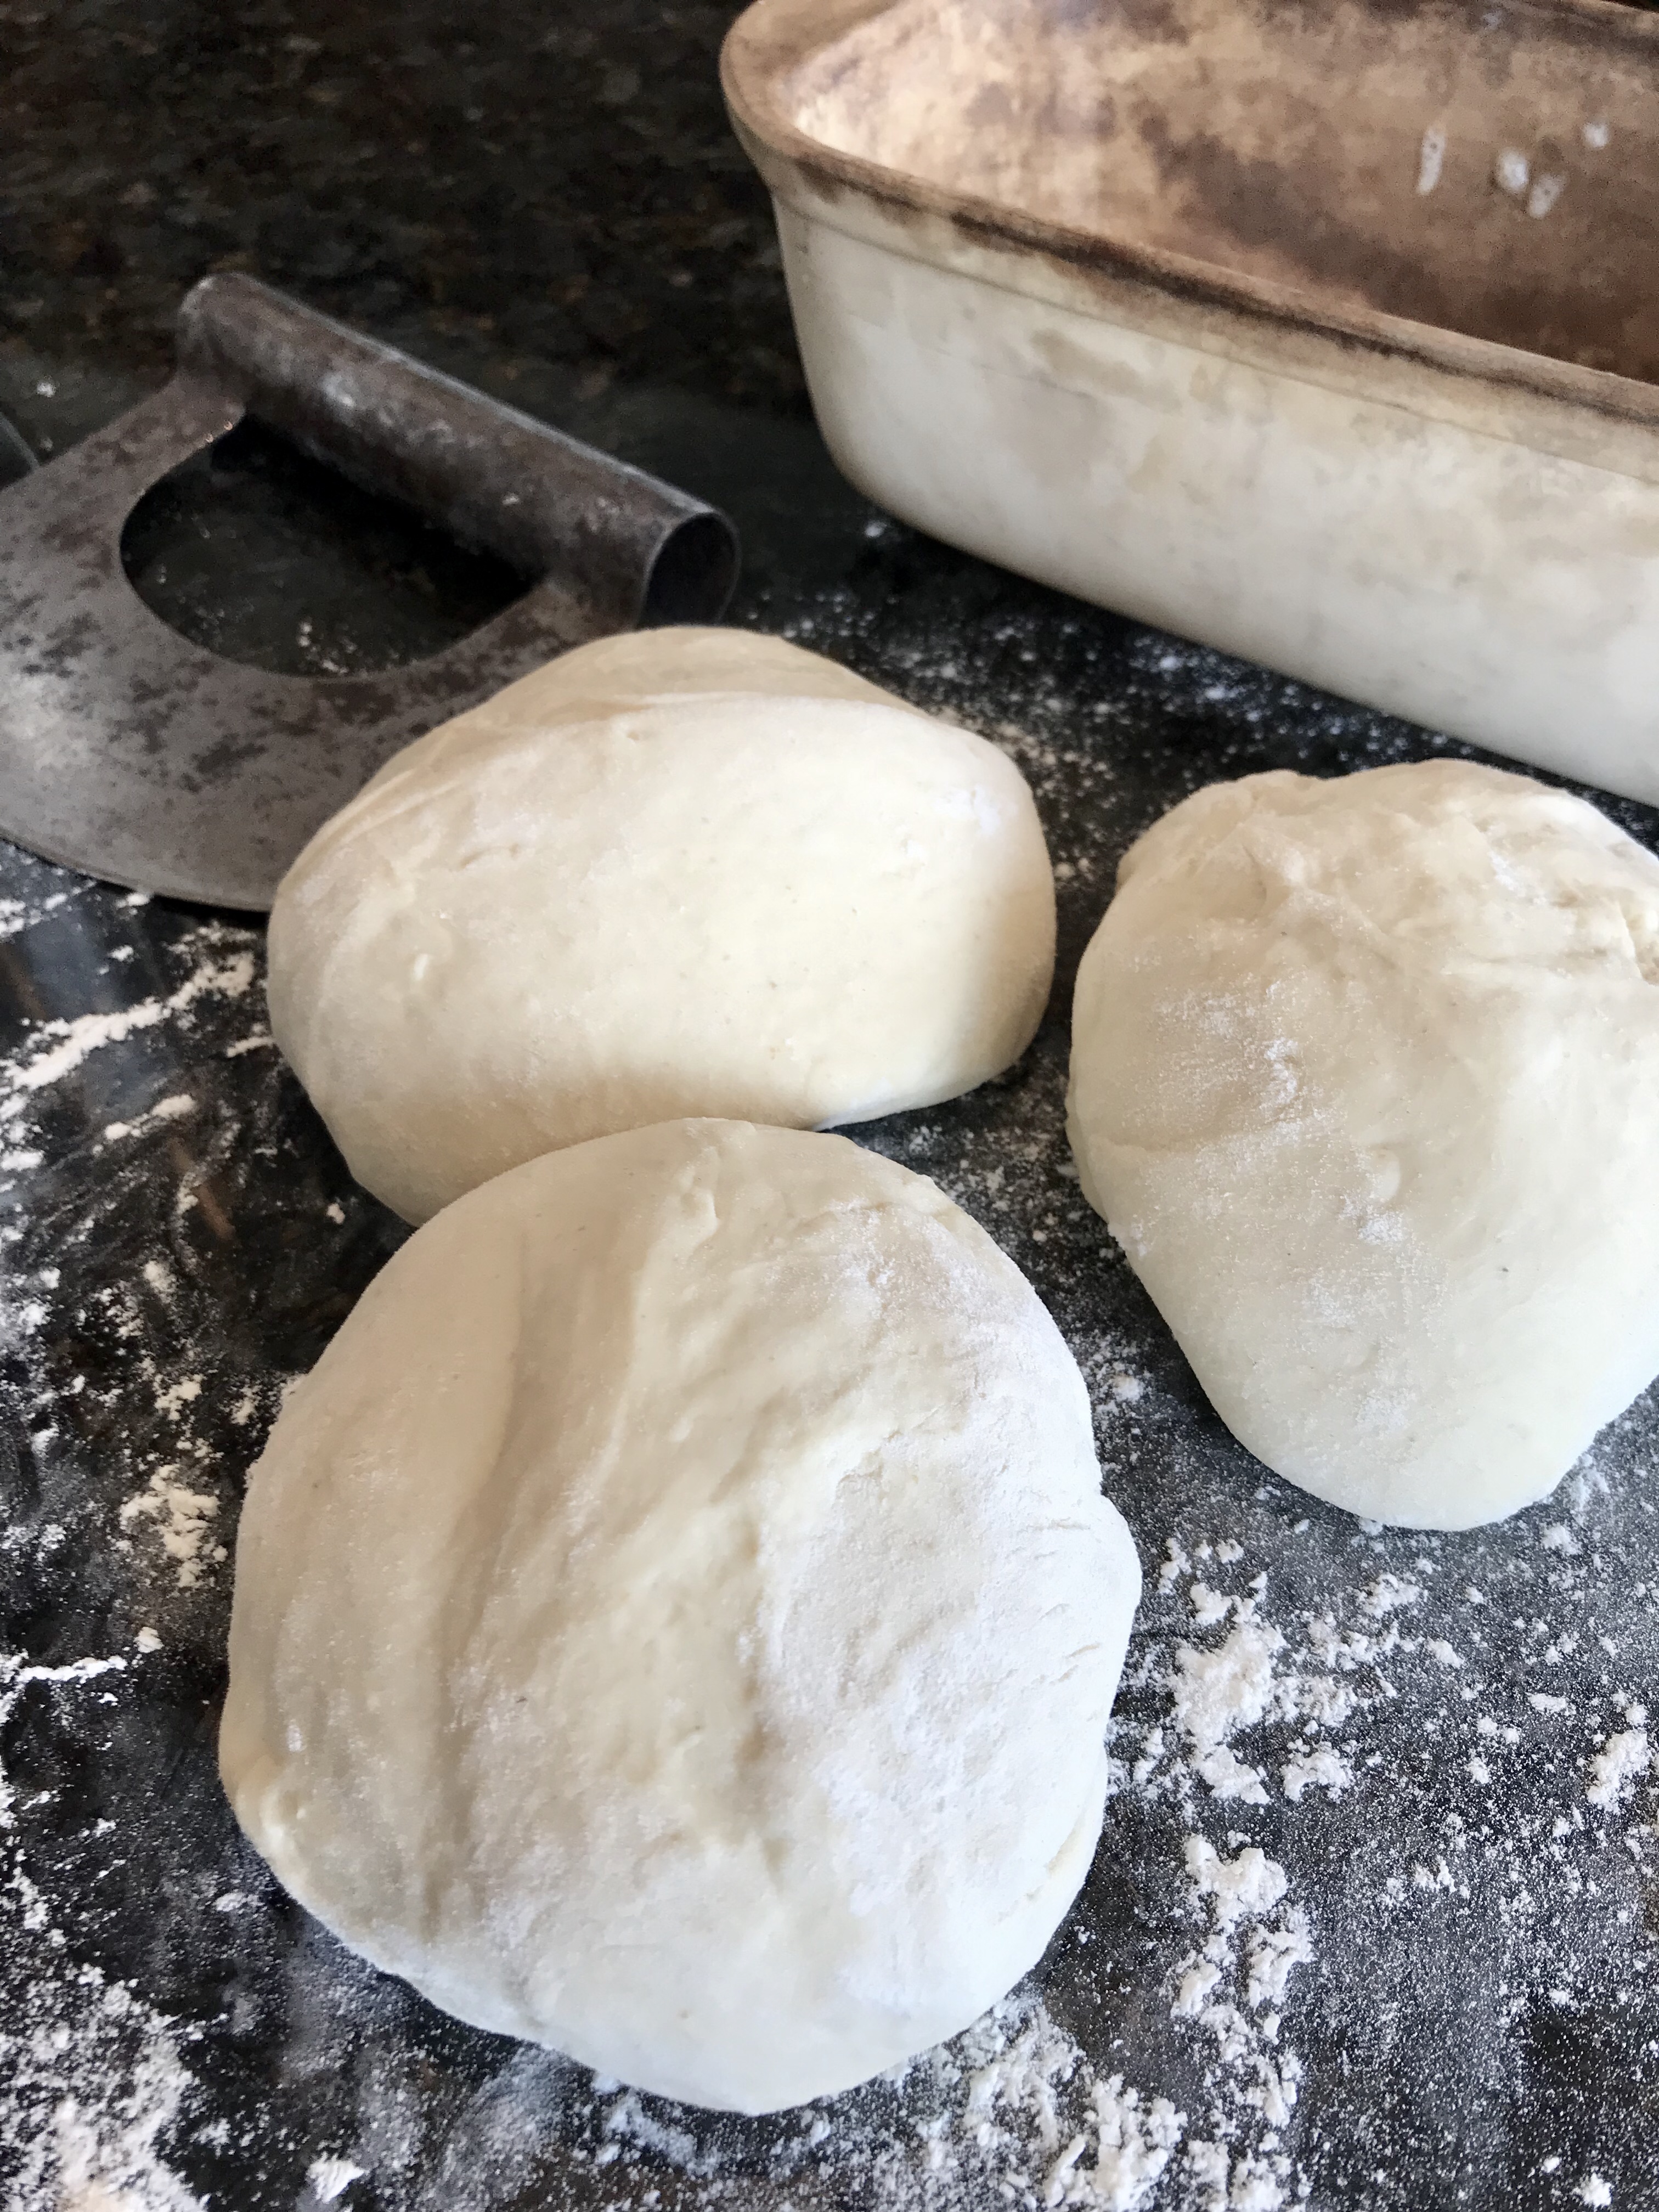
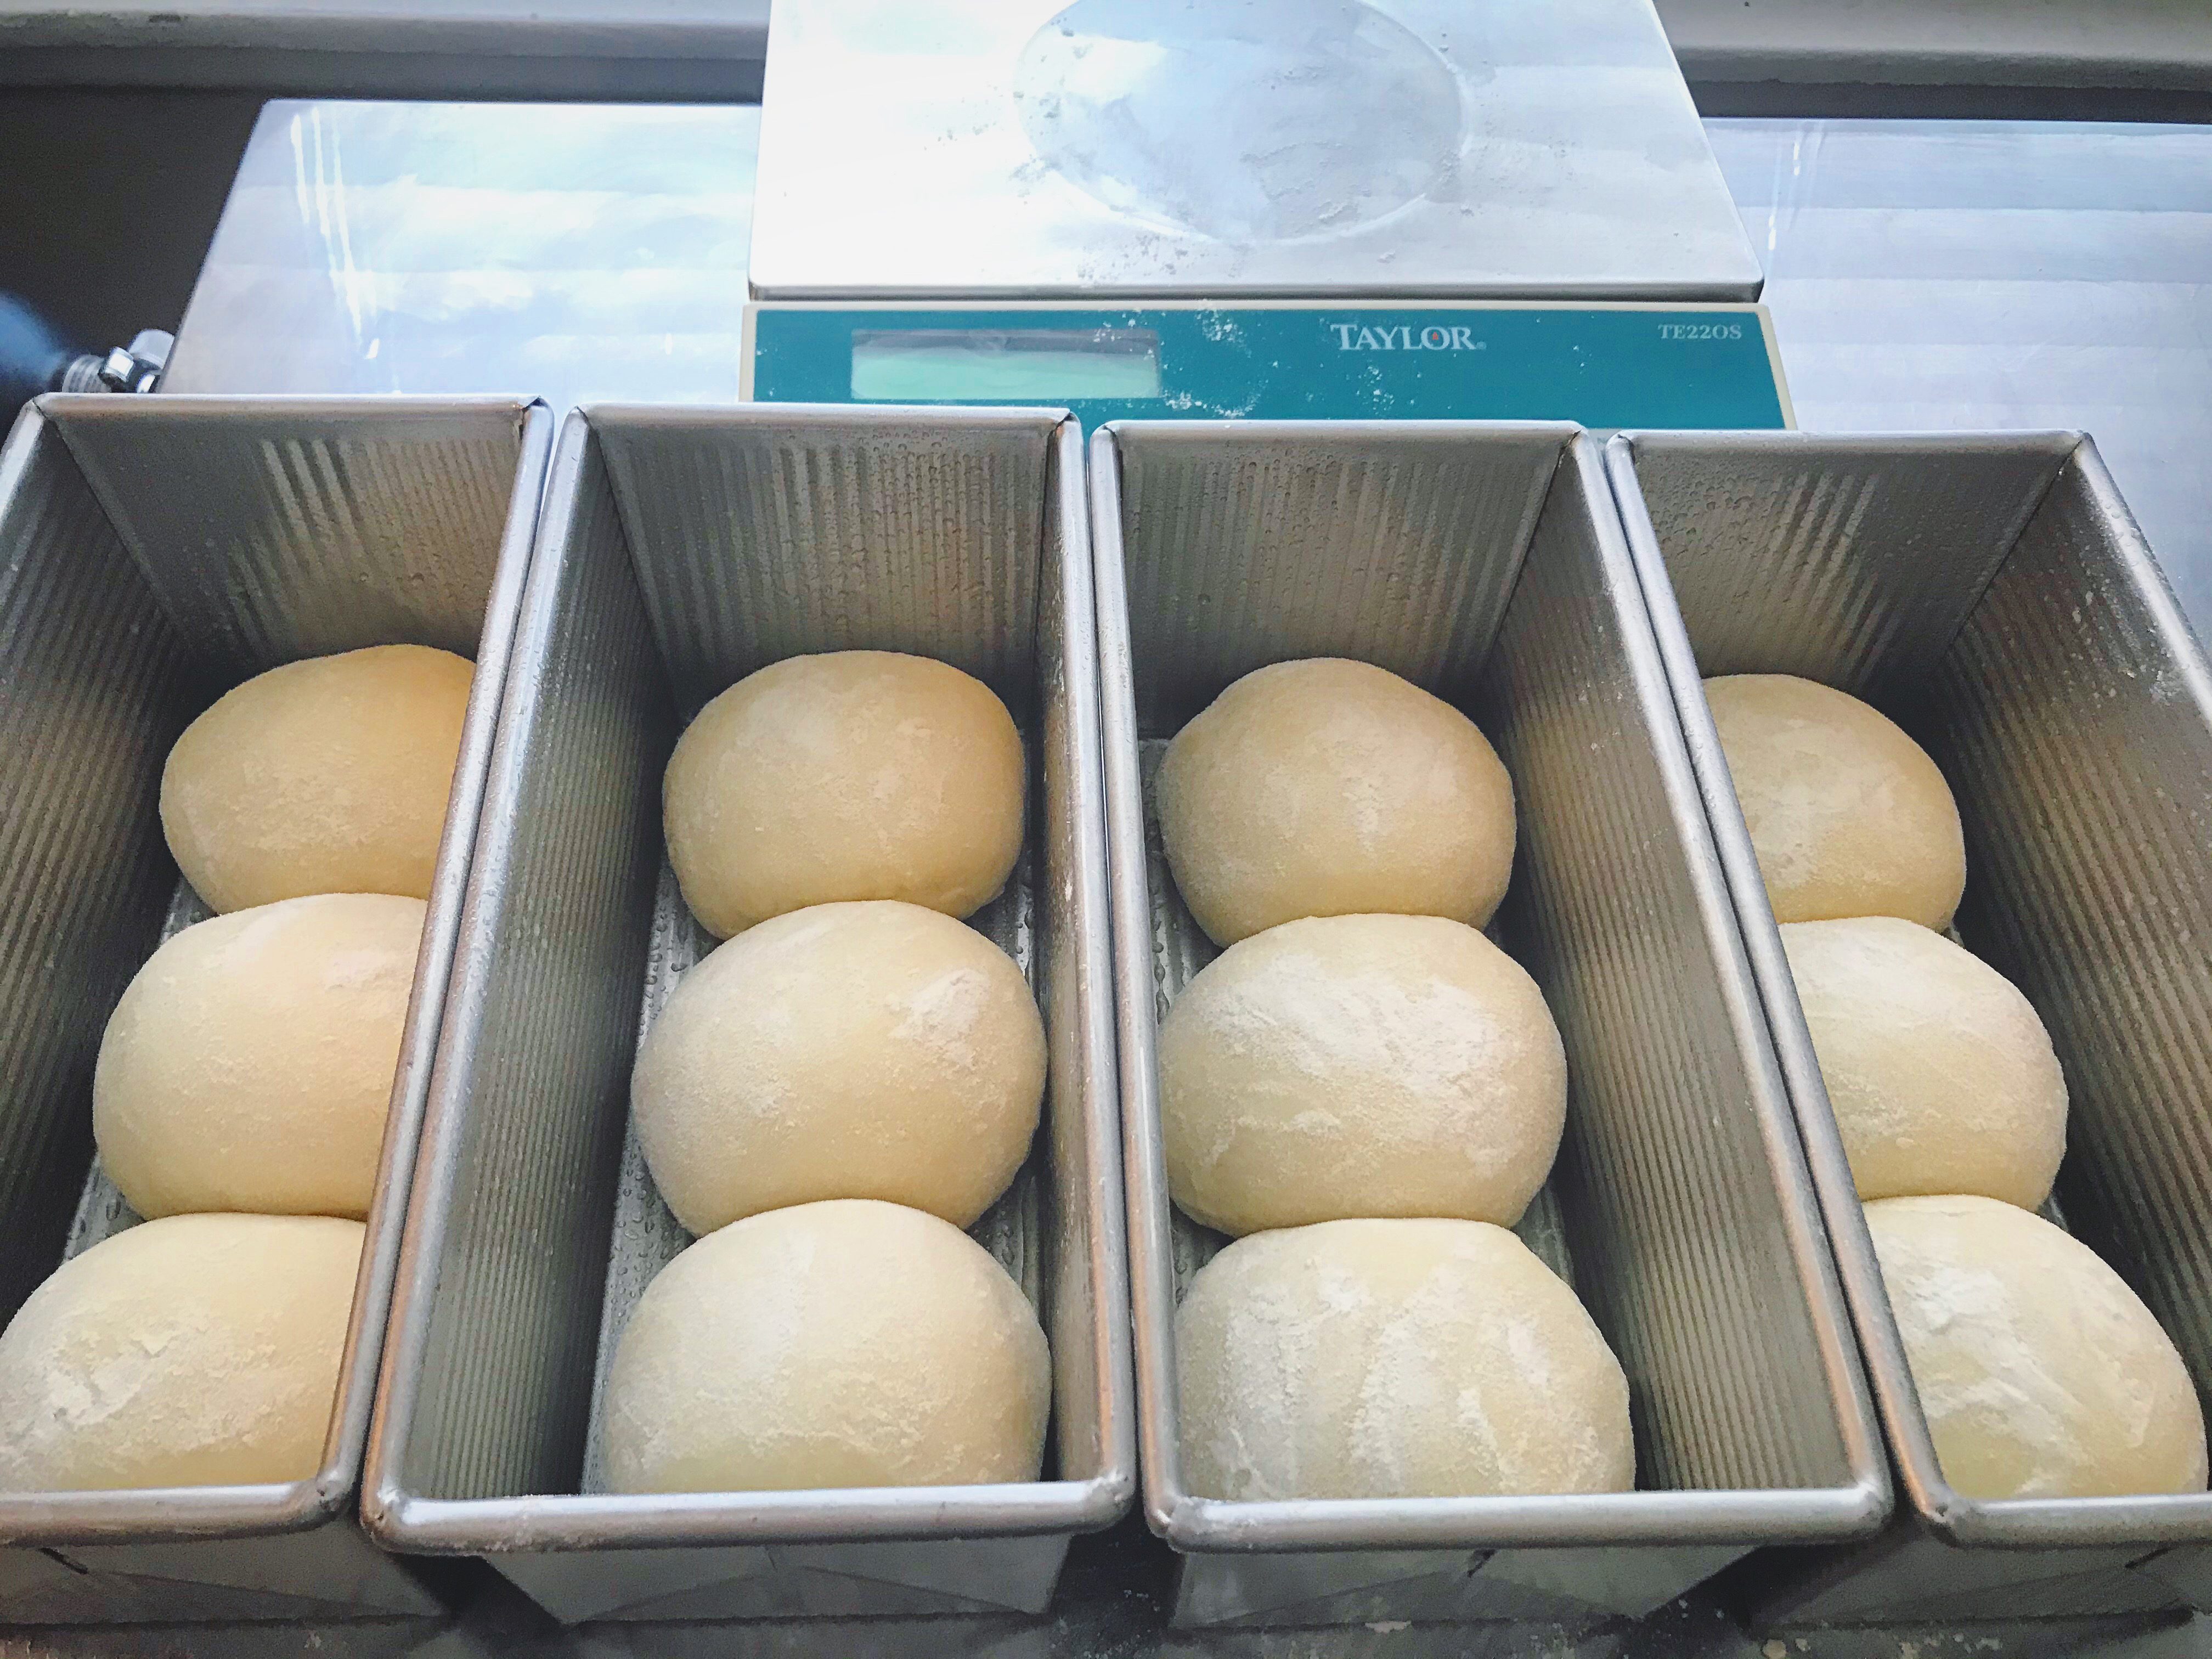
Divide the dough into 3 peices and create 3 smooth, tight balls of dough. Use the envelope method shown here to stretch the dough over itself left to right, top to bottom, right to left, and then bottom to top. As you do this process, gently pinch the dough at the seams to form a ball. Repeat with the 2 other pieces of dough.
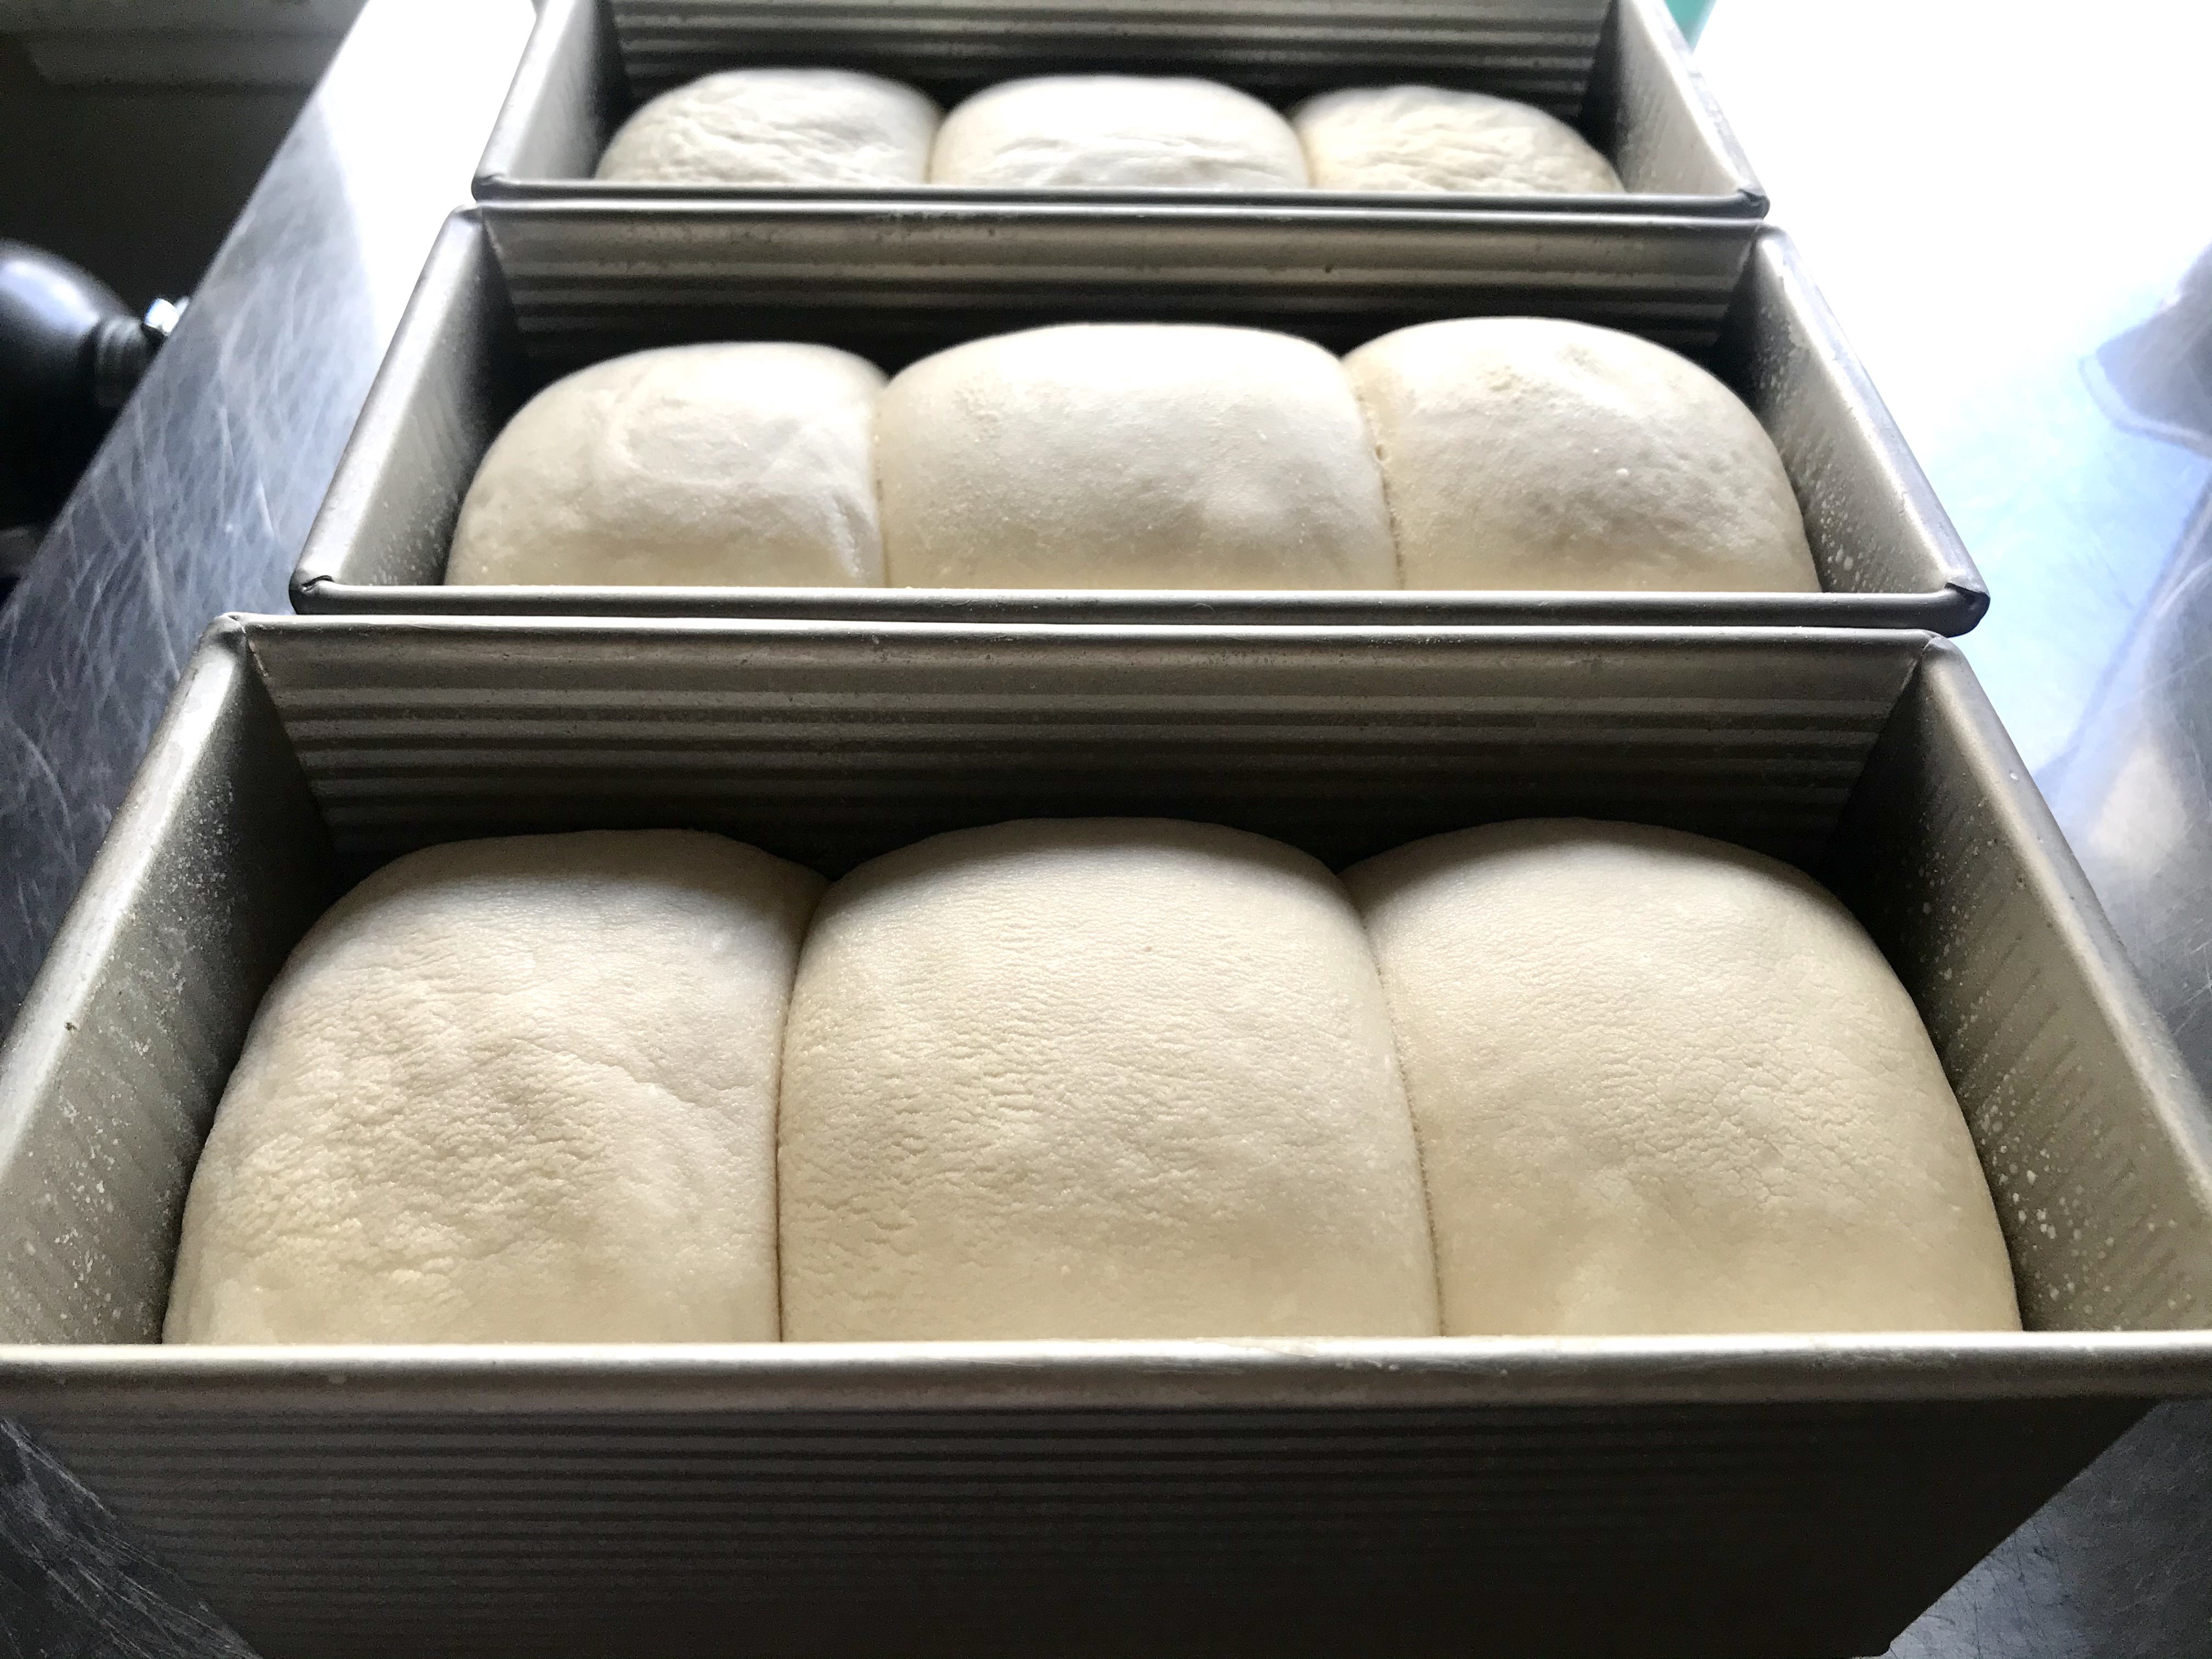
Place your dough balls into a buttered loaf pan. Use a brush to butter the top of the dough as well. You can also use avocado or coconut oil spray so that you don’t have to deal with melted butter. Cover with plastic wrap and allow to proof at room temperature for 6-8 hours or until the dough just begins to reach the top of the pan. This takes the whole darn day in the winter and may only take 4 hours in the summer. Let the way the dough looks be your guide, not the clock.
 Once the dough has proofed, let it rest overnight in the refrigerator. This step is not absolutely necessary but will increase the nutrition and enhance the flavor of the bread without adding any more active work to your process.
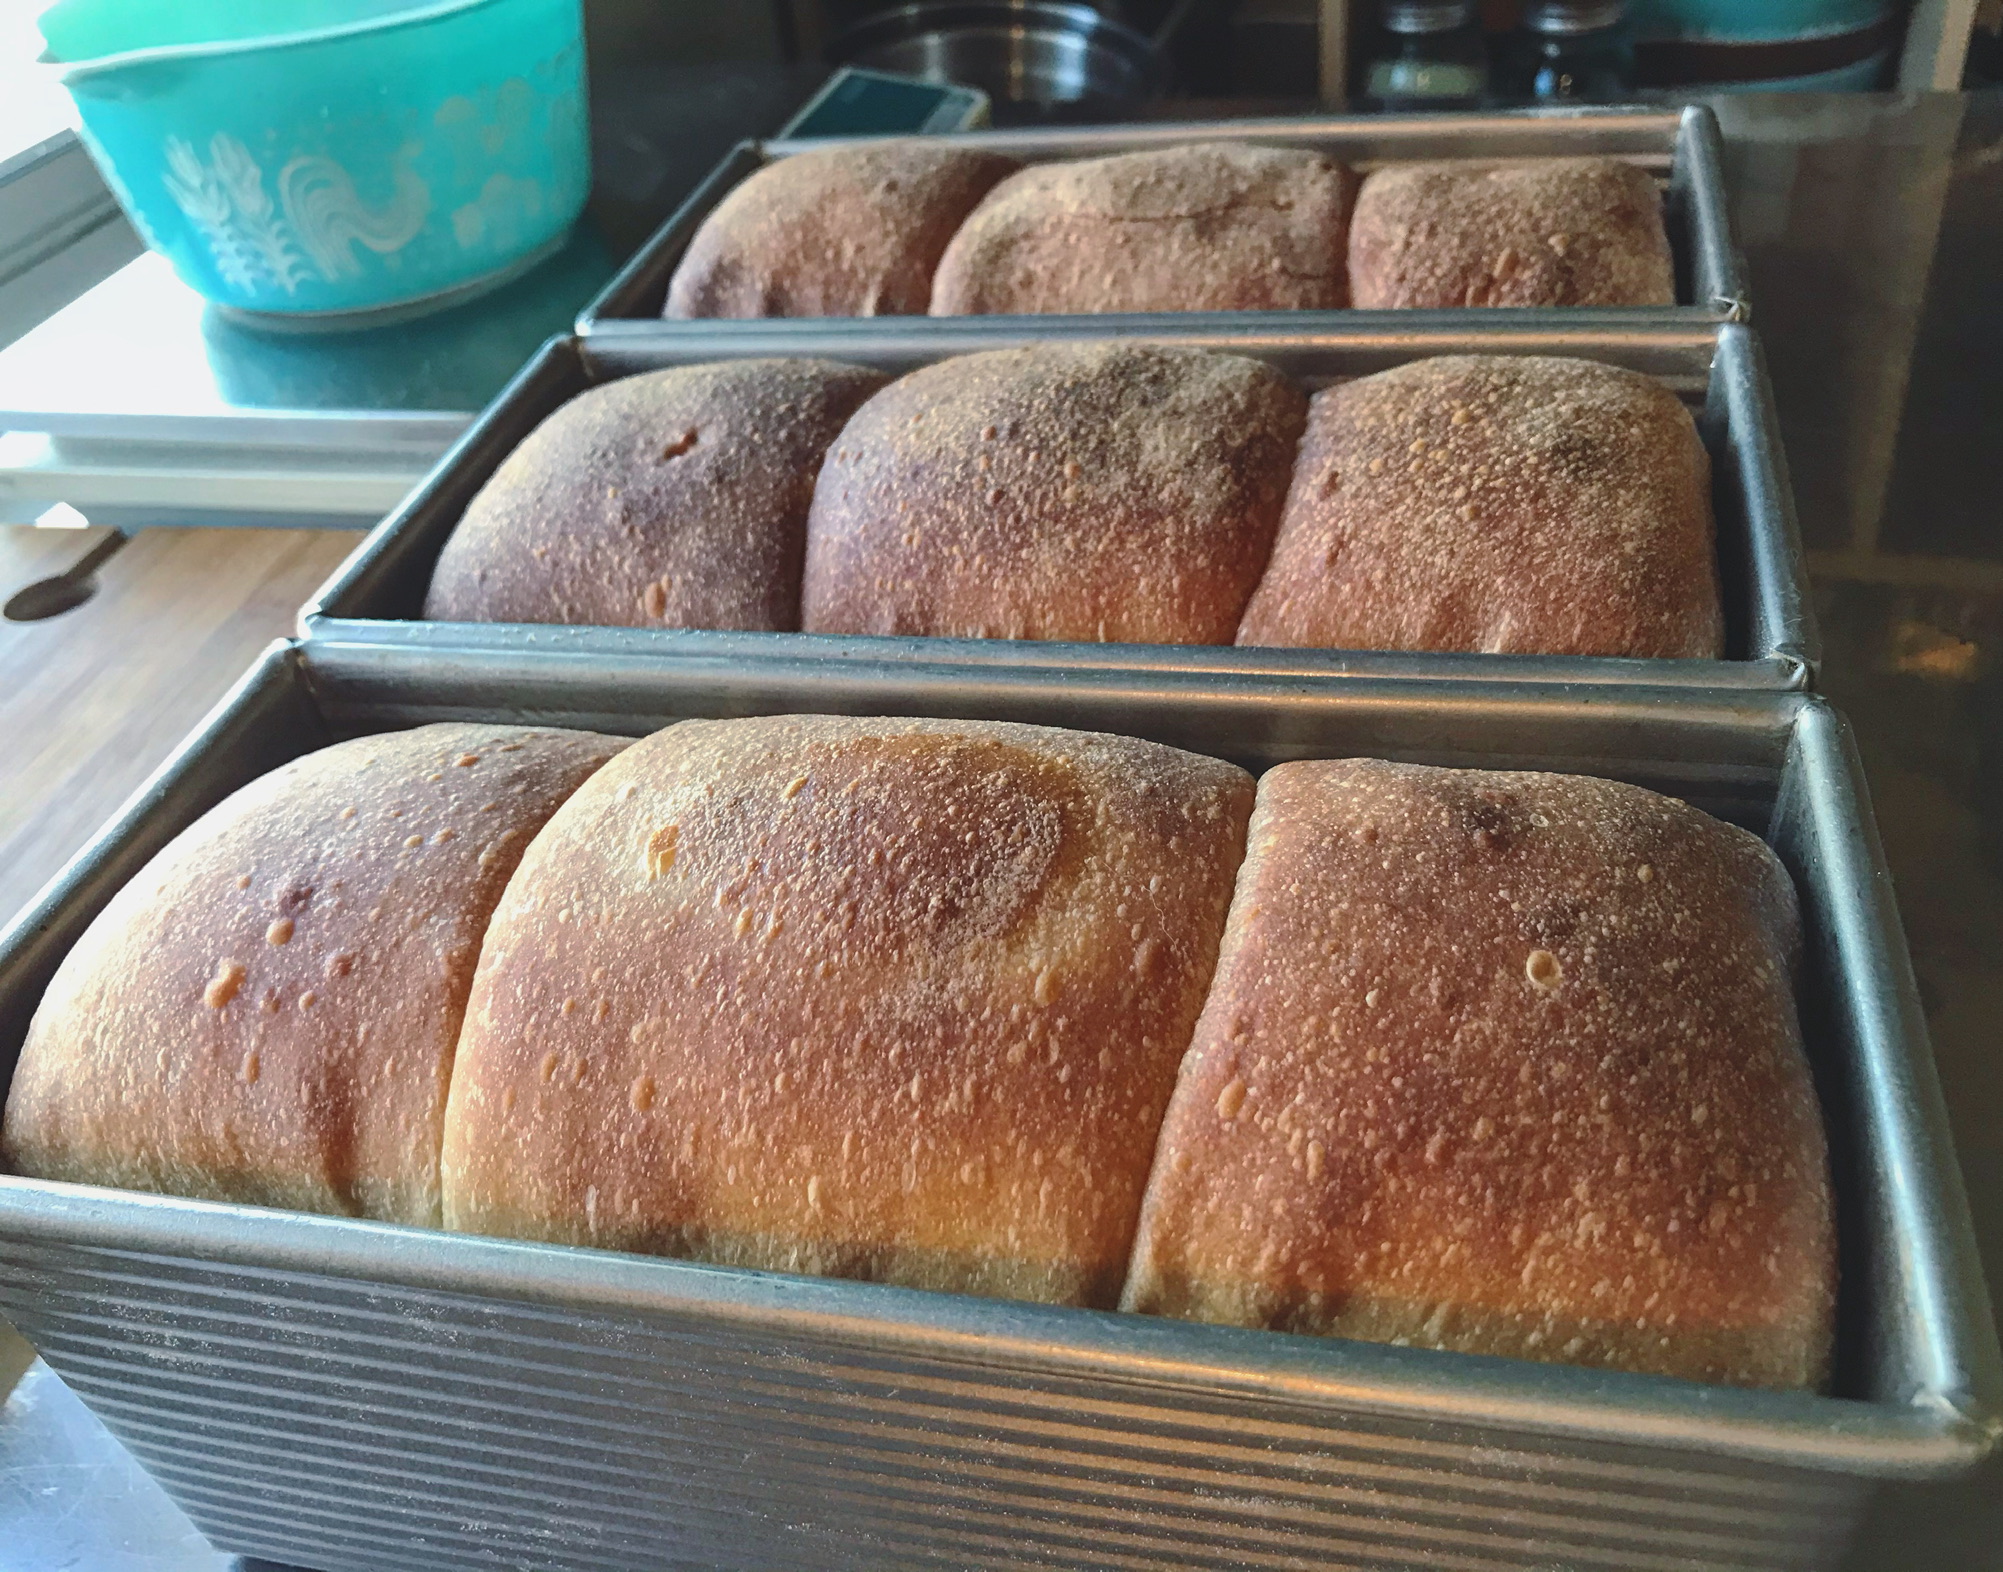
 When you are ready to bake, remove the loaf from the refrigerator and preheat your oven to 450 degrees. Remove the plastic wrap and put the loaf in the oven, immediately turning down the oven temperature to 400 degrees. Bake for 15 min. Now reduce the temperature of the oven to 350 degrees and set the timer for another 15 min. During the second half of the baking, you may want to loosely tent the loaf with a piece of aluminum foil to prevent it from over browning before it bakes all the way through. You may also turn the loaf pan once, to ensure even browning.
When the timer goes off for the second half of baking, your loaf should be golden brown and sound hollow when thumped gently. Remove the loaf onto a hot pad and allow it to sit for 10 minutes. Once it has cooled slightly, you can turn it out onto a cooling rack. Resist the urge to cut into it for at least an hour!
Once completely cooled, you can store your bread in a zip-lock or bread storage bag. You can also freeze these loaves, wrapped tightly in plastic wrap, and defrost them in the refrigerator without any loss of quality.

I’d love to see the finished loaf! I will be making this as soon as the starter is ready! Thank you for sharing.
LikeLike
I just added them before I officially published 👍🏻
LikeLike
Thank you!
LikeLike
Hello there – I’ve made this loaf a couple times and it’s delicious. I want to add seeds to this loaf. At what stage do I add the seeds? Thank u!
LikeLike
I would add your seeds right before you create the little balls to put in your loaf pan. The dough needs to proof just a bit before the seeds go in. So glad you are enjoying the recipe!
LikeLike
Hi! Is there a way to make this without egg? Any good substitution? My daughter is very allergic but I would love a change of pace to make a softer sandwich loaf of sourdough. Thanks!
LikeLike
You can just leave the egg out. I actually use a variation of this recipe for English muffins and don’t add egg to the recipe. It proofs up just fine and tastes delicious.
LikeLike